Can You Record Directly To Your Computer A Complete Guide
Yes, you can record directly to your computer using built-in tools or external gear. This guide covers audio, video, and screen recording methods for any skill level. You’ll learn the best software, hardware setups, and pro tips to start capturing high-quality content today.
Can You Record Directly To Your Computer? Absolutely. In fact, it’s one of the simplest ways to capture high-quality audio, video, or screen content without any extra equipment. Whether you want to record a podcast, a gaming session, or a quick tutorial, your computer can handle it all. Recording directly to your computer saves time, keeps files organized, and lets you edit right away. In this guide, you’ll learn every method, tool, and tip you need to start recording today.
Many people think they need expensive gear to make great recordings. That’s not true. Built-in microphones, webcams, and free software can produce amazing results. Of course, adding a few affordable tools can boost quality even more. This guide covers everything from basic setups to advanced configurations. You’ll find practical examples, quick tips, and common mistakes to avoid. By the end, you’ll feel confident hitting that record button.
Key Takeaways
- Direct recording is simple: You can capture audio, video, and screen content straight to your computer without extra hardware.
- Built-in tools work well: Windows Voice Recorder, QuickTime, and OBS Studio offer free, easy options for beginners.
- External gear improves quality: An audio interface, XLR microphone, or capture card can take your recordings to a professional level.
- Software choice matters: Free tools like Audacity and OBS are great, while paid DAWs and video editors offer advanced features.
- Setup is quick: A few minutes of configuration can fix common issues like latency, noise, and low storage.
- Avoid these mistakes: Ignoring audio levels, skipping backups, and recording in the wrong file format can ruin your content.
📑 Table of Contents
Can You Record Directly To Your Computer? Here’s How It Works
Direct recording means sending your audio or video signal straight to your computer’s hard drive. No tapes, no SD cards, no extra steps. Your computer acts as the recorder and storage device all in one. This method works for voice, music, gameplay, webcam video, and screen activity. It’s the backbone of modern content creation.
What Does Direct Recording Mean?
Direct recording captures a live signal and writes it directly to a file on your computer. For audio, this might mean plugging a microphone into your PC’s input jack or connecting an audio interface via USB. For video, your webcam or a capture card sends the feed straight to recording software. The result is a single file you can edit, share, or archive immediately.
Why Record Straight to Your PC?
- Simplicity: One device does the job. No need to transfer files from a phone or camera.
- Speed: You can start editing right after you stop recording.
- Cost: Built-in tools are free. You don’t need a dedicated recorder.
- Flexibility: You can record multiple tracks separately or mix them in real time.
- Quality: Modern computers handle high-resolution audio and video with ease.
How to Record Audio Directly to Your Computer
Audio recording is the most common form of direct computer recording. You can capture voice, music, or any sound using your PC. The process is straightforward, but the quality depends on your setup. Let’s break it down into simple steps.
Using Built-In Tools
Every computer comes with basic recording tools. On Windows, you can use Voice Recorder (formerly Sound Recorder). On macOS, QuickTime Player or Voice Memos do the job. These tools require no installation. Just open the app, click record, and speak into your built-in microphone.
Built-in tools are perfect for quick notes, interviews, or rough drafts. However, they offer limited control over audio settings. You can’t adjust sample rate, bit depth, or input gain easily. For more serious work, you’ll want dedicated software.
External Microphones and Audio Interfaces
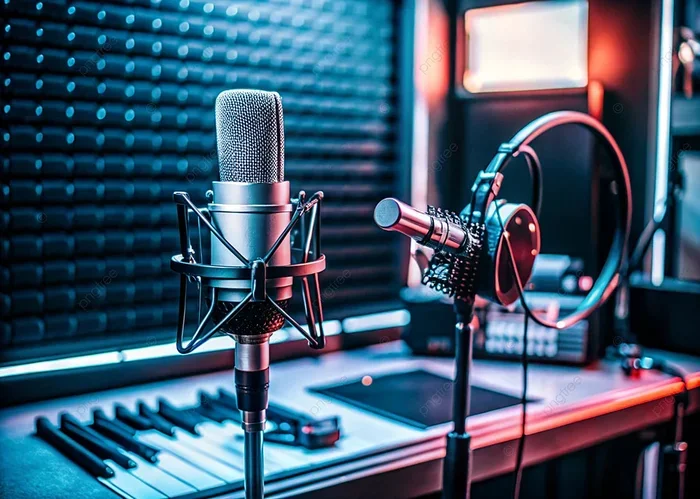
To get professional sound, connect an external microphone. A USB microphone plugs directly into your computer and works instantly. For higher quality, use an XLR microphone with an audio interface. The interface converts the analog signal to digital and sends it to your PC via USB or Thunderbolt.
Popular audio interfaces include the Focusrite Scarlett Solo and PreSonus AudioBox. They provide clean preamps, low latency, and multiple inputs. Pair them with a dynamic microphone for podcasts or a condenser microphone for vocals and acoustic instruments. Don’t forget a pop filter to reduce plosive sounds.
Best Software for Audio Recording
You have many options for recording software. Free tools like Audacity and Ocenaudio are powerful and beginner-friendly. They support multiple tracks, effects, and export formats like MP3 and WAV. For musicians, a Digital Audio Workstation (DAW) like Reaper, Ableton Live, or Logic Pro offers advanced editing and mixing.
If you’re streaming or recording gameplay, OBS Studio is the go-to choice. It can record system audio, microphone, and webcam simultaneously. All these tools record directly to your computer’s storage, giving you full control over the file.
Quick Tip: Always record in WAV or AIFF for the best quality. You can convert to MP3 later for sharing. This preserves every detail of your sound.
Recording Video Directly to Your Computer
Video recording follows the same principle. Your computer receives a video signal and saves it as a file. You can use a built-in webcam, an external camera, or even a capture card to bring in professional gear. Let’s explore the main methods.
Webcam Recording Made Simple
Most laptops have a built-in webcam. You can use it with apps like Camera on Windows or Photo Booth on Mac. For better quality, buy an external USB webcam. Models like the Logitech C920 or Elgato Facecam offer 1080p or 4K resolution, autofocus, and good low-light performance.
Webcam recording is ideal for video calls, vlogs, and quick tutorials. The footage saves directly to your computer as an MP4 or MOV file. You can then edit it in any video editor or upload it straight to YouTube.
Using a Capture Card for Cameras
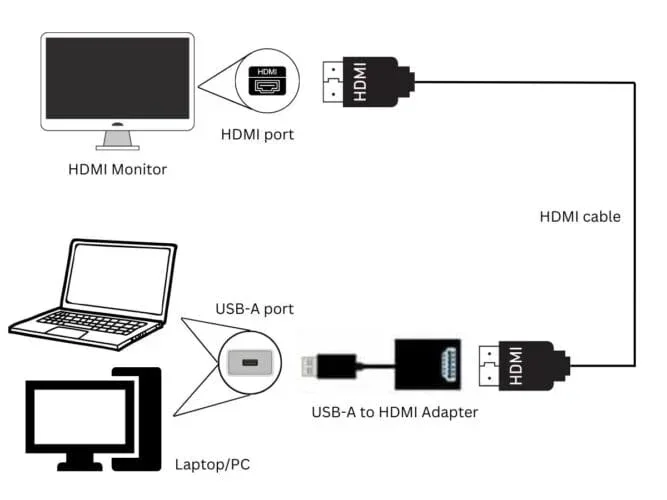
Want to use a DSLR, mirrorless, or camcorder as your webcam? A capture card makes it possible. This small device connects your camera’s HDMI output to your computer’s USB or PCIe slot. Software like OBS or Zoom then sees the camera as a video source.
Capture cards are popular among streamers and content creators. They provide clean, lag-free video with beautiful background blur and lighting. The Elgato Cam Link and AverMedia Live Gamer are top choices. You’ll also need an HDMI cable and a camera with clean HDMI output.
Screen Recording for Tutorials and Gaming
Screen recording captures everything on your display. It’s perfect for software tutorials, gameplay, and presentations. Windows has a built-in Xbox Game Bar that records screens and games. macOS offers Screenshot tools with a screen recording option. For more features, use OBS Studio or Camtasia.
Screen recorders save video files directly to your computer. You can choose the resolution, frame rate, and file format. Most creators use 1080p at 30 or 60 frames per second. This balances quality and file size.
Common Mistake: Recording in a tiny window reduces quality. Always set your recording area to the full screen or your desired resolution before you start.
The Best Software for Direct Recording
Choosing the right software is key to a smooth recording experience. Free tools work great for beginners, while paid options offer advanced features. Here’s a quick comparison of the most popular direct recording programs.
| Software | Type | Best For | Platform |
|---|---|---|---|
| OBS Studio | Free | Screen recording, streaming, multi-source setups | Windows, macOS, Linux |
| Audacity | Free | Audio recording, editing, podcasting | Windows, macOS, Linux |
| GarageBand | Free | Music creation, simple voiceover | macOS |
| Camtasia | Paid | Tutorials, screen recordings with editing | Windows, macOS |
| Adobe Audition | Paid | Professional audio editing and noise removal | Windows, macOS |
| Logic Pro | Paid | Music production, multi-track recording | macOS |
Each tool records directly to your computer. OBS and Audacity are excellent starting points. They’re free, lightweight, and packed with features. As you grow, you can move to paid software for more control.
Expert Insight: “The best software is the one you’ll actually use. Start with a free tool like OBS or Audacity, learn the basics, then upgrade only if you need advanced features.” – A seasoned content creator.
Setting Up Your Computer for Direct Recording
A proper setup ensures smooth, high-quality recordings. You don’t need a supercomputer, but a few checks make a big difference. Let’s walk through hardware and software configuration.
Hardware Requirements
- Processor: A modern dual-core or quad-core CPU handles most recording tasks easily.
- RAM: 8 GB is the minimum for smooth video recording. 16 GB is ideal for multitasking.
- Storage: Use a fast SSD for your recording drive. A 1 TB SSD gives you plenty of space for hours of HD video.
- USB Ports: Ensure you have enough USB ports for your microphone, interface, webcam, and capture card.
- Audio Output: Use headphones while recording to avoid echo and feedback.
Software Configuration and Settings
Once your gear is connected, open your recording software. Set the input source to your microphone or interface. Choose the correct sample rate (44.1 kHz or 48 kHz) and bit depth (16-bit or 24-bit). For video, select 1080p resolution and 30 fps as a default. Adjust the audio levels so your voice peaks around -6 dB. This prevents distortion and keeps the sound clean.
Enable low-latency monitoring if your software supports it. This lets you hear yourself in real time without delay. Test your setup by recording a short clip and playing it back. Fix any issues before your actual session.
Quick Tip: Close unnecessary programs before recording. Background apps can eat CPU power and cause dropped frames or audio glitches.
Common Mistakes and How to Avoid Them
Even with the best setup, mistakes can ruin a recording. Here are the most common pitfalls and simple ways to avoid them.
Ignoring Storage and File Management
High-quality video and audio files take up a lot of space. A 10-minute 1080p video can be over 1 GB. If your drive is full, your recording will stop or fail. Always check your available storage before a long session. Use an external hard drive or cloud storage for archiving old files.
Overlooking Audio Levels and Latency
Recording too quietly or too loudly is a common error. Check your input meter and adjust the gain until your voice is clear and consistent. Latency, the delay between speaking and hearing the playback, can be distracting. Use a low-latency audio driver like ASIO (Windows) or Core Audio (macOS). Close other apps that might use your audio device.
Recording in the Wrong File Format
Choosing the wrong format can lead to poor quality or huge files. For audio, use WAV or AIFF for lossless quality, and MP3 for compressed sharing. For video, use MP4 with H.264 encoding. It offers the best balance of quality and file size. Avoid recording in exotic formats that your editing software can’t open.
Final Thoughts
Can You Record Directly To Your Computer? Yes, and it’s easier than ever. With built-in tools, free software, and a few affordable accessories, you can create professional content from your desk. Whether you’re recording a voice memo, a podcast episode, a gaming highlight, or a how-to video, your computer is all you need.
Start simple. Use what you have, then upgrade as your skills grow. Pay attention to audio levels, storage, and file formats. Avoid the common mistakes we covered, and you’ll produce great recordings every time. The most important step is to just begin. Hit record, learn from each session, and soon you’ll be a confident direct recorder.
Now you have all the knowledge to start. Set up your gear, open your favorite software, and capture something amazing. Happy recording!
Frequently Asked Questions
Do I need a special microphone to record directly to my computer?
No, you can use your computer’s built-in microphone for basic recordings. However, an external USB microphone or an XLR mic with an audio interface will give you much better sound quality and reduce background noise.
Can I record video from an external camera straight to my PC?
Yes, you can. Connect your camera via a capture card or USB. Software like OBS Studio will recognize the camera as a video source and record the feed directly to your computer’s hard drive.
What file format should I use for direct audio recording?
Record in WAV or AIFF for the highest quality, especially if you plan to edit later. Convert to MP3 or AAC when you’re ready to share or upload the file.
Is OBS Studio free to use for recording video and audio?
Yes, OBS Studio is completely free and open-source. It works on Windows, macOS, and Linux, and it can record screen, webcam, and microphone audio all at once.
How much storage do I need for direct video recording?
A 10-minute 1080p video at 30 fps takes about 1 GB. A 1-hour recording can be 6 GB or more. Always keep at least 20% of your drive free to ensure smooth recording and prevent file corruption.
Can I record directly to my computer without internet?
Absolutely. Direct recording saves files to your local hard drive. You don’t need an internet connection to capture audio or video. You only need the web to upload or share the finished file later.