Can I Use My Laptop And Monitor As Two Separate Screens
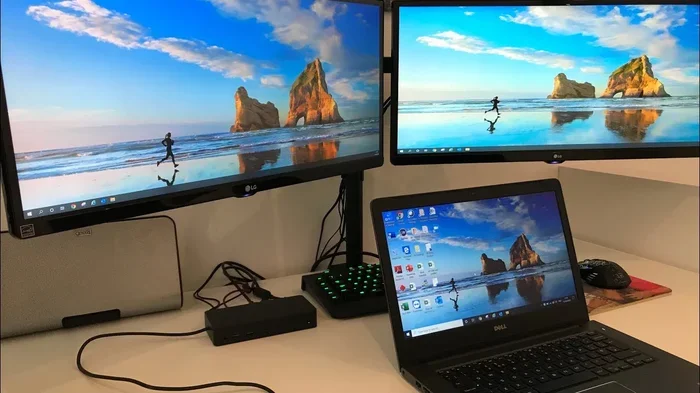
Yes, you can absolutely use your laptop and monitor as two separate screens. This simple setup boosts productivity, expands your workspace, and makes multitasking easier than ever. Whether you connect via HDMI, USB-C, or go wireless, setting up a dual display takes just minutes. This guide covers every method, troubleshooting tips, and expert recommendations for both Windows and Mac users.
Have you ever wished your laptop screen was bigger? Or maybe you want to spread your work across two screens instead of constantly switching tabs. The good news is that you can use your laptop and monitor as two separate screens. It is easier than you think, and it does not require expensive equipment. In this guide, I will walk you through every method, every setting, and every tip you need. Let us get started.
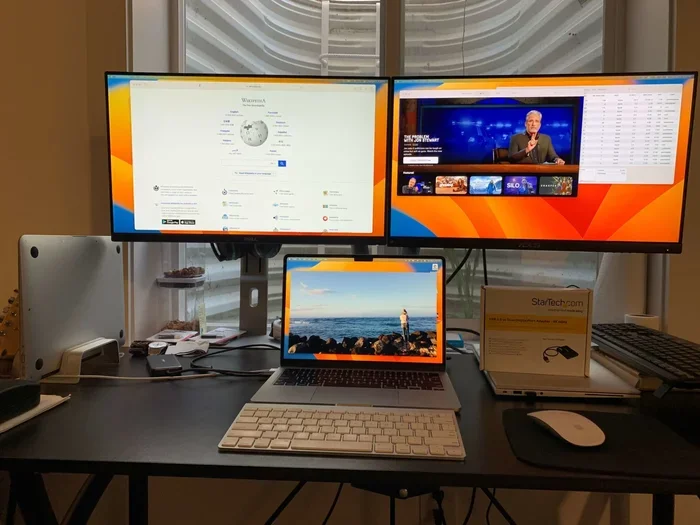
Using a laptop and monitor as two separate screens is one of the simplest ways to upgrade your workspace. Whether you are a student, a remote worker, or a creative professional, a dual monitor setup can change the way you work. You get more screen real estate, better multitasking, and a smoother workflow. Let us explore how to make it happen.
Key Takeaways
- Easy Setup: Connecting a monitor to your laptop is straightforward with HDMI, USB-C, or wireless options.
- Windows and Mac Compatible: Both operating systems support extending your display to an external monitor with built-in settings.
- Productivity Boost: Using two screens can significantly improve your workflow and multitasking ability.
- Multiple Connection Types: You can choose from wired (HDMI, DisplayPort, USB-C) or wireless (Miracast, AirPlay) methods.
- Common Issues Are Fixable: Most problems like no signal or resolution issues have simple solutions.
- Docking Stations Help: A USB-C docking station simplifies cable management and adds extra ports.
📑 Table of Contents
- Why Use Your Laptop and Monitor as Two Screens?
- How to Connect Your Monitor to Your Laptop
- Setting Up Dual Displays on Windows
- Setting Up Dual Displays on Mac
- Optimizing Your Dual Screen Setup
- Common Problems and How to Fix Them
- Who Benefits Most From a Dual Screen Setup?
- Wireless vs. Wired: Which Is Better?
- Final Thoughts
Why Use Your Laptop and Monitor as Two Screens?
Before we dive into the how-to, let us talk about why this matters. A single laptop screen can feel cramped when you are juggling multiple windows. You drag tabs back and forth, resize windows, and waste time. Adding a second screen changes everything. Here is why people love this setup:
- More workspace: You can keep your email open on one screen while working on a document on the other.
- Better multitasking: No more alt-tabbing between windows constantly.
- Improved focus: You can dedicate one screen to your main task and the other for reference material.
- Easier collaboration: Share one screen with a colleague while keeping your notes on the other.
- Enhanced creativity: Video editors and designers benefit from having more space for timelines and tools.
Studies show that people who use dual screens can be up to 30% more productive. That is a huge gain from just adding one extra display. The laptop second screen setup is not just a luxury. It is a practical upgrade for anyone who spends hours in front of a computer.
How to Connect Your Monitor to Your Laptop
Now let us get into the actual setup. Connecting your monitor to your laptop is the first step. The method depends on the ports available on both devices. Here are the most common ways to make the connection.
Option 1: HDMI Cable (Most Common)
HDMI is the most popular way to connect a monitor to a laptop. Most laptops have an HDMI port, and almost every external monitor supports HDMI. Here is how to do it:
- Plug one end of the HDMI cable into your laptop.
- Plug the other end into your monitor.
- Turn on the monitor and select the correct input source.
- Go to your display settings and choose “Extend” instead of “Duplicate.”
That is it. Your laptop screen and monitor now act as two separate screens. You can drag windows from one to the other seamlessly.
Option 2: USB-C or Thunderbolt Connection
Many modern laptops use USB-C or Thunderbolt ports. These ports can carry video signals, which means you do not need a separate video cable. Here is what to do:
- Use a USB-C to HDMI or USB-C to DisplayPort adapter if your monitor does not have USB-C.
- Or use a USB-C docking station for a cleaner setup.
- Plug the cable into your laptop and the monitor.
- Your operating system should detect the external display automatically.
A USB-C docking station is a great investment if you use multiple peripherals. It gives you extra USB ports, an ethernet connection, and audio output all in one device. This simplifies your workspace and reduces cable clutter.
Option 3: Wireless Connection (No Cables Needed)
Not a fan of cables? You can go wireless. Both Windows and Mac support wireless display connections. Here is how:
- Windows: Press the Windows key + K to open the Connect panel. Select your wireless display adapter or smart TV.
- Mac: Click the AirPlay icon in the menu bar and choose your AirPlay-compatible display.
- Make sure both devices are on the same Wi-Fi network for the best experience.
Wireless setups are convenient, but they may have slight latency. For tasks like video editing or gaming, a wired connection is better. For everyday work like browsing, writing, and video calls, wireless works great.
Quick Comparison of Connection Types
| Connection Type | Speed | Setup Difficulty | Best For |
|---|---|---|---|
| HDMI | Fast | Very Easy | Most users |
| USB-C / Thunderbolt | Fast | Easy | Modern laptops |
| Wireless (Miracast/AirPlay) | Moderate | Easy | Cable-free setups |
| DisplayPort | Fast | Moderate | High-resolution monitors |
| VGA (Older) | Slow | Easy | Legacy devices |
Each connection type has its strengths. HDMI and USB-C are the best choices for most people. They offer fast data transfer and reliable connections. Wireless options are perfect if you value a clean desk setup.
Setting Up Dual Displays on Windows
If you use a Windows laptop, you are in luck. Windows has built-in support for external monitors. Here is a step-by-step guide to set up your dual monitor setup on Windows.
Step 1: Open Display Settings
Right-click on your desktop and select “Display settings.” You will see a layout of your connected screens. If your monitor is not showing up, click “Detect.”
Step 2: Choose Your Display Mode
Windows offers three display modes:
- PC screen only: The monitor stays off. Only your laptop screen is active.
- Duplicate these displays: Both screens show the same image. Good for presentations.
- Extend these displays: This is what you want. It creates one large workspace across both screens.
Select “Extend these displays” to use your laptop and monitor as two separate screens. This is the key setting that makes the dual screen setup work.
Step 3: Arrange Your Displays
You can drag and drop the display boxes to match the physical layout of your screens. If your monitor is to the left of your laptop, move the monitor box to the left in the settings. This ensures your mouse moves naturally between screens.
Step 4: Adjust Resolution and Scaling
Each display can have its own resolution. Go to the display settings, click on each screen, and choose the recommended resolution. For the best screen resolution experience, match the native resolution of each monitor.
Pro Tip: If text looks too small on one screen, adjust the scaling. Windows lets you set different scaling percentages for each display. This is helpful when your laptop and monitor have different sizes.
Setting Up Dual Displays on Mac
Mac users can also connect an external monitor easily. Apple makes the process simple, though it works a bit differently than Windows. Here is how to set up your external monitor setup on macOS.
Step 1: Connect Your Monitor
Use a USB-C cable, Thunderbolt cable, or an adapter depending on your Mac model and monitor. Once connected, your Mac should detect the display automatically.
Step 2: Open System Settings
Go to System Settings (or System Preferences on older Macs). Click on “Displays.” You will see both your laptop screen and the external monitor listed.
Step 3: Arrange Your Displays
Drag the display icons to match your physical setup. The white bar at the top of one display icon represents your main screen. This is where your menu bar and desktop icons appear by default.
Step 4: Set the Display to Extended
By default, Mac may mirror your displays. To extend, make sure “Mirror Displays” is unchecked. Once unchecked, your laptop and monitor work as two separate screens with different content on each.
Expert Insight: On newer Macs with Apple Silicon, the external monitor support has improved significantly. You can now connect high-resolution monitors with ease. If you experience any lag, make sure you are using a certified cable or adapter.
Optimizing Your Dual Screen Setup
Once you have both screens connected and working, you can optimize the setup for the best experience. Here are some practical tips to get the most out of your laptop screen extension.
Adjust Screen Brightness and Color
Your laptop and monitor may have different brightness levels and color profiles. This can be distracting when you drag windows between them. Try to match the brightness on both screens. Some monitors come with built-in color calibration tools that help.
Use a Monitor Stand or Arm
Ergonomics matter when you use two screens. Position your monitor at eye level to reduce neck strain. A monitor stand or a monitor arm can help you achieve the perfect height. Your laptop screen should be slightly below eye level to maintain a natural posture.
Manage Your Cables
A messy desk can reduce productivity and increase stress. Use cable management solutions like clips, sleeves, or a cable tray. A laptop docking station can also help by reducing the number of cables you need. It connects to your laptop through a single USB-C cable and provides power, video, and data connections.
Set Up Different Backgrounds
This is a small but nice touch. You can set different wallpapers for each display in Windows and Mac. It helps you visually distinguish between the two screens at a glance. On Windows, right-click the desktop and select “Personalize.” On Mac, go to System Settings and choose “Wallpaper.”
Quick Tips for Better Productivity
- Keep your primary task on the laptop screen and reference material on the monitor.
- Use keyboard shortcuts to move windows between screens quickly.
- On Windows, press Windows key + Shift + Left or Right arrow to snap windows to the other display.
- On Mac, use Mission Control to manage windows across displays.
- Turn off the laptop screen when using the monitor as your primary display to save battery.
Common Problems and How to Fix Them
Even with a simple setup, you might run into issues. Here are the most common problems people face when setting up a laptop and monitor as two separate screens and how to fix them.
Problem 1: Monitor Not Detected
If your monitor does not show up, try these steps:
- Check that the cable is firmly connected on both ends.
- Try a different cable or adapter.
- On Windows, right-click the desktop and select “Detect” in Display Settings.
- On Mac, go to Display Settings and click “Detect Displays.”
Problem 2: Blurry or Low-Resolution Display
A blurry screen usually means the resolution is set incorrectly. Go to Display Settings and select the recommended resolution for your monitor. Also, make sure you are using the right cable type. Some older cables like VGA cannot support high resolutions.
Problem 3: Mouse Does Not Move Between Screens
If your cursor gets stuck at the edge of one screen, check the display arrangement in settings. The screens must be positioned correctly to match their physical placement on your desk. Drag the display boxes in the settings until they align.
Problem 4: Flickering or Intermittent Signal
Flickering is often caused by a loose connection or a low-quality cable. Try a different HDMI or DisplayPort cable. If you are using an adapter, the adapter might be the culprit. Replace it with a higher-quality one.
Problem 5: Audio Not Playing Through the Monitor
Some monitors have built-in speakers, but audio does not always route through them automatically. On Windows, right-click the speaker icon in the taskbar and select your monitor as the audio output device. On Mac, go to Sound Settings and choose the monitor as the output.
Most of these issues have simple fixes. Do not panic if something does not work right away. A quick restart of both devices often solves the problem too.
Who Benefits Most From a Dual Screen Setup?
Almost anyone can benefit from using a laptop and monitor as two separate screens. But some people see the biggest gains. Here is a look at who benefits the most:
- Remote workers: You can keep video calls on one screen and your work documents on the other.
- Students: Research on one screen and notes on the other makes studying much easier.
- Content creators: Video editors and graphic designers need the extra space for timelines and tool panels.
- Programmers: Keep your code editor on one screen and the terminal or browser on the other.
- Gamers: Some gamers use a second screen for walkthroughs or chat while gaming on the primary display.
- Financial analysts: Spreadsheets and data on one screen, charts and reports on the other.
The beauty of this setup is its versatility. No matter what you do, an extra screen gives you room to breathe and work more efficiently.
Wireless vs. Wired: Which Is Better?
This is a common question, and the answer depends on your needs. Here is a quick breakdown:
Wired connections offer the best performance. They provide a stable signal, no latency, and support higher resolutions. If you are doing anything that requires a smooth, responsive display, go wired. HDMI and USB-C are the top choices.
Wireless connections offer convenience and a cleaner desk. They are great for presentations, casual browsing, and light work. However, they may experience slight delays or lower image quality depending on your Wi-Fi strength.
For most people, a wired connection is the way to go. It is reliable, fast, and set-and-forget. But if you value a minimalist desk, wireless is a solid option too.
Final Thoughts
Using your laptop and monitor as two separate screens is one of the best upgrades you can make to your workspace. It is affordable, easy to set up, and delivers immediate productivity gains. Whether you connect with an HDMI cable, a USB-C docking station, or go wireless, the process is straightforward and well-supported by both Windows and Mac.
Start with the basics. Get the right cable or adapter, connect your monitor, and extend your display through your operating system settings. Then fine-tune the setup with brightness adjustments, cable management, and ergonomic positioning. Soon, you will wonder how you ever worked with just one screen.
The key takeaway is this: setting up a dual monitor setup does not have to be complicated. Anyone can do it with a few simple steps. So go ahead, grab a cable, connect your monitor, and enjoy the expanded workspace. Your productivity will thank you.
Frequently Asked Questions
Can I use any monitor with my laptop?
Most monitors work with laptops as long as you have the right cable or adapter. Check the ports on both your laptop and monitor. HDMI, USB-C, and DisplayPort are the most common and widely supported connections.
Do I need a special cable to connect my laptop to a monitor?
Not always. If your laptop has an HDMI port and your monitor has an HDMI port, a standard HDMI cable works. For USB-C laptops, you may need a USB-C to HDMI adapter or a docking station depending on your monitor.
Can I use my laptop screen and monitor at the same time?
Yes, absolutely. When you extend your display, both screens remain active. You can use your laptop screen for one task and your monitor for another. This is the core benefit of a dual screen setup.
Does using a second screen drain my laptop battery faster?
Yes, running two displays uses more power. Your laptop GPU has to render content on both screens. If you are working unplugged, expect slightly faster battery drain. It helps to keep your laptop plugged in during extended use.
Can I connect a monitor wirelessly without any extra hardware?
On Windows 11, you can use Miracast for a wireless connection if both your laptop and monitor support it. On Mac, AirPlay works with compatible displays. Some smart TVs and wireless display adapters also enable this without extra hardware.
What is the best monitor size for a dual screen setup?
A 24-inch or 27-inch monitor pairs well with most laptop screens. These sizes offer a good balance between screen real estate and desk space. ultrawide monitors are also a great alternative if you prefer a single large display instead of two separate ones.
=== CONCLUSION ===
Setting up your laptop and monitor as two separate screens is simple, affordable, and incredibly rewarding. You get more space, better multitasking, and a more comfortable workflow. Whether you are a student, a professional, or a creative, this setup will elevate your daily computing experience. Follow the steps in this guide, troubleshoot any issues with the tips provided, and enjoy your new dual display workspace.