Can I Print On Canvas At Home Everything You Need To Know
Can I print on canvas at home? Absolutely! With a compatible printer, canvas paper, and a few simple supplies, you can create beautiful canvas prints right from your living room. This guide covers home canvas printing equipment, step-by-step instructions, and pro tips to help you achieve gallery-quality results without leaving your house.
Have you ever looked at a beautiful canvas print in a store and thought, “I could make that at home”? Well, you totally can. Can I print on canvas at home? Yes, and it’s simpler than most people think. Whether you want to turn a favorite photo into wall art or create custom home decor, printing on canvas from your own space is totally doable.
The process might seem intimidating at first, but it really isn’t. You need the right printer, the right paper, and a little patience. Once you understand the basics, you’ll be producing stunning DIY canvas pieces in no time. Let’s walk through everything you need to know about canvas printing at home.
Key Takeaways
- Home canvas printing is affordable and easy: You don’t need expensive equipment to get started.
- An inkjet printer is essential: Laser printers don’t work well with canvas media.
- Canvas paper and ink quality matter: Using the right supplies makes a huge difference in final output.
- Printer settings need adjustment: Default settings won’t give you the best results on canvas.
- DIY canvas prints save money: You can create wall art for a fraction of professional printing costs.
- Common mistakes are easy to avoid: Simple tips prevent smudging, fading, and poor color accuracy.
📑 Table of Contents
What Is Home Canvas Printing?
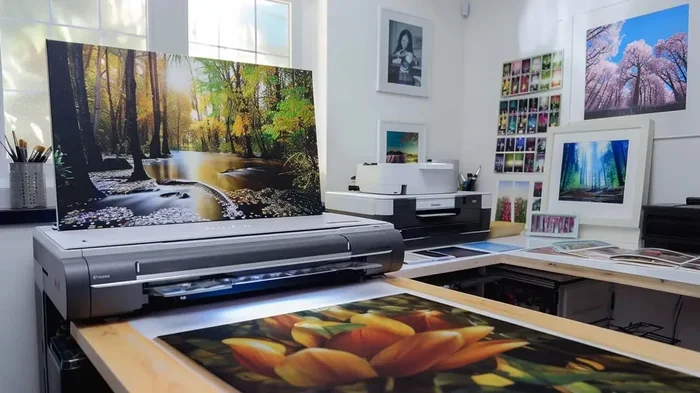
Home canvas printing means creating canvas art using your own printer and supplies. Instead of sending your design to a professional lab, you handle the entire process yourself. This includes choosing your image, preparing your printer, selecting the right canvas paper, and printing directly onto the media.
The results can be surprisingly professional. Many people are shocked by how good their first home canvas print turns out. The key is understanding your equipment and taking the time to set things up correctly. Once you get the hang of it, you’ll wonder how you ever paid for expensive prints elsewhere.
Why People Are Choosing DIY Canvas Prints
There are several reasons why DIY canvas printing has become so popular. First, it saves a ton of money. Professional printing services charge premium prices, especially for large formats. When you print at home, you control the cost entirely.
Second, you get complete creative control. You choose the image, the size, the finish, and the framing. There’s no waiting for shipping or dealing with customer service if something goes wrong. Third, it’s incredibly satisfying to hang something on your wall that you made yourself.
Finally, home canvas printing lets you experiment freely. Want to try a different size or tweak the colors? Just hit print again. There’s no minimum order or expensive setup fee holding you back.
What You Need to Print on Canvas at Home
Before you start, let’s talk about what you actually need. The good news is you probably already own most of the essentials. Here’s a breakdown of everything required for successful canvas printing at home.
An Inkjet Printer
This is the most important piece of equipment. Inkjet printers are the only type that works well for canvas printing. They spray tiny droplets of ink onto the paper, which creates the smooth, vibrant colors you see in quality prints. Laser printers use heat and toner, and they simply don’t bond properly with canvas media.
If you don’t have an inkjet printer yet, look for one with at least six color cartridges. More ink colors mean better color accuracy and smoother gradients. Some great options for home canvas printing include models from Epson and Canon that are specifically designed for photo-quality output.
Canvas Paper
Not all paper works for canvas printing. You need special canvas paper that’s designed to accept ink and mimic the texture of real canvas. This paper comes in various weights and finishes, so you can choose what suits your project best.
Look for printable canvas sheets that are compatible with your printer model. Some brands offer textured matte finishes that closely resemble stretched canvas. Others have a glossy coating that makes colors pop. Testing different brands is part of the fun of DIY canvas printing.
High-Quality Ink
The ink you use matters just as much as the paper. Cheap ink produces dull, faded prints that won’t last. Invest in pigment-based inks if your printer supports them. These inks resist fading and moisture, which means your canvas print will look great for years.
Also, make sure your ink cartridges are fresh. Old or low ink levels cause banding and uneven color. Before starting any important project, run a test print and check the cartridge levels first.
Image Editing Software
You don’t need expensive software, but having something to adjust your image makes a big difference. Free options like GIMP work perfectly fine. If you already use Adobe Photoshop or Lightroom, even better. You’ll use this software to adjust resolution, color balance, and sizing before sending the file to your printer.
Optional but Helpful Supplies
- Canvas stretcher bars: If you want to stretch your printed canvas over a frame like a gallery-wrapped piece.
- Lamination sheets: These add a protective layer and enhance color vibrancy.
- Color calibration tools: A simple colorimeter helps ensure what you see on screen matches what comes out of the printer.
- Lint-free cloths: For cleaning your printer’s print head and handling printed canvas gently.
Step-by-Step Guide to Printing on Canvas at Home
Now that you have your supplies, let’s get into the actual process. Following these steps will help you achieve the best possible results every time you print on canvas at home.
Step 1: Choose and Prepare Your Image
Start by selecting a high-resolution image. The higher the resolution, the sharper your final print will be. Aim for at least 300 DPI (dots per inch) at the size you want to print. Low-resolution images will look pixelated and blurry once stretched onto canvas.
Next, adjust the color settings in your editing software. Make sure the image is in RGB color mode, not CMYK, since most home printers work in RGB. Brighten the image slightly if needed, because canvas paper tends to absorb some ink and can make prints appear a bit darker.
Step 2: Load the Canvas Paper Correctly
Place your printable canvas sheets into the printer tray with the coated side facing the correct direction. Check your printer manual if you’re unsure. Feeding the paper backward is one of the most common mistakes beginners make.
Make sure the paper is flat and aligned properly in the tray. Crooked paper leads to crooked prints, and that’s a waste of expensive canvas media. Use the manual feed slot if your printer has one, as it provides better control than the automatic tray.
Step 3: Adjust Your Printer Settings
This step is crucial for great results. Go into your printer settings and select the highest quality print option available. Look for settings labeled “Photo,” “Best,” or “High Resolution.” These settings slow the print speed but produce much sharper, more detailed output.
Also, select the correct paper type in your driver settings. Choose “Canvas” or “Photo Paper” if those options appear. Using the wrong paper setting causes the printer to apply too much or too little ink, which ruins the final result.
Step 4: Run a Test Print First
Before you print your actual canvas piece, run a test print on regular paper. This lets you check the colors, composition, and sizing without wasting expensive canvas sheets. Adjust any issues you spot before committing to the real print.
This one simple step saves money and frustration. Many people skip it and end up disappointed with their first attempt. Trust the process and always test first.
Step 5: Print and Let It Dry
Once you’re happy with the test print, go ahead and print on your canvas paper. Let the print dry completely before handling it. Canvas prints need at least 15 to 30 minutes to dry, depending on the ink and paper type.
Handle the print by the edges to avoid smudging. If you’re in a hurry, a hair dryer on a cool setting can speed up the process. Just don’t use heat, as it can warp the canvas paper or cause the ink to bubble.
Step 6: Stretch and Display (Optional)
If you want a professional gallery look, stretch your printed canvas over canvas stretcher bars. This gives it a three-dimensional appearance and makes it ready to hang. You can buy stretcher bars at any craft store for just a few dollars.
Alternatively, you can frame the canvas print with a standard frame or leave it as a loose sheet. Both options look great, and it all comes down to personal preference and the look you’re going for.
Best Printers for Canvas Printing at Home
Not all printers are created equal when it comes to canvas printing at home. Some models excel at photo-quality output, while others are better suited for everyday documents. Here’s what to look for when choosing a printer for your DIY canvas projects.
Epson Expression Photo HD XP-15000
This printer is a favorite among home canvas printing enthusiasts. It uses a six-color ink system that produces incredibly vivid and detailed prints. The print head technology ensures smooth color transitions and sharp details, which is exactly what you want for canvas art.
It handles thick media well, including heavyweight canvas sheets. The setup is straightforward, and the companion app makes it easy to print directly from your phone. If you’re serious about home canvas printing, this is a solid investment.
Canon PIXMA PRO-100
The Canon PIXMA PRO-100 is another excellent choice. It uses an eight-color dye ink system that delivers outstanding color accuracy. The prints have a beautiful lustre finish that looks almost like traditional darkroom photographs.
This printer handles canvas paper with ease and produces consistent results batch after batch. The main downside is the price, but if you print regularly, the quality justifies the cost. It’s one of the best options for serious DIY canvas printing at home.
Canon PIXMA TR8620
If you’re on a budget, the Canon PIXMA TR8620 offers great value. It’s a five-color inkjet printer that still delivers impressive photo quality. The prints aren’t quite as vibrant as higher-end models, but they’re more than good enough for most home canvas print projects.
This all-in-one printer also scans and copies, which adds extra value. It’s a great entry-level option for anyone wondering whether can I print on canvas at home without spending a fortune.
Common Mistakes and How to Avoid Them
Even with the right equipment, mistakes happen. Here are the most common pitfalls people encounter when they start canvas printing at home, and how to avoid each one.
Using the Wrong Paper Type
This is the number one mistake. Regular printer paper simply cannot replicate the look and feel of canvas. It absorbs ink differently and produces flat, lifeless results. Always use dedicated canvas paper designed for inkjet printers.
Also, make sure you’re loading the paper the right way. Some canvas sheets have a coated side and a rough side. The coated side should face the print head. Mixing these up leads to poor ink adhesion and smudged prints.
Ignoring Printer Settings
Default printer settings are optimized for regular paper, not canvas. If you don’t change the settings, your print will likely come out too dark, too light, or with banding. Always select “Canvas” or “Photo Paper” in your printer driver before hitting print.
Also, avoid using “Fast” or “Draft” modes for canvas printing. These modes reduce print quality significantly. Take the extra few minutes and use the highest quality setting your printer offers. Your canvas print will thank you for it.
Skipping Color Calibration
What you see on your monitor often doesn’t match what comes out of the printer. Screen brightness, color profiles, and ambient lighting all affect how colors appear. Without proper color calibration, you might be disappointed by the final result.
You don’t need an expensive calibrator to get good results. Simply adjusting your monitor brightness and using the printer’s built-in color management tools can make a noticeable difference. For the best accuracy, consider a basic colorimeter.
Handling Prints Before They Dry
Fresh canvas prints are extremely vulnerable to smudging. Touching the surface before the ink dries leaves fingerprints and streaks. Always let your canvas prints dry completely before handling them, and always hold them by the edges.
If you need to speed up drying, use a cool hair dryer or let the print sit in a well-ventilated area. Avoid placing anything on top of the print while it dries, as this can cause sticking and damage.
Tips for Stunning Canvas Prints
Want your home canvas prints to look truly professional? These practical tips will help you elevate your results from good to absolutely stunning.
Choose the Right Image
Not every photo works well as a canvas print. Images with high contrast, rich colors, and strong composition look best on canvas. Landscapes, portraits, and abstract art all translate beautifully onto canvas paper.
Avoid images that are too dark or too bright. Canvas paper tends to slightly mute colors, so start with an image that’s a bit more vibrant than you want the final result to be. This compensates for the natural absorption of ink into the canvas texture.
Experiment with Different Finishes
Canvas paper comes in various finishes, and each one creates a different look. Matte finishes reduce glare and give a classic gallery feel. Glossy finishes make colors pop and look more vibrant. Luster finishes fall somewhere in between and are a popular choice for photo on canvas projects.
Buy small packs of different finishes and test them side by side. You’ll quickly discover which finish you prefer for your wall art projects. This experimentation is part of the fun of printing at home.
Protect Your Prints
Once your canvas print is dry, consider applying a protective spray or laminate. This helps prevent fading from sunlight and protects against moisture damage. A UV-resistant spray can significantly extend the life of your DIY canvas art.
For prints that will hang in sunny rooms, this extra step is especially important. It’s a small effort that makes a big difference in preserving the beauty of your canvas print over time.
Frame It Right
The way you display your canvas print affects how it looks on your wall. Gallery-wrapped canvas (stretched over bars) looks modern and clean. A standard frame gives a more traditional appearance. Both are valid choices depending on your home decor style.
For a truly professional look, consider adding a floating frame around your canvas print. This creates depth and draws the eye to the artwork. Simple framing upgrades can make even a basic home canvas print look like it came from a high-end gallery.
How to Troubleshoot Common Printing Issues
Sometimes things don’t go as planned. Here’s how to handle the most common issues you might face when printing on canvas at home.
Banding or Streaks in the Print
Horizontal lines or streaks usually mean your print head needs cleaning. Run the print head cleaning utility from your printer’s software. This clears any clogged nozzles that are causing uneven ink flow.
If cleaning doesn’t work, try replacing the affected ink cartridge. Low ink levels often cause banding. Also, make sure your canvas paper is loaded correctly and flat in the tray, as wrinkles or misalignment can create streaks too.
Colors Look Different on Screen vs. Print
This is a very common frustration. The main culprit is usually an incorrect color profile. Make sure your editing software and printer driver are using the same color profile for the best match between screen and print.
Also, remember that canvas paper naturally absorbs more ink than regular photo paper, which can make colors appear slightly muted. Adjusting your image to be a bit more saturated before printing helps compensate for this effect.
Ink Not Drying Properly
If the ink feels tacky or smudges easily, your paper might not be compatible with your printer. Check that you’re using printable canvas sheets designed for inkjet use. Also, make sure you’re using the correct print quality setting, as fast modes use less ink and it may not dry properly.
Humidity and temperature can also affect drying time. Prints dry faster in warm, dry environments. If your home is particularly humid, consider running a dehumidifier in the room where you print.
Conclusion
Can I print on canvas at home? Absolutely, and now you know exactly how. From choosing the right inkjet printer and canvas paper to following a simple step-by-step process, home canvas printing is well within reach for anyone. The key is using quality supplies, taking time to adjust your settings, and not being afraid to experiment.
Start with a simple project to build your confidence. Print a favorite photo on canvas and see how rewarding the process is. Once you see the results, you’ll be hooked. The ability to create custom wall art and home decor pieces on your own schedule is incredibly empowering.
Remember, every great canvas print starts with a willingness to try. Don’t worry about perfection on your first attempt. Each print teaches you something new. Before long, you’ll be producing gallery-quality DIY canvas art that you’ll be proud to display in your home. So go ahead, gather your supplies, and start creating. Your wall art journey begins right at home.
Frequently Asked Questions
Do I need a special printer to print on canvas at home?
Yes, you need an inkjet printer. Laser printers cannot print on canvas paper because they use heat and toner instead of liquid ink. Inkjet printers spray tiny ink droplets that bond properly with canvas paper, giving you vibrant, detailed results.
Can I use regular printer paper instead of canvas paper?
You can, but the results won’t look or feel like canvas. Regular paper is thin, flat, and lacks the textured surface that gives canvas prints their distinctive look. For authentic canvas printing at home, always use dedicated printable canvas sheets designed for inkjet printers.
How long do homemade canvas prints last?
With proper supplies and care, home canvas prints can last for many years. Using pigment-based inks and UV-protective sprays significantly extends their lifespan. Avoid hanging prints in direct sunlight, and keep them in low-humidity environments for the best durability.
What size canvas can I print at home?
Your printer’s maximum paper size determines the largest canvas print you can create at home. Most standard inkjet printers handle up to 8.5 by 11 inches or 13 by 19 inches. For larger prints, you may need a wide-format printer or a professional printing service.
Is home canvas printing cheaper than professional services?
Yes, DIY canvas printing is generally much more affordable. A single canvas print from a professional service can cost $20 to $50 or more. When you print at home, your cost per print drops to just a few dollars for paper and ink, especially if you buy supplies in bulk.
Do I need to stretch my canvas print over a frame?
No, stretching is optional. You can leave your printed canvas flat and frame it, or hang it as a loose sheet. However, stretching the print over canvas stretcher bars gives it a professional gallery appearance and creates a three-dimensional look that many people prefer for their wall art.