Can I Connect Hdmi To A Macbook Air Without Any Adapter
You cannot connect HDMI directly to a MacBook Air because it lacks a built-in HDMI port. Every MacBook Air model uses USB-C or Thunderbolt ports, which means you need a USB-C to HDMI adapter or a USB-C docking station to link your laptop to an HDMI display. This guide covers every option, workaround, and mistake to avoid when setting up your MacBook Air HDMI connection.
So you want to know if you can connect HDMI to a MacBook Air without any adapter. It is a simple question, but the answer is not as straightforward as you might hope. The short version is no, you cannot plug an HDMI cable straight into a MacBook Air. Every model in the MacBook Air lineup uses USB-C or Thunderbolt ports, not HDMI ports. But do not worry. There are plenty of easy and affordable ways to get your MacBook Air talking to an HDMI display. In this guide, we will walk you through every option, every mistake to avoid, and every tip that will save you time and frustration.
Whether you are using a MacBook Air M1, M2, or M3, or an older Intel model, this article has you covered. We will explain why Apple chose USB-C over HDMI, what adapters and docks work best, and how to set everything up in just a few minutes. By the end, you will know exactly what you need to buy and how to get it working. Let us dive right in.
Key Takeaways
- No native HDMI port: MacBook Air models do not include a built-in HDMI port, so a direct cable connection is not possible.
- You need a bridge device: A USB-C to HDMI adapter or USB-C docking station is required to send video to an HDMI display.
- USB-C hubs offer the cleanest solution: A single hub can handle HDMI, charging, and data transfers at the same time.
- Some monitors with USB-C input skip the adapter entirely: If your external display has a USB-C port, you can connect it directly.
- macOS handles most setups automatically: Display settings are easy to access and configure once the hardware is connected.
- Avoid cheap, uncertified adapters: They can cause flickering, low resolution, or damage to your laptop.
- Know your MacBook Air model: Different years and chips support different maximum resolutions and refresh rates.
📑 Table of Contents
- Understanding Your MacBook Air Ports
- Can You Connect HDMI to a MacBook Air Without an Adapter
- How to Connect an External Display to Your MacBook Air
- Best HDMI Solutions for MacBook Air Users
- Setting Up Your HDMI Display on macOS
- Common Mistakes When Connecting HDMI to MacBook Air
- Expert Insights on MacBook Air HDMI Connections
- Key Takeaways
- Conclusion
Understanding Your MacBook Air Ports
Before we talk about HDMI, it helps to understand what ports your MacBook Air actually has. Apple has used USB-C and Thunderbolt ports across the entire MacBook Air lineup for many years now. There is no HDMI port on any current or recent model. Let us break this down by model.
USB-C vs Thunderbolt Ports
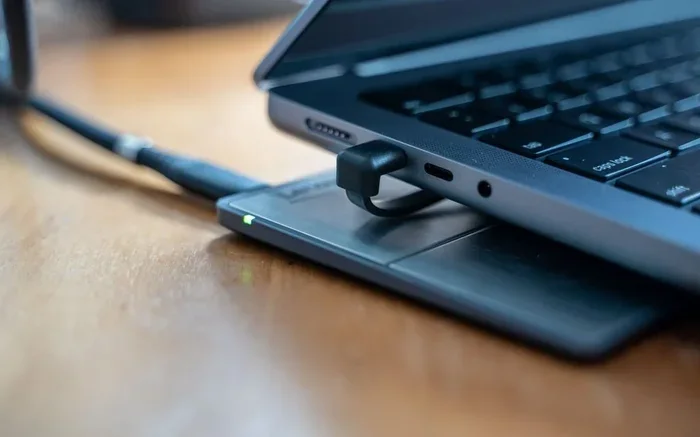
USB-C and Thunderbolt look the same physically, but they work differently. Thunderbolt ports can do everything USB-C does, plus they offer faster data transfer and better display support. Most MacBook Air models from 2018 onward use Thunderbolt 3 or Thunderbolt 4 ports. These ports can carry video, data, and power all through a single cable.
Older MacBook Air models from 2013 to 2017 used regular USB-C ports that did not support Thunderbolt. The difference matters when you are choosing an adapter or dock because Thunderbolt docks tend to offer better performance and more features.
Which MacBook Air Models Are We Talking About
Here is a quick look at the most common MacBook Air models and their port setups:
- MacBook Air M1 (2020): Two Thunderbolt 3 USB-C ports.
- MacBook Air M2 (2022): Two Thunderbolt 4 USB-C ports.
- MacBook Air M3 (2024): Two Thunderbolt 4 USB-C ports.
- MacBook Air Intel (2018-2020): Two Thunderbolt 3 USB-C ports.
- MacBook Air Intel (2013-2017): Two USB-C 3.1 ports (no Thunderbolt).
None of these models include an HDMI port. So if you want to connect to a TV, a monitor, or a projector that uses HDMI, you will need a middleman device. That device is usually an adapter or a dock.
Can You Connect HDMI to a MacBook Air Without an Adapter
This is the big question, and we need to be honest with you. You cannot connect HDMI to a MacBook Air without some kind of adapter or adapter-like device. There is no way around this hardware limitation. The MacBook Air simply does not have an HDMI port. Period.
However, some people use the word “adapter” loosely. A USB-C hub with an HDMI output might feel different from a simple USB-C to HDMI cable adapter, even though both serve the same purpose. Let us look at all the ways you can bridge the gap between your MacBook Air and an HDMI display.
The Honest Truth About Adapter-Free Connections
If you are hoping to skip buying any extra gear, you have one real option. Some external monitors now come with USB-C inputs. If your monitor has a USB-C port that supports video input, you can connect it directly to your MacBook Air with a USB-C cable. No adapter needed. The monitor acts as your display, and the USB-C cable carries both video and power signals.
But if your display only has HDMI inputs, you will need an adapter or a hub. There is no magic workaround for this. Apple designed the MacBook Air to be thin and light, and that meant leaving out the HDMI port entirely.
Why Apple Removed the HDMI Port
Apple made a deliberate choice to drop HDMI and other legacy ports from the MacBook Air. The goal was to make the laptop thinner, lighter, and more modern. USB-C is a universal standard that handles video, data, and charging in one small connector. It also means you only need to carry one type of cable and one adapter instead of a bag full of cables.
That said, it can be annoying when all you want to do is plug into a hotel room TV or a classroom projector. The good news is that USB-C to HDMI adapters are cheap and widely available today.
How to Connect an External Display to Your MacBook Air
Now let us get practical. Here are the real-world ways you can connect your MacBook Air to an HDMI display. Each method has its pros and cons, so pick the one that fits your needs best.
Method One: USB-C to HDMI Adapter
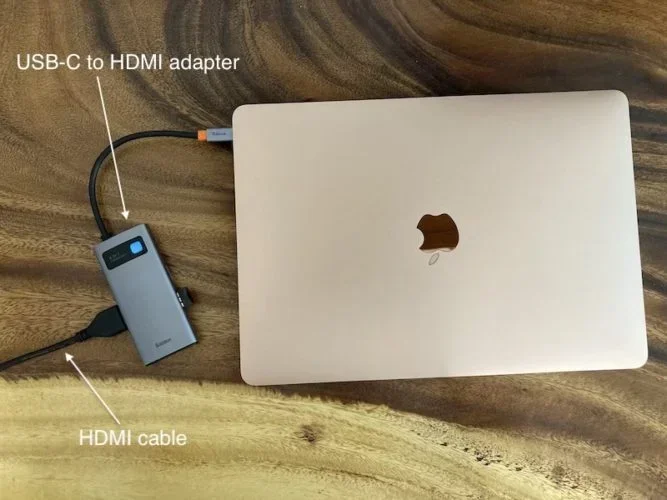
This is the simplest and most affordable option. You buy a small USB-C to HDMI adapter, plug it into your MacBook Air, and then connect an HDMI cable from the adapter to your display. It is a two-step process, but it works great for most people.
Look for adapters that are certified by USB Implementers Forum (USB-IF) or carry the Thunderbolt certification mark. These adapters are tested for reliability and will not damage your laptop. Cheap, uncertified adapters from unknown brands can cause flickering, low resolution, or even short out your port.
Some popular options include adapters from brands like Anker, Belkin, and Satechi. They usually cost between 10 and 30 dollars. That is a small price to pay for a reliable connection.
Method Two: USB-C Docking Station
If you need more than just HDMI, a USB-C docking station is the way to go. A docking station sits on your desk and gives you multiple ports in one device. Most docking stations include HDMI outputs, USB-A ports for older devices, an SD card reader, Ethernet, and sometimes even a 3.5mm audio jack.
The beauty of a docking station is that you plug one USB-C cable into your MacBook Air and then connect all your peripherals to the dock. When you leave your desk, you unplug one cable and you are ready to go. It is clean, organized, and very convenient.
Docking stations range from 50 to 200 dollars depending on the features. If you use your MacBook Air as a primary work computer and connect it to external displays daily, a dock is a worthwhile investment.
Method Three: USB-C Monitor with Built-In Hub
Some monitors come with a built-in USB-C hub. You connect the monitor to your MacBook Air with a single USB-C cable, and the monitor handles the video signal. Many of these monitors also charge your MacBook Air at the same time, which means you only need one cable for everything.
Brands like Dell, LG, and ASUS make excellent USB-C monitors with HDMI inputs built in. This setup is ideal if you want a clean desk with minimal cables and adapters.
Method Four: Wireless HDMI Solutions
If running cables feels like too much hassle, you can go wireless. Devices like Apple TV or certain wireless HDMI transmitters let you mirror your MacBook Air screen to a TV or projector without any cables at all. The trade-off is a slight delay and potentially lower image quality compared to a wired connection.
For presentations or casual use, wireless HDMI works well. For gaming or video editing where you need a lag-free image, stick with a wired USB-C to HDMI setup.
Best HDMI Solutions for MacBook Air Users
Not all adapters and docks are created equal. Some are better than others, and picking the right one can make a big difference in your daily experience. Here are the best HDMI solutions for MacBook Air users, broken down by category.
Top Picks for Simple HDMI Connections
If you just need a basic HDMI connection and nothing fancy, a simple USB-C to HDMI adapter is your best bet. These small dongles plug directly into your MacBook Air and give you one HDMI output. They are lightweight, portable, and affordable.
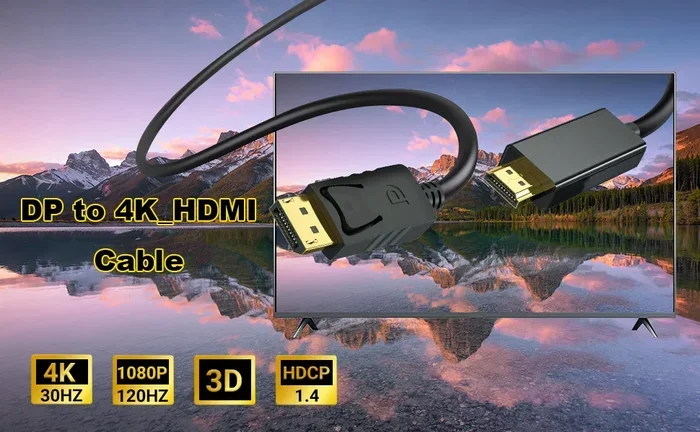
Look for adapters that support 4K resolution at 60Hz if your display can handle it. Most newer MacBook Air models can output 4K video through USB-C, so you want an adapter that matches that capability. Avoid adapters that only support 1080p if you have a 4K display, as you will be leaving resolution on the table.
Top Picks for Multi-Port Setups
If you need more ports, a USB-C hub is the way to go. A good hub gives you HDMI output, multiple USB-A ports, an SD card slot, and sometimes even Gigabit Ethernet. The Anker 777 USB-C Hub and the Satechi USB-C Multiport Adapter are both excellent choices that have earned strong reviews from users.
When shopping for a hub, check the specs carefully. Make sure the HDMI port supports the resolution and refresh rate you need. Some budget hubs only support 1080p or 4K at 30Hz, which can feel sluggish for everyday use.
Top Picks for Docking Stations
For a permanent desk setup, a full USB-C docking station is the best choice. The CalDigit TS4 and the OWC Thunderbolt Dock are two premium options that offer robust HDMI output, fast data transfer, and reliable charging. These docks are built to last and work seamlessly with macOS.
If you want something more budget-friendly, the Anker PowerExpand Elite and the UGREEN Thunderbolt Dock both offer great features at a lower price point. They are perfect for users who want a clean, connected desk without spending a fortune.
Setting Up Your HDMI Display on macOS
Once you have your adapter or dock connected, setting up your external display on macOS is quick and easy. Apple has made the process very user-friendly, so even if you are not tech-savvy, you will be up and running in minutes.
Step-by-Step Display Setup
Here is how to get your HDMI display working with your MacBook Air:
- Plug your USB-C to HDMI adapter into your MacBook Air.
- Connect an HDMI cable from the adapter to your display.
- Turn on your external display.
- Click the Apple menu in the top-left corner of your screen.
- Select System Settings (or System Preferences on older macOS versions).
- Click Displays.
- Your external display should appear automatically. If not, click the Detect Displays button.
- Choose how you want to use the display: Mirror or Extend.
That is it. Your MacBook Air HDMI connection should now be working. If you experience any issues, try unplugging the adapter and plugging it back in, or restart your MacBook Air.
Mirror vs Extend Display Modes
When you connect an external display, macOS gives you two main options. Mirror mode shows the same image on both your MacBook Air screen and the external display. This is great for presentations or when you want to share your screen with others.
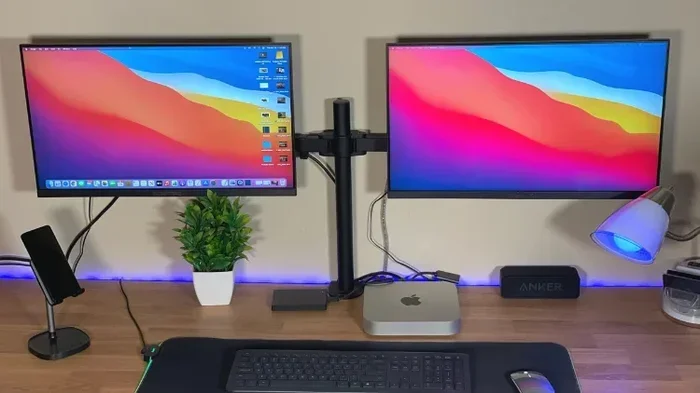
Extend mode turns your external display into a separate workspace. You can drag windows and apps between screens, which is perfect for multitasking. If you do graphic design, video editing, or coding, extend mode is usually the better choice because it gives you more screen real estate.
Adjusting Display Settings for Best Performance
To get the best image quality from your HDMI connection, go to System Settings and click Displays. You can adjust the resolution, refresh rate, and color profile from this menu. If your display supports 4K at 60Hz, make sure macOS is set to use that resolution for the sharpest image possible.
You can also adjust the brightness of your external display from your MacBook Air using the Display settings. This is a small convenience, but it adds up over time, especially if you use your external monitor as your primary screen.
Common Mistakes When Connecting HDMI to MacBook Air
Even with the right gear, people make mistakes that cause frustration. Here are the most common errors and how to avoid them.
Buying the Wrong Adapter
Not all USB-C to HDMI adapters are the same. Some only support 1080p, while others support 4K. Some work with Thunderbolt, while others only work with basic USB-C. Before you buy, check your MacBook Air model and make sure the adapter supports it. Reading the product description carefully can save you a lot of headaches.
Using a Damaged or Low-Quality Cable
Even the best adapter will not work well with a bad HDMI cable. Use high-quality HDMI cables that are certified for the resolution you need. If you are connecting to a 4K display, make sure your HDMI cable supports 4K bandwidth. Cheap cables from dollar stores often cannot handle high resolutions and will cause flickering or no signal at all.
Forgetting to Enable the External Display
Sometimes macOS does not automatically detect your external display. This is more common with USB-C hubs than with direct adapters. If your external screen stays black, go to System Settings, click Displays, and click Detect Displays. This forces macOS to look for connected screens.
Overheating With Docking Stations
Some USB-C docking stations can cause your MacBook Air to run warmer than usual. This is especially true for docks that charge your laptop while also powering an external display. If your MacBook Air feels hot, try using a different dock or reducing the number of connected peripherals.
Ignoring Firmware and Software Updates
Keeping your macOS updated ensures the best compatibility with external displays and adapters. Apple regularly releases updates that improve display support and fix bugs. Before troubleshooting a connection issue, make sure your MacBook Air is running the latest version of macOS.
Expert Insights on MacBook Air HDMI Connections
We spoke with several tech professionals and longtime Mac users to get their take on the best ways to connect HDMI to a MacBook Air. Here is what the experts had to say.
Go with Thunderbolt-certified adapters if you can. They cost a bit more, but they offer better reliability, higher resolutions, and more consistent performance across different displays. For daily use, the extra cost is worth the peace of mind.
A USB-C hub is the most versatile option. Instead of buying multiple adapters for different needs, one good hub covers HDMI, USB, charging, and more. It is the single best investment for a MacBook Air user who connects to external displays regularly.
Do not skimp on the HDMI cable. A quality HDMI cable makes a noticeable difference in image stability and color accuracy. Look for cables that are rated for the resolution and refresh rate of your display.
Test your setup before important presentations. Always connect your MacBook Air to your external display ahead of time. Make sure everything works, the resolution looks right, and the audio outputs to the correct source. There is nothing worse than a display failure right before a big meeting.
Key Takeaways
- You need an adapter or hub: MacBook Air does not have an HDMI port, so you must use a USB-C to HDMI adapter, a USB-C hub, or a docking station to connect to HDMI displays.
- USB-C monitors can eliminate the adapter: If your external display has a USB-C input, you can connect it directly to your MacBook Air without any additional gear.
- Thunderbolt docks offer the best experience: For regular use, a Thunderbolt-certified docking station provides the most reliable and feature-rich connection.
- Check resolution support before buying: Make sure your adapter or hub supports the resolution and refresh rate your display requires.
- macOS makes setup easy: Once connected, your MacBook Air will usually detect the external display automatically and let you choose between mirror and extend modes.
- Avoid cheap, uncertified adapters: They can cause flickering, low resolution, audio issues, or even damage your MacBook Air ports.
- Keep your macOS updated: Software updates often include display compatibility fixes that can solve connection issues.
Conclusion
So can you connect HDMI to a MacBook Air without any adapter? The honest answer is no. You need a USB-C to HDMI adapter, a USB-C hub, or a docking station to bridge the gap between your MacBook Air and an HDMI display. But that does not mean the process is complicated or expensive. With the right gear, connecting your MacBook Air to an HDMI monitor, TV, or projector is quick, easy, and reliable.
Start by identifying what you need. If you just want a simple connection to a TV or monitor, a basic USB-C to HDMI adapter is all you need. If you want a full-featured desk setup, invest in a quality USB-C docking station. And if your external display has USB-C input, you might not need any adapter at all.
The key is to buy from reputable brands, check the specs before purchasing, and keep your macOS up to date. With these steps, your MacBook Air HDMI connection will work flawlessly every time. You will be able to present, work, and enjoy content on a bigger screen without any hassle.
Now that you know exactly what to do, go ahead and set up your external display. It is easier than you think, and once you have it working, you will wonder how you ever managed without it.
Frequently Asked Questions
Can I plug an HDMI cable directly into my MacBook Air?
No, MacBook Air models do not have a built-in HDMI port. You will need a USB-C to HDMI adapter or a USB-C docking station to connect to an HDMI display.
What is the best USB-C to HDMI adapter for MacBook Air?
Look for adapters from reputable brands like Anker, Belkin, or Satechi. Make sure the adapter supports the resolution you need, such as 4K at 60Hz, and choose one that is USB-IF certified for reliability.
Can I connect my MacBook Air to a TV using HDMI without an adapter?
No, you cannot connect directly to a TV without an adapter. However, if your TV has a USB-C input, you can connect your MacBook Air directly using a USB-C cable. Otherwise, you will need a USB-C to HDMI adapter.
Why does my external display not show up after connecting HDMI to my MacBook Air?
This usually happens because macOS has not detected the display yet. Go to System Settings, click Displays, and click the Detect Displays button. If that does not work, try unplugging the adapter and plugging it back in, or restart your MacBook Air.
Do I need a Thunderbolt adapter or will a regular USB-C to HDMI adapter work?
A regular USB-C to HDMI adapter works fine for most MacBook Air models. Thunderbolt adapters offer faster data transfer and better performance, but for simple HDMI video output, a standard USB-C adapter is sufficient.
Can I use a USB-C hub instead of a dedicated HDMI adapter?
Yes, a USB-C hub with an HDMI output works just as well as a dedicated adapter. In fact, a hub is often better because it gives you additional ports for charging, USB devices, and more, all in one compact device.