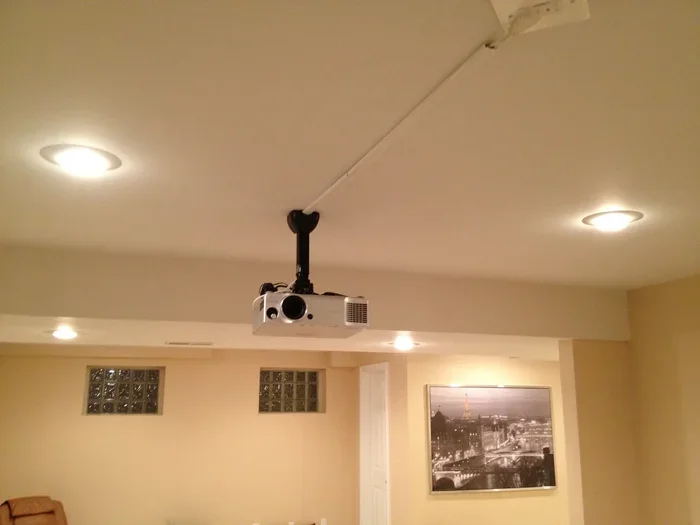
Can You Mount A Projector To Drywall Without Any Hassle
Yes, you can mount a projector to drywall, but you must use the right drywall anchor and mounting hardware. A standard drywall can’t support a heavy projector alone, so you’ll need a toggle bolt or a specialized drywall anchor for load-bearing support. This guide shows you exactly how to mount projector on drywall without cracking or falling, ensuring a safe projector installation for your home theater projector setup.
You’ve finally decided to create a home theater. The big screen, the surround sound, the projector. But then you look up at your bare walls and wonder, Can You Mount A Projector To Drywall? The short answer is yes, but there’s a catch. Drywall is not a structural wall. It’s a thin layer of gypsum that can crumble under heavy weight if you don’t reinforce it properly. A projector can weigh anywhere from 5 to 20 pounds. That’s a lot of force pulling down on a fragile surface. If you just screw it into drywall without anchors, it will eventually pull out and damage your wall. That’s why understanding the right mounting hardware is so important. In this article, I’ll walk you through every step of a safe projector installation. You’ll learn which anchors work best, how to find wall studs, and how to avoid costly repairs.
A wall mount projector setup can transform any room into a cinematic experience. But the success of your projector mounting depends entirely on the wall surface. Most homes have drywall, also known as plasterboard or gypsum board. It’s lightweight, easy to cut, and perfect for hanging pictures. But a projector is not a picture frame. It’s a heavy electronic device that needs solid support. Many people assume they can just drill a hole and hang it. That’s a mistake. Without proper drywall support, your projector could fall, break, or damage your wall. This guide will show you exactly how to do it right. We’ll cover the tools you need, the best hardware choices, and the step-by-step process. By the end, you’ll feel confident tackling your own projector installation.
Key Takeaways
- Drywall alone can’t hold a projector: You need a proper drywall anchor or toggle bolt to support the projector weight.
- Toggle bolts are the strongest option: They distribute weight across the drywall and grip the wall studs securely.
- Always use a stud finder: Locating wall studs gives you a solid base for your projector ceiling mount.
- Check the projector weight rating: Match your drywall anchor to the projector weight and mounting hardware.
- Avoid common mistakes: Don’t use plastic anchors for heavy projectors; they will pull out over time.
- Test the mount before use: Gently tug the bracket to ensure it’s secure before hanging the projector.
- Repair any damage promptly: If you need to remove the mount later, patch the drywall properly to avoid unsightly holes.
📑 Table of Contents
- Why Mounting a Projector to Drywall Is a Game-Changer
- Can You Mount A Projector To Drywall? The Short Answer
- The Real Challenge: Drywall Can’t Hold Weight Alone
- Step-by-Step Guide to Mounting a Projector on Drywall
- Best Hardware for a Secure Projector Mount
- Common Mistakes That Damage Your Walls
- Expert Tips for a Flawless Installation
- Conclusion
Why Mounting a Projector to Drywall Is a Game-Changer
The Benefits of a Wall-Mounted Projector
Mounting a projector on the wall frees up floor space. You no longer need a bulky TV stand or a projector shelf. A ceiling mount projector creates a clean, minimalist look. It also gives you the flexibility to adjust the angle. You can project onto a wall or a dedicated screen. The image quality often surpasses that of a standard television. Plus, a wall mount projector setup is perfect for bedrooms, living rooms, and even outdoor movie nights. With the right drywall support, you can enjoy a big picture without worrying about the mount falling.
Why Ceiling Mounts Are Popular
Ceiling mounting is the most common way to install a projector. It keeps the device out of sight and away from curious hands. But not everyone has a ceiling joist or a solid overhead surface. In many rooms, the ceiling is just drywall over wooden joists. That means you still need to anchor into drywall. A proper projector ceiling mount uses a bracket that spreads the weight. It relies on strong drywall anchors or a direct connection to a wall stud. This is where many DIYers get stuck. They don’t realize that drywall alone isn’t enough.
Can You Mount A Projector To Drywall? The Short Answer
The answer is yes, but only with the right preparation. You cannot simply drive a screw into a drywall surface and hang a heavy projector. The drywall will crack, the screw will loosen, and the projector will eventually fall. To mount projector on drywall safely, you must use mechanical fasteners designed for drywall. These include toggle bolts, self-drilling anchors, and heavy-duty drywall screws. You also need to know where the wall studs are. A stud finder is an essential tool. It helps you locate the wooden framing behind the drywall. If you can hit a stud, you have a solid anchor point. If you can’t, you must rely on a drywall anchor that distributes the load. The key is matching the anchor to the projector weight and the drywall thickness.
Most projectors weigh between 5 and 15 pounds. That’s well within the capacity of a good toggle bolt. A toggle bolt can hold up to 50 pounds in drywall. That’s more than enough for any home theater projector. The trick is installing it correctly. You need a hole large enough to fit the toggle wings through. Once the toggle is behind the drywall, you tighten the screw. The wings expand against the back of the drywall, creating a strong hold. This is the secret to a secure projector mounting. Without a toggle bolt or similar anchor, your drywall anchor will fail.
The Real Challenge: Drywall Can’t Hold Weight Alone
Understanding Drywall Weight Limits
Drywall is a building material, not a structural wall. It’s made of gypsum plaster sandwiched between two sheets of thick paper. A standard ½-inch drywall panel can hold a few pounds if you use a simple nail. But that’s it. A heavy projector will pull right through. The paper facing will tear, and the gypsum will crumble. This is why drywall repair is a common headache after a failed projector installation. You don’t want to end up with a big hole in your wall. That’s why you must use the right drywall support from the start.
The weight capacity of drywall depends on several factors. The thickness of the drywall matters. A ⅝-inch drywall is stronger than a ½-inch drywall. The presence of a wall stud behind the surface changes everything. A screw driven into a stud can hold up to 100 pounds. But if you’re mounting in the middle of a wall with no stud, you’re relying entirely on the drywall anchor. That’s where the projector weight becomes critical. You must never exceed the rating of your anchor. Always check the manufacturer’s specifications for your drywall anchor and projector mounting hardware.
Why You Need a Drywall Anchor
A drywall anchor is a simple device that spreads the pulling force over a larger area. Without an anchor, the screw acts like a wedge. It pushes the drywall apart and eventually pops out. A drywall anchor has wings or bolts that expand behind the surface. Some anchors are made of plastic. Others are metal. For a projector, you need a metal anchor or a toggle bolt. Plastic anchors are fine for lightweight picture frames. They are not safe for a heavy projector. The projector weight can crush plastic anchors over time. Always choose a drywall anchor rated for at least twice the projector weight. This gives you a safety margin.
Here’s a quick comparison of common drywall anchors. This will help you choose the right one for your projector mounting.
| Anchor Type | Weight Capacity | Best For | Installation Difficulty |
|---|---|---|---|
| Plastic Expansion Anchor | 5–10 lbs | Light frames, shelves | Easy |
| Metal Toggle Bolt | 25–50 lbs | Heavy projectors, TVs | Medium |
| Self-Drilling Drywall Anchor | 10–25 lbs | Medium projectors, shelves | Easy |
| Molly Bolt | 20–50 lbs | Medium to heavy mounts | Medium |
As you can see, a metal toggle bolt is the clear winner for projector mounting. It can hold the heaviest home theater projector with ease. A self-drilling anchor works well for lighter models. Always match the anchor to the projector weight and the type of drywall you have.
Step-by-Step Guide to Mounting a Projector on Drywall
Gather Your Tools and Materials
Before you start, make sure you have everything you need. Here’s a list of essential tools for projector installation:
- A stud finder to locate wall studs
- A drill with appropriate drill bits
- A level to ensure the mount is straight
- A pencil to mark holes
- A screwdriver or drill driver
- Toggle bolts or heavy-duty drywall anchors
- A projector ceiling mount or wall mount bracket
- A drywall patch kit (just in case)
Having all the tools ready will make the process smooth. You don’t want to stop halfway through because you’re missing a drywall screw or a level. A good stud finder is especially important. It will save you from drilling into pipes or wires hidden behind the wall. Take a moment to read the instructions for your mounting hardware. Every projector bracket is a little different. Knowing the steps beforehand will prevent frustration.
Locate the Wall Studs
Start by using your stud finder to scan the wall. Move it slowly across the surface. When it beeps or lights up, you’ve found a stud. Mark the spot with a pencil. If you can find two studs that align with the projector bracket holes, you’re in luck. You can screw directly into the wood. This is the strongest possible drywall support. A wall stud can easily hold the weight of any projector.
If you can’t find a stud in the right spot, don’t worry. You’ll use a toggle bolt. But you still want to avoid hitting electrical wires or plumbing. Use a wire detector if your stud finder has that feature. In older homes, the wiring might be close to the surface. Be cautious. Once you’ve identified a safe spot, you’re ready to drill the pilot hole.
Install the Drywall Anchor
Drill a pilot hole into the drywall at your marked spot. The hole size should match the toggle bolt or anchor instructions. For a toggle bolt, you’ll need a hole large enough to fold the wings and pass them through. Push the anchor through the hole from the front. If you’re using a toggle bolt, fold the metal wings flat against the back of the drywall. Then, from the front, drive the screw into the anchor. Tighten it until the toggle is snug against the drywall. You should feel resistance. The anchor is now secure.
Repeat this process for each mounting point. Most projector brackets need two or three anchors. If you’re mounting into a single stud, you might only need one screw into the wood and one toggle bolt for the other side. Always use a level to check that the bracket is straight before you fully tighten the screws. A crooked mount will cause the projector image to tilt. That’s an easy fix if you catch it early, but it’s annoying to correct later.
Mount the Projector Bracket
Now attach the projector bracket to the wall. Line up the holes with the anchors. Insert the screws and tighten them with a screwdriver or drill. Don’t overtighten, or you might strip the drywall anchor. Once the bracket is secure, give it a firm tug. It should not move at all. If it wiggles, check that the toggle bolt is fully expanded or that you’ve hit a stud. A solid bracket is the foundation of a safe projector installation.
Next, attach the projector to the bracket. Most projectors have a standard mounting hole pattern. Use the bolts provided with your projector or bracket. Slide the projector onto the bracket and lock it in place. Make sure it’s secure. A heavy projector can detach if the latch isn’t fully engaged. Once the projector is mounted, plug in the power and HDMI cables. You might need to route cables through the wall for a clean look. Use cable clips to keep them tidy.
Best Hardware for a Secure Projector Mount
Toggle Bolts vs. Drywall Anchors
When it comes to projector mounting, not all anchors are created equal. Toggle bolts are the gold standard for drywall. They consist of a bolt and a pair of metal wings. You fold the wings, push them through a hole, and then tighten the bolt. The wings spread behind the drywall, creating a strong mechanical grip. A toggle bolt can hold a heavy projector for years without any issues. They are especially useful when you can’t hit a wall stud.
Self-drilling drywall anchors are another good option. They don’t require a separate pilot hole in many cases. You just screw them directly into the drywall. They have a sharp tip that drills in as you turn the screw. The wings expand behind the surface. These anchors are easier to install but have a lower weight capacity than toggle bolts. For a lightweight projector under 10 pounds, they work well. For a heavy projector, stick with toggle bolts or Molly bolts.
Choosing the Right Projector Ceiling Mount
If you’re going with a ceiling mount projector, the hardware is slightly different. A ceiling mount bracket attaches to a ceiling plate. That plate then connects to the projector. You still need to anchor the plate into the ceiling drywall. The same rules apply. Use a toggle bolt for each mounting point. Make sure the ceiling can support the weight. Most residential ceilings are drywall over wood joists. The joists provide extra support, but you still need a proper anchor.
Some projector ceiling mounts are adjustable. They allow you to tilt the projector up or down. This is great for getting the perfect image on your screen. When choosing a projector ceiling mount, look for one with a high weight rating. Check that it includes the right drywall anchors. A good mount will have all the hardware you need, including drywall screws and toggle bolts. Read reviews before you buy. A sturdy projector bracket makes the whole installation easier and safer.
Common Mistakes That Damage Your Walls
Skipping the Stud Finder
The biggest mistake people make is guessing where the studs are. They drill a hole, hear a hollow sound, and assume it’s safe. It’s not. You might hit a cavity, and the anchor won’t hold. Or worse, you might drill into a wire or pipe. Always use a stud finder. It takes a few seconds and saves you from expensive drywall repair. If you don’t have a stud finder, you can tap the wall and listen for a solid sound. But a stud finder is far more reliable.
Overloading a Single Anchor
Another common error is using too few anchors for the projector weight. A heavy projector needs multiple support points. If you rely on a single drywall anchor, it will eventually pull out. The drywall will crack, and you’ll have a large hole to fix. Always use at least two anchors for any projector mount. If the projector is over 15 pounds, use three or four. Distribute the weight evenly across the wall. This is the key to long-lasting drywall support.
Using the Wrong Size Drill Bit
Drilling the wrong size hole is a quick way to ruin your drywall anchor. If the hole is too small, the toggle bolt won’t fit. If it’s too large, the anchor will spin freely and never grip. Always check the anchor packaging for the correct drill bit size. Match the bit to the anchor. Take your time. A clean, properly sized hole makes all the difference in the strength of your projector mounting.
Forgetting to Patch the Drywall
If you ever need to remove the projector mount, you’ll be left with holes. Even with careful installation, there will be some damage. Keep a drywall patch kit on hand. You can fill small holes with spackle and sand them smooth. For larger holes, use a drywall patch and joint compound. A little patience and some sanding will make the wall look brand new again. This is an essential part of any projector installation project.
Expert Tips for a Flawless Installation
Pro Insight: Always test your mount before you hang the projector. Install the bracket, give it a strong tug, and then hang the projector for just a few minutes. Check for any movement or creaking. This simple test can save you from a dramatic fall later. If the bracket feels loose, tighten the screws or add another toggle bolt. It’s much easier to fix a problem at this stage than after the projector is hanging at eye level.
Use a Level for Perfect Alignment
A crooked projector image is distracting. To avoid this, use a bubble level on top of the projector bracket before you tighten the final screws. You can also use a laser level for more precision. A small bubble level costs just a few dollars and makes a huge difference. Take the extra minute to get it right. Your eyes will thank you during movie night.
Consider the Projector Lamp Heat
Projectors generate heat, especially when the lamp is on. Make sure your mount allows for some airflow around the projector. Don’t press the projector tightly against the wall without any gap. Heat buildup can shorten the lamp life and even cause the projector to shut down. A good projector bracket has a slight offset or ventilation slots. Keep this in mind when you choose your mounting hardware.
Plan Your Cable Routing
A clean installation looks professional. Plan how you’ll route the power cord and HDMI cable. You can run cables through the wall using a cable pass-through kit. This hides the wires completely. If you can’t go through the wall, use cable raceways or adhesive cable clips. Keep cables away from the projector vent. A neat setup not only looks better but also prevents accidental tugs on the projector.
Know When to Call a Professional
If your drywall is old and crumbling, or if you’re mounting on a textured ceiling, the job might be tricky. In those cases, it’s okay to hire a professional. A handyman or a home theater installer knows how to handle difficult surfaces. They can also repair any damage after the mount is removed. Don’t hesitate to ask for help if you’re unsure. A safe projector installation is worth the investment.
Conclusion
So, can you mount a projector to drywall without any hassle? Absolutely. The secret lies in using the right drywall anchor and taking the time to do it correctly. A toggle bolt is your best friend when you’re dealing with a heavy projector and a standard wall. Always locate the wall studs with a stud finder. If you can’t hit a stud, a high-quality drywall anchor will still give you a secure hold. Follow the steps in this guide, and you’ll have a safe, stable mount that lasts for years.
Remember to test the bracket before you trust it with your expensive projector. Avoid common mistakes like using plastic anchors or skipping the level. With the right projector ceiling mount and a little patience, you can enjoy a stunning home theater experience on any drywall wall. Now you know exactly how to mount projector on drywall the right way. Go ahead and set up your big screen. Your next movie night is going to be amazing.
Frequently Asked Questions
Can I use a plastic drywall anchor for a projector?
No, plastic anchors are not safe for a heavy projector. They can crack or pull out over time. Always use a metal toggle bolt or a self-drilling anchor rated for the projector weight. A toggle bolt can hold up to 50 pounds, which is more than enough for most projectors.
How do I find a wall stud for my projector mount?
Use a stud finder and slide it slowly across the wall. When it detects the edge of a stud, it will beep or light up. Mark the spot with a pencil. If you don’t have a stud finder, you can tap the wall and listen for a solid, dull sound instead of a hollow one. A stud finder is the most reliable method.
What if I can’t hit a wall stud with my projector bracket?
Don’t worry. You can still mount the projector safely using toggle bolts. A toggle bolt expands behind the drywall and creates a strong hold even without a stud. Just make sure the toggle bolt is rated for the projector weight and that you drill the correct size hole.
How much weight can drywall hold with a toggle bolt?
A single toggle bolt can typically hold between 25 and 50 pounds in drywall, depending on the size and the type of drywall. For a heavy projector, use two or three toggle bolts to distribute the weight. This ensures the mount stays secure and the drywall doesn’t crack.
Do I need to patch the drywall after removing the projector mount?
Yes, removing the mount will leave holes. You can fill small holes with spackle and sand them smooth. For larger holes, use a drywall patch and joint compound. Once it’s dry, paint over the spot to match your wall. This keeps your wall looking clean and prevents further damage.
Can I mount a projector on a textured drywall ceiling?
Yes, but it’s a bit trickier. Textured ceilings can make it hard to get a solid anchor. Use a toggle bolt that can expand past the texture. You might need to drill through the texture first. If the texture is very thick, consider using a ceiling mount projector designed for textured surfaces or consult a professional for the best results.