Can You Install An Operating System On A USB Flash Drive
Yes, you can install an operating system on a USB flash drive and carry a full OS with you anywhere. A bootable USB drive lets you run Windows or Linux from any computer without touching the internal hard drive. This guide walks you through every step, from choosing the right flash drive to troubleshooting common issues.
Have you ever wondered if you could carry a complete computer operating system in your pocket? The idea might sound like science fiction, but it is very real. You can install an operating system on a USB flash drive and turn any compatible computer into your personal machine. Whether you are a tech enthusiast, a student, or someone who needs to fix computers on the go, this skill is incredibly useful.
A bootable USB flash drive works just like a regular hard drive or SSD. When you start up a computer, you can tell it to load the operating system from the USB stick instead of the internal drive. This means you get a fully functional OS with your files, settings, and applications — all running from a small device that fits on your keychain.
The process is simpler than most people think. With the right tools and a little patience, anyone can create a portable operating system on a USB drive. In this guide, we will cover everything you need to know. We will look at what you need, how to do it step by step, and what to watch out for along the way.
Key Takeaways
- It is absolutely possible: You can install a full operating system on a USB flash drive and boot from it on most computers.
- USB 3.0 or higher is best: Faster USB drives dramatically improve the performance of a portable OS.
- Windows and Linux both work: Linux is generally easier to set up as a portable OS, while Windows requires specific tools like Windows To Go.
- You need at least 16 GB: For Windows, aim for 32 GB or more to have enough space for the OS and your files.
- Common mistakes hurt performance: Using the wrong file system, old USB standards, or skipping the boot menu step causes most failures.
- It is great for troubleshooting: A USB OS lets you fix broken computers, recover data, or test a new system safely.
📑 Table of Contents
- What Does It Mean to Install an OS on a USB Flash Drive?
- Why Would You Want to Install an OS on a USB Flash Drive?
- What Do You Need to Install an OS on a USB Flash Drive?
- Step-by-Step Guide to Installing an OS on a USB Flash Drive
- Windows vs. Linux on a USB Flash Drive
- Common Mistakes to Avoid When Setting Up a USB OS
- Expert Tips for the Best USB OS Experience
- Can You Install Any Operating System on a USB Flash Drive?
- Final Thoughts
What Does It Mean to Install an OS on a USB Flash Drive?
Installing an operating system on a USB flash drive means setting up a complete OS — like Windows or Linux — so it can run directly from the USB stick. The flash drive becomes your main drive for that session. You can open apps, save files, browse the internet, and do everything you normally do on a computer.
This is different from simply copying files to a USB drive. A bootable USB contains special files that tell the computer how to start up using the USB as its main storage. The computer treats the flash drive just like it would treat its internal hard drive.
How Does a Bootable USB Work?
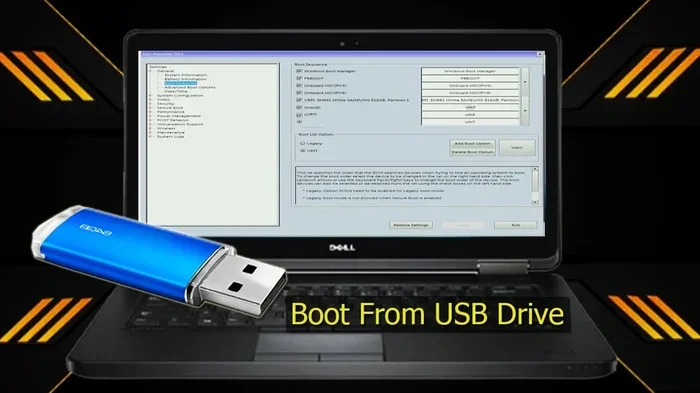
Every computer has a boot sequence. When you press the power button, the computer looks for an operating system to load. Normally, it finds one on the internal hard drive or SSD. But you can change the boot order in the BIOS or UEFI settings to tell the computer to look at the USB drive first.
Once the computer finds the bootable USB, it loads the operating system from the flash drive into the computer’s RAM. From that point on, everything runs as if the OS were installed on the computer’s internal drive. The only difference is that all the data is being read from and written to the USB stick.
A live USB is a special type of bootable USB. It lets you run the operating system without making any changes to the computer’s hard drive. This is great for testing or for emergency repairs. You can also set up a persistent live USB, which saves your files and settings even after you restart.
Why Would You Want to Install an OS on a USB Flash Drive?
There are many good reasons to install an operating system on a USB flash drive. Let us look at the most common ones.
1. Portability and Convenience
Imagine carrying your entire computer setup in your pocket. With a USB OS installation, you can plug into any computer and have your familiar desktop, applications, and files ready to go. This is perfect for people who work across multiple machines or travel frequently.
You do not need to carry a laptop. Any desktop computer at a library, office, or friend’s house becomes your computer the moment you plug in your USB drive.
2. System Recovery and Troubleshooting
A bootable USB is one of the best tools for fixing a broken computer. If your main operating system fails to start, you can boot from the USB and access your files or run repair tools. Many IT professionals always keep a system restore USB handy for exactly this reason.
You can also use a USB OS to scan for malware, recover lost data, or test hardware without risking your main system.
3. Testing a New Operating System
Not sure if you want to switch from Windows to Linux? A USB flash drive lets you test a new OS without committing to a full installation. You can see how the system runs on your hardware, check app compatibility, and decide if it is right for you.
4. Privacy and Security
Using a portable OS on a USB drive means you leave no trace on the computer you are using. This is valuable when working on public or shared computers. Your data stays on the USB stick, which you can encrypt and carry with you at all times.
What Do You Need to Install an OS on a USB Flash Drive?
Before you start, you need a few things. Having the right equipment saves time and prevents frustration.
USB Flash Drive Requirements
Not all USB flash drives are created equal. Here is what you should look for:
- Capacity: At least 16 GB for Linux. For Windows, aim for 32 GB or more. Windows 10 and 11 need around 20 GB just for the OS, and you will want extra space for your files.
- Speed: A USB 3.0 or USB 3.1 drive makes a huge difference. A slow USB 2.0 drive will make the OS feel sluggish and frustrating.
- Quality: Use a reputable brand. Cheap, low-quality flash drives can fail during installation or corrupt your data.
- Durability: Look for drives with a good warranty. Since you will be reading and writing constantly, reliability matters.
Computer Requirements
Most modern computers can boot from a USB drive. Here is what you need:
- A computer with a USB port (USB 3.0 is preferred but not required).
- Access to the BIOS or UEFI settings (usually by pressing F2, F12, Del, or Esc during startup).
- At least 4 GB of RAM for a smooth experience with Linux. For Windows, 8 GB or more is recommended.
Software You Will Need
You cannot just copy an OS file to a USB drive and expect it to work. You need special software to create a bootable USB installer. Here are the most popular options:
- Rufus: A free, lightweight tool for Windows. It is the go-to choice for most people creating bootable USB drives.
- BalenaEtcher: Works on Windows, Mac, and Linux. Very simple to use with a clean interface.
- Ventoy: Lets you put multiple ISO files on one USB drive and choose which one to boot from.
- Windows Media Creation Tool: Microsoft’s official tool for creating a Windows bootable USB.
You Will Also Need
- An ISO file of the operating system you want to install. An ISO is a single file that contains everything needed to set up the OS.
- A backup of any important data on the USB drive. The installation process will erase everything on it.
Step-by-Step Guide to Installing an OS on a USB Flash Drive
Now for the fun part. Let us walk through the process of creating a bootable USB flash drive. I will use Rufus as the example tool because it is free, fast, and widely trusted.
Step 1: Download the Operating System ISO
Go to the official website of the operating system you want to install. For Windows, visit Microsoft’s website and use the Media Creation Tool or download the ISO directly. For Linux, visit the website of your chosen distribution like Ubuntu or Fedora.
Save the ISO file to your computer. Make sure it is the correct version for your needs — 32-bit or 64-bit, for example.
Step 2: Download and Open Rufus
Go to the Rufus website and download the free tool. It is a small file and does not need installation. Just run it.
When Rufus opens, you will see a simple interface. At the top, select your USB flash drive from the device dropdown menu.
Step 3: Select the ISO File
Click the “SELECT” button next to the Boot Selection section. Find the ISO file you downloaded in Step 1 and open it.
Rufus will automatically detect the type of ISO and configure the settings for you. In most cases, you do not need to change anything else.
Step 4: Start the Process
Click the “START” button. Rufus will warn you that all data on the USB drive will be erased. Confirm that you have backed up anything important.
The process usually takes 5 to 15 minutes depending on the size of the ISO and the speed of your USB drive. Do not remove the drive or shut down the computer during this time.
Step 5: Boot from the USB Drive
Once Rufus finishes, plug the USB drive into the computer where you want to install or run the OS. Restart the computer.
As the computer starts up, press the boot menu key. This is usually F12, F8, F9, or Esc, depending on your computer brand. You can also enter the BIOS by pressing F2 or Del.
In the boot menu, select your USB drive as the first boot device. The computer will now load the operating system from the USB flash drive.
Step 6: Install or Run the OS
You will see the operating system setup screen. If you want to install it permanently on the USB drive, follow the on-screen prompts and choose the USB drive as the installation target.
If you are using a live USB, you can explore the OS without installing anything. Just be aware that any changes you make will be lost when you restart, unless you set up persistence.
Windows vs. Linux on a USB Flash Drive
Not all operating systems are the same when it comes to running from a USB drive. Here is a comparison to help you decide.
| Feature | Windows (Windows To Go) | Linux (Live USB) |
|---|---|---|
| Ease of Setup | Moderate | Easy |
| Minimum USB Size | 32 GB recommended | 8 GB minimum |
| Performance | Good with USB 3.0 | Very good with USB 3.0 |
| Free Tools Available | Limited official tools | Many free tools |
| Persistence | Full support | Built into most distros |
| Software Compatibility | Excellent (familiar apps) | Good (open-source apps) |
| Best For | Corporate or Windows users | Testing, recovery, privacy |
Windows To Go was a feature in older versions of Windows that allowed you to create a portable Windows installation on a USB drive. Microsoft discontinued this feature in Windows 10 version 2004, but third-party tools can still achieve similar results. The process is more complex than setting up a Linux live USB, but it gives you a familiar Windows environment.
Linux is the easier choice for most people. Distributions like Ubuntu, Linux Mint, and Fedora come with built-in tools to create a live USB. The setup process is straightforward, and many Linux distros are completely free. You also get great performance because Linux is lighter on system resources than Windows.
Which Should You Choose?
If you already use Windows and need the same apps and files on the go, try a Windows-based portable setup. If you want something simple, free, and fast for testing or recovery, Linux is the better option. For most beginners, a Linux live USB is the easiest and most rewarding starting point.
Common Mistakes to Avoid When Setting Up a USB OS
Even with the right tools, things can go wrong. Here are the most common mistakes people make and how to avoid them.
Using a USB 2.0 Drive
This is the number one mistake. A USB 2.0 flash drive will make your operating system painfully slow. Everything — opening apps, loading files, even moving the mouse — will lag. Always use a USB 3.0 or USB 3.1 drive for the best experience.
Not Enough Storage Space
Trying to cram an operating system onto an 8 GB drive is a recipe for frustration. Windows needs at least 32 GB. Even Linux benefits from 16 GB or more. Always check the recommended storage requirements before you start.
Skipping the Boot Menu
Many people create a perfect bootable USB but forget to change the boot order. The computer will just start from the hard drive as usual, and nothing will happen. Always enter the BIOS or boot menu and select the USB drive first.
Using a Fake or Low-Quality Flash Drive
Some cheap USB drives on the market have false capacity claims. A drive advertised as 64 GB might actually have only 8 GB of real storage. These drives fail during the installation process or corrupt the OS. Stick with trusted brands like SanDisk, Samsung, or Kingston.
Not Backing Up Data Before Formatting
The USB creation process formats the drive. If you have files on it, they will be gone forever. Always back up your data first. This sounds obvious, but it is one of the most common reasons people lose files during the process.
Expert Tips for the Best USB OS Experience
Here are some pro tips that will make your portable operating system run smoothly and reliably.
Use a High-Quality USB 3.0 Drive
Speed is everything when running an OS from a USB drive. A good USB 3.0 drive with read speeds of 100 MB/s or more will feel almost like running from an internal SSD. The difference between a cheap drive and a quality one is night and day.
Enable USB Boot in BIOS
Some computers have USB booting disabled by default. Go into your BIOS settings and look for a setting called “USB Boot” or “Legacy Boot” and make sure it is enabled. This small step saves a lot of headaches.
Keep Your USB Drive Safe
Since your operating system lives on this drive, treat it with care. Use a protective case. Avoid exposing it to extreme heat or moisture. A damaged USB drive means a lost operating system.
Update Your OS Regularly
Just like any other installation, keep your USB OS updated. Security patches and performance improvements are released regularly. Running an outdated OS on a USB drive can be a security risk, especially if you use it on public computers.
Try Ventoy for Multiple ISOs
Ventoy is a fantastic tool that lets you put multiple operating system ISO files on a single USB drive. You can carry Windows, Ubuntu, Fedora, and rescue tools all on one stick. When you boot, you simply pick which one you want to use. It is a game-changer for anyone who works with multiple operating systems.
Can You Install Any Operating System on a USB Flash Drive?
The short answer is almost yes. Most mainstream operating systems can be installed on a USB flash drive. Windows, various Linux distributions, and even some versions of ChromeOS can run from a USB drive. However, macOS is a different story. Apple’s licensing and hardware restrictions make it very difficult to install macOS on a USB drive for use on non-Apple hardware.
For most people, the choice comes down to Windows or Linux. Windows gives you the familiar experience and access to the widest range of software. Linux is free, lightweight, and incredibly versatile. Both options work well on a USB flash drive when you follow the right steps.
The key is using the right tools. A proper USB installer tool handles all the technical details so you do not have to. Whether you choose Rufus, BalenaEtcher, or Ventoy, each one simplifies the process and gives you a reliable bootable drive.
Remember that the performance of your USB OS depends heavily on the flash drive speed and the computer’s USB port version. A USB 3.0 drive in a USB 3.0 port will give you the best results. If your computer only has USB 2.0 ports, expect slower performance, but it will still work.
Final Thoughts
Installing an operating system on a USB flash drive is a practical, powerful skill that everyone should know. It gives you a portable computer, a recovery tool, and a way to test new systems — all from a tiny device that costs under $30.
The process is straightforward once you understand the steps. Get the right flash drive, download the ISO, use a tool like Rufus, and boot from the USB. You will be up and running in less than an hour.
Start with Linux if you are new to this. It is forgiving, free, and the perfect way to learn how bootable USB drives work. Once you are comfortable, you can explore Windows To Go or more advanced setups.
The world of portable computing is at your fingertips. All you need is a USB flash drive and the willingness to try something new. Give it a shot, and you will wonder how you ever lived without it.
Frequently Asked Questions
Can I install Windows 11 on a USB flash drive?
Yes, you can install Windows 11 on a USB flash drive. You will need at least a 32 GB USB drive and a tool like Rufus or the Windows Media Creation Tool to create the bootable installer. The process is the same as installing Windows 10 on a USB drive.
Will running an OS from a USB flash drive damage my computer?
No, running an OS from a USB flash drive will not damage your computer. The USB drive acts as a separate storage device, and your internal hard drive remains untouched. You are simply using the computer’s hardware to run the OS from an external source.
How fast is an OS running from a USB flash drive?
The speed depends on your USB drive and the computer’s USB port. A USB 3.0 drive in a USB 3.0 port will feel quite fast for everyday tasks. A USB 2.0 drive will be noticeably slower. For the best experience, always use USB 3.0 or newer.
Can I save files and settings on a USB OS?
Yes, you can save files and settings on a USB OS. If you install the operating system directly onto the USB drive, all your files and settings persist between sessions. With a live USB, you can also set up persistence to save changes across reboots.
What is the difference between a live USB and an installed USB OS?
A live USB lets you run the operating system without installing it, and changes are not saved when you restart. An installed USB OS is set up permanently on the drive, and all your files and settings are saved. An installed USB OS performs better and feels more like a regular computer.
Do I need administrator rights to create a bootable USB?
Yes, you typically need administrator rights on your computer to create a bootable USB drive. The process involves writing low-level data to the flash drive, which requires elevated permissions. Make sure you are logged in as an administrator before you start.
=== CONCLUSION ===
Can you install an operating system on a USB flash drive? Absolutely yes. It is a simple, affordable, and incredibly useful skill that opens up a world of possibilities. Whether you need a portable workspace, a recovery tool, or a way to test a new operating system, a bootable USB drive has you covered.
All you need is a quality USB flash drive, the right software, and a little bit of patience. Follow the steps in this guide, avoid the common mistakes, and you will have a fully functional operating system running from your USB drive in no time.
Start today. Pick an operating system, grab a USB drive, and take your computer wherever you go. Once you experience the freedom of a portable OS, you will never go back.