Can I Install Windows 10 On A Usb Everything You Need
Yes, you can install Windows 10 on a USB drive, and it is one of the easiest ways to set up or reinstall Windows on any PC. You need a USB flash drive of at least 8 GB, a working computer, and the free Windows Media Creation Tool. This guide walks you through the entire process, from creating the bootable USB to completing the installation, so you can do it yourself with confidence.
Have you ever wanted to install Windows 10 on a computer without a DVD or without downloading everything on the target machine? The answer is yes, and it is simpler than you might think. Installing Windows 10 on a USB drive gives you a portable, fast, and reliable way to set up Windows on almost any PC. Whether you are a student, a IT helper, or someone who just wants to do a fresh install at home, a bootable USB is the way to go.
In this guide, we will walk you through every single step. You will learn what you need, how to create the installer, and how to use it. We will also cover common mistakes to avoid and tips that save time. By the end, you will feel confident enough to do it all by yourself. Let us get started.
Key Takeaways
- You can install Windows 10 on a USB: A bootable USB drive lets you install Windows 10 on any compatible computer quickly.
- You need at least 8 GB of storage: Use a reliable USB flash drive with enough space and no important files on it.
- The Windows Media Creation Tool is free: Microsoft offers this tool to create a bootable USB in just a few clicks.
- BIOS settings matter: You must change the boot order in your BIOS or UEFI settings to start from the USB drive.
- Back up your data first: Always save important files before installing Windows 10 to avoid losing anything.
- It works for clean installs and upgrades: A USB installer helps you do a fresh install or upgrade an older version of Windows.
📑 Table of Contents
- Can I Install Windows 10 On A USB? Yes, Here Is Why
- What You Need Before You Start
- How to Create a Bootable USB Drive for Windows 10
- How to Install Windows 10 From the USB Drive
- Common Mistakes to Avoid When Installing Windows 10 on a USB
- System Requirements for Windows 10 Installation
- Can You Use a USB Drive on a Mac to Install Windows 10?
- How to Remove Windows 10 From a USB Drive After Installation
- Final Thoughts on Installing Windows 10 on a USB
Can I Install Windows 10 On A USB? Yes, Here Is Why
The short answer is absolutely yes. You can use a USB flash drive to install Windows 10 on any compatible computer. Microsoft officially supports this method, and it has been the go-to approach for years. A bootable USB drive works just like a Windows installation disc, but it is faster, more portable, and much more convenient.
Think of a bootable USB drive as a tiny, pocket-sized installation toolkit. You plug it into any PC, tell the computer to start from the USB, and Windows 10 begins to install. No need for a DVD drive. No need to download large files on the target computer. Everything you need is right there on the USB stick.
The process works on desktop computers, laptops, and even some tablets. As long as the computer has a USB port and can boot from external devices, you are good to go. The Windows 10 USB installer method is trusted by millions of people around the world.
Why Use a USB Drive for Windows 10 Installation?
There are several great reasons to use a USB drive instead of other methods. Here are the main benefits:
- Speed: USB drives are much faster than DVDs. The installation process completes quicker, which saves you a lot of time.
- Portability: You can carry the USB drive in your pocket and use it on multiple computers whenever you need to.
- No special hardware needed: Many modern laptops do not even have a DVD drive anymore. A USB drive solves that problem completely.
- Reusable: You can erase the USB drive and use it again for future installations or other purposes.
- Easy to create: With the right tool, creating a bootable USB takes only about 15 to 20 minutes.
What You Need Before You Start
Before you begin the process of installing Windows 10 from a USB, you need to gather a few things. Having everything ready prevents delays and frustration. Here is a simple checklist of what you need:
- A USB flash drive: Use a drive with at least 8 GB of storage. 16 GB is even better if you have it. Make sure the USB drive is empty or that you have backed up all the files on it. The process will erase everything on the drive.
- A working computer: You need a computer that is already working to create the bootable USB. This can be a Windows PC or even a Mac, though a Windows PC makes the process easiest.
- A stable internet connection: You need the internet to download the Windows 10 ISO file and the Media Creation Tool. A fast connection saves time.
- Your Windows 10 product key: While you can install Windows 10 without a key at first, you will need a valid product key to activate it later. Keep it handy.
- A target computer: This is the computer where you want to install Windows 10. Make sure it can boot from a USB device.
Understanding the Windows Media Creation Tool
The Windows Media Creation Tool is a free official tool from Microsoft. It downloads the Windows 10 files and prepares your USB drive to be bootable. Think of it as the magic wand that turns a regular USB stick into a Windows installer. You do not need any third-party software to do this. Microsoft makes the tool available for free on their website, and it works very reliably.
The tool is simple to use. You download it, run it, choose your options, and it handles the rest. It downloads the correct version of Windows 10, formats the USB drive, and copies all the necessary files. In most cases, the entire process takes less than 30 minutes.
How to Create a Bootable USB Drive for Windows 10
Now let us get into the step-by-step process. Creating a bootable USB drive is the most important part of the entire journey. Follow these steps carefully, and you will have a working Windows 10 USB installer in no time.
Step 1: Download the Media Creation Tool
Go to the official Microsoft website and search for the Media Creation Tool. Download the latest version. Make sure you are on the official Microsoft page to avoid any security risks. The tool is free and safe to use.
Step 2: Plug in Your USB Flash Drive
Insert your USB drive into the working computer. Make sure it is at least 8 GB. If you have important files on it, back them up first because this process will wipe the drive clean.
Step 3: Run the Media Creation Tool
Open the tool you just downloaded. Accept the license terms. You will see a screen asking what you want to do. Choose the option that says “Create installation media for another PC.” This is the option that lets you make a bootable USB.
Step 4: Choose Your Language and Edition
Select the language, edition, and architecture you want. The default settings usually work fine for most people. If you are not sure, stick with the recommended options. Click Next to continue.
Step 5: Select USB Flash Drive
Choose the “USB flash drive” option when asked how you want to create the media. The tool will show you a list of available USB drives. Select yours and click Next. The tool will now download Windows 10 and prepare the USB drive. This can take 15 to 30 minutes depending on your internet speed.
Step 6: Wait for the Process to Finish
Do not unplug the USB drive during this process. Let the tool do its work. Once it says the process is complete, you can safely remove the USB drive. Your bootable Windows 10 installation USB is now ready to use.
How to Install Windows 10 From the USB Drive
Now that you have your bootable USB, it is time to install Windows 10 on your target computer. This part is straightforward, but you need to pay attention to a few settings on the target PC.
Step 1: Plug the USB Drive Into the Target Computer
Insert the bootable USB drive into the computer where you want to install Windows 10. Make sure it is a USB port on the front or back of the computer for the best connection.
Step 2: Restart the Computer
Restart the target computer. As it starts up, you need to press a specific key to enter the BIOS or boot menu. The key varies by computer brand. Common keys include F12, F2, Esc, or Del. Look for a message on the screen during startup that tells you which key to press.
Step 3: Change the Boot Order
Once you are in the BIOS or boot menu, you need to set the USB drive as the first boot device. This tells the computer to look at the USB drive first when starting up. Use the arrow keys to move the USB option to the top of the list. Save your changes and exit.
Step 4: Start the Windows 10 Installation
The computer will now boot from the USB drive. You will see the Windows 10 setup screen. Choose your language, time format, and keyboard layout. Click “Install Now” to continue.
Step 5: Enter Your Product Key
If you have a product key, enter it now. If you do not have one yet, you can skip this step and activate Windows later. Choose the edition of Windows 10 you want to install.
Step 6: Accept the License Terms
Read the license terms and accept them to move forward. This is required to continue with the installation.
Step 7: Choose the Installation Type
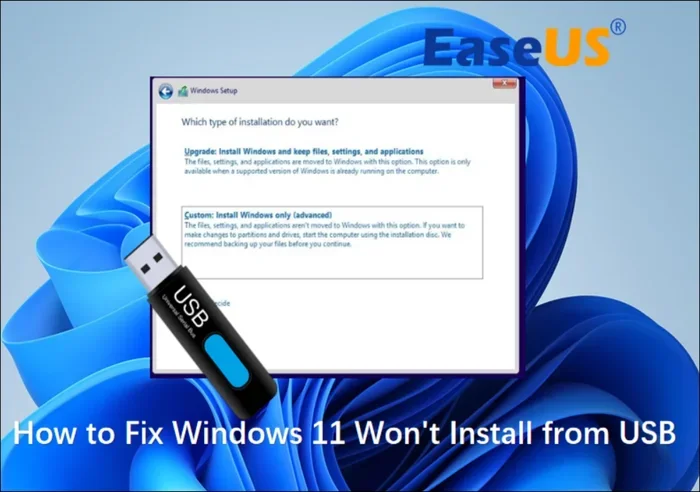
You will see two options: “Upgrade” and “Custom: Install Windows only.” For a fresh install, choose “Custom.” This option lets you pick which drive or partition to install Windows 10 on. Be very careful here. Make sure you select the correct drive so you do not accidentally erase the wrong data.
Step 8: Wait for the Installation to Complete
Windows 10 will now copy files, install features, and restart your computer a few times. Do not unplug the USB drive until you see the Windows desktop. The entire process usually takes 20 to 45 minutes.
Common Mistakes to Avoid When Installing Windows 10 on a USB
Even though the process is straightforward, some common mistakes can cause problems. Here are the pitfalls to watch out for:
- Using a USB drive that is too small: If your USB drive has less than 8 GB, the tool will not work. Always use at least 8 GB, and 16 GB is better.
- Skipping the backup step: The process of creating a bootable USB erases all data on the drive. Always back up your files first.
- Downloading from unofficial sources: Only download the Media Creation Tool from the official Microsoft website. Third-party sites can contain malware or outdated files.
- Not changing the boot order: If you forget to set the USB drive as the first boot device, the computer will boot from the hard drive instead. You will need to go back into the BIOS and fix this.
- Choosing the wrong drive during installation: When selecting a drive for the custom install, double-check that you are picking the right one. Installing to the wrong drive can erase important data.
- Interrupting the installation: Do not turn off the computer during the installation process. This can corrupt the installation and cause problems.
Quick Tips for a Smooth Installation
Here are some quick tips that make the whole process easier and faster:
- Use a USB 3.0 drive for faster file copying and installation speeds.
- Keep your target computer plugged into power during the installation.
- Have your product key written down or saved in a safe place.
- If the USB drive does not show up in the boot menu, try a different USB port.
- Update your BIOS on the target computer before starting the installation if possible.
System Requirements for Windows 10 Installation
Before you try to install Windows 10, make sure your computer meets the basic system requirements. These are the minimum specs needed for Windows 10 to run properly:
- Processor: 1 GHz or faster
- RAM: 2 GB for 64-bit or 1 GB for 32-bit
- Storage: 20 GB of free disk space
- Graphics card: DirectX 9 or later with WDDM 1.0 driver
- Display: 800 x 600 resolution or higher
- USB port: Available USB port for the installation drive
If your computer meets these requirements, you should have no trouble running Windows 10 from a USB installation. Most computers made in the last 10 years easily meet these specs.
Can You Use a USB Drive on a Mac to Install Windows 10?
Yes, you can use a USB drive to install Windows 10 on a Mac, but the process is slightly different. Apple computers use a different firmware called EFI, and the boot process works a bit differently than on Windows PCs. You still use the Windows Media Creation Tool to create the bootable USB. However, when you start up your Mac, you hold down the Option key instead of F12 to access the boot menu. From there, you select the USB drive to start the Windows installation. Microsoft provides a free tool called Boot Camp Assistant that helps with this process on Mac computers. It makes the whole thing much easier and more reliable.
How to Remove Windows 10 From a USB Drive After Installation
Once you have successfully installed Windows 10 on your computer, you might want to reuse the USB drive for other purposes. The USB drive will still have Windows 10 files on it, taking up several gigabytes of space. To clean it up, simply plug the USB drive into your computer, open File Explorer, right-click the drive, and choose “Format.” Select FAT32 or NTFS as the file system and click Start. This will erase all the Windows files and return the drive to normal use. You can now store any files you want on it or use it to create another bootable USB in the future.
Final Thoughts on Installing Windows 10 on a USB
Installing Windows 10 on a USB drive is one of the most useful skills you can have for your computer. It saves time, works on almost any PC, and gives you full control over the installation process. Whether you are setting up a new computer, reinstalling Windows on an old one, or helping a friend fix their PC, a bootable USB drive is your best friend.
The process might seem a bit technical at first, but once you do it a couple of times, it becomes second nature. Follow the steps in this guide carefully, avoid the common mistakes we highlighted, and you will have a smooth experience every time. Remember to always back up your data, use the official Microsoft tools, and double-check your settings before you start the installation.
Now that you know how to install Windows 10 from a USB drive, you have the power to handle any Windows setup or reinstall with confidence. Grab your USB drive, follow the steps, and enjoy your fresh copy of Windows 10. You have got this.
Frequently Asked Questions
What size USB drive do I need to install Windows 10?
You need a USB flash drive with at least 8 GB of storage. However, 16 GB is recommended because it gives you extra space and works more reliably. Make sure the USB drive is empty before you start, as the process will erase all data on it.
Can I use the same USB drive to install Windows 10 on multiple computers?
Yes, absolutely. A bootable USB drive is reusable. You can use it to install Windows 10 on as many computers as you need. Just make sure you have your product key ready for each computer if you are activating Windows 10.
Do I need an internet connection to install Windows 10 from a USB?
You need an internet connection to download the Media Creation Tool and the Windows 10 ISO file when creating the bootable USB. During the actual installation on the target computer, you can install Windows 10 offline, but you will not be able to download updates until you connect to the internet.
What is the difference between BIOS and UEFI when booting from USB?
BIOS and UEFI are two types of firmware that control how your computer starts up. UEFI is the newer version and is found on most modern computers. Both allow you to boot from a USB drive, but the steps to access the boot menu or change the boot order may be slightly different. Check your computer’s manual for specific instructions.
Will installing Windows 10 from a USB erase my hard drive?
Only if you choose the “Custom” install option and select your main hard drive as the destination. If you choose the “Upgrade” option instead, your files and programs will be kept. Always back up your important data before installing Windows 10, just to be safe.
Can I create a Windows 10 bootable USB on a Mac?
Yes, you can create a bootable USB on a Mac using the Windows Media Creation Tool. The process is similar to creating one on a Windows PC. However, you may need to format the USB drive as FAT32 first, since macOS uses a different file system by default. Microsoft also offers Boot Camp Assistant, which helps Mac users with this process.
=== CONCLUSION ===
Installing Windows 10 on a USB drive is a simple, effective, and incredibly useful skill. With just a USB flash drive and the free Windows Media Creation Tool, you can set up Windows 10 on almost any computer in under an hour. You have learned what you need, how to create the bootable drive, how to install Windows 10, and what mistakes to avoid. The Windows 10 USB installer method gives you freedom and flexibility that no other installation method can match.
Now it is your turn. Gather your supplies, follow the steps in this guide, and enjoy the satisfaction of a successful Windows 10 installation. Whether you are doing it for yourself or helping someone else, you are now equipped with all the knowledge you need. Happy installing!