Can You Hang A Projector Screen From The Ceiling Easily
Yes, you can hang a projector screen from the ceiling easily with the right mount and basic tools. This guide walks you through every step, from choosing the best ceiling mount to avoiding common pitfalls. You’ll learn how to create a clean, space-saving setup for your home theater.
Have you ever watched a movie on a tiny TV and wished for a bigger picture? Hanging a projector screen from the ceiling can turn any room into a home theater. It’s a simple upgrade that delivers a cinematic experience without taking up wall space. Many people worry that ceiling installation is too hard, but it’s actually quite doable with basic tools.
Whether you have a drop ceiling or a solid plaster ceiling, there’s a mounting solution for you. This guide covers everything you need to know. You’ll learn about different screen types, the tools required, and a step-by-step installation process. By the end, you’ll feel confident to tackle the project yourself.
Let’s dive in and explore how to hang a projector screen from the ceiling the right way. We’ll cover every detail, from choosing the perfect screen to avoiding common pitfalls. You’ll also find expert tips that make the job faster and safer.
Key Takeaways
- Ceiling mounting is simple: With the right bracket and a few tools, you can hang a projector screen from the ceiling in under an hour.
- Multiple mount types exist: Fixed, retractable, and motorized screens all work well on the ceiling.
- Locate ceiling joists: Always anchor into joists or use heavy-duty drywall anchors for safety.
- Consider room layout: Ceiling height and projector throw distance affect your screen size and placement.
- Cable management matters: Hide wires for a clean, professional look.
- Avoid common mistakes: Don’t skip measuring, ignore weight limits, or forget to test the setup.
📑 Table of Contents
Why Hang a Projector Screen From the Ceiling?
A ceiling-mounted screen offers several advantages over a wall-mounted setup. It frees up wall space and creates a cleaner, more immersive viewing experience. Here are the main benefits that make ceiling mounting the preferred choice for many homeowners.
The Benefits of a Ceiling-Mounted Screen
- Saves wall space: You can use your walls for artwork, shelves, or seating without clutter. A wall-mounted screen often blocks the area behind it, making it hard to hang pictures or place furniture.
- Better viewing angles: A ceiling mount allows you to position the screen exactly where you need it, reducing neck strain. You can adjust the tilt and height for every seat in the room.
- Cleaner look: No visible brackets or stands. The screen appears to float, giving a modern, minimalist feel. This is especially important in living rooms where aesthetics matter.
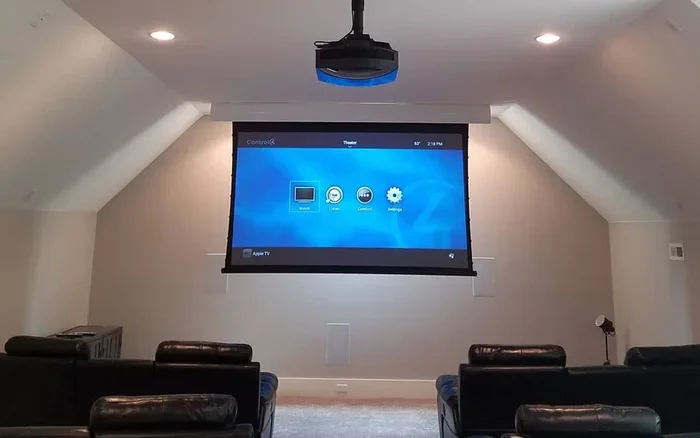
- Ideal for home theaters: A dedicated movie room looks and feels more professional with a ceiling-mounted setup. It mimics the experience of a real cinema.
- Improved projector placement: Mounting the screen on the ceiling gives you more flexibility with projector positioning. You can place the projector on a low table or ceiling mount, avoiding tripping hazards.
- Safer in family rooms: A ceiling-mounted screen stays out of reach, reducing the risk of accidental damage from children or pets.
Quick Tips: Best Rooms for Ceiling Screens
- Basements and attics with high ceilings work great. They offer plenty of vertical space and often have minimal ambient light.
- Living rooms with a drop ceiling can hide the mechanism easily. You can install a retractable screen that stays flush with the ceiling tiles.
- Avoid rooms with low ceilings unless you choose a retractable screen that stays flush when not in use. A large fixed screen in a low room can feel oppressive.
- Consider the room’s primary use. If the room doubles as a bedroom, a motorized drop-down screen is a smart choice.
- Rooms with blackout curtains or shades benefit most from ceiling-mounted screens because you can control the light completely.
Expert Insights: Ceiling Mount vs Wall Mount
When comparing a wall mount vs ceiling mount, the ceiling option often wins for dedicated home theaters. Wall mounts can create glare if the screen is too close to a light source. Ceiling mounts let you control the projector placement and screen angle more precisely. However, wall mounts are simpler to install if you lack ceiling access. Consider your room layout and personal preference before deciding. A ceiling mount also keeps the screen out of reach, making it safer in homes with children or pets. For a truly immersive experience, the ceiling mount is the way to go.
How Ceiling Height Affects Your Setup
The ceiling height plays a big role in your screen choice. For a fixed frame screen, you need at least 8 feet of clearance for comfortable viewing. If your ceiling is lower, a retractable or drop-down screen is better because it disappears when not in use. Measure the distance from the floor to the ceiling where you plan to mount the screen. Subtract the screen’s height and a few inches for the bracket. The remaining space should feel open, not cramped. A room with 9-foot ceilings is ideal for most projector screens.
Types of Ceiling Projector Screen Mounts
Not all screens are the same. The type of screen you choose affects the installation process and the overall look. Here are the three main options available on the market today.
Fixed Frame Screens
A fixed frame screen is a rigid, flat display that stretches tightly like a canvas. It provides the best image quality because the surface never wrinkles. You mount the frame directly to the ceiling using a sturdy bracket. These screens are perfect for permanent home theater setups. They come in various screen aspect ratios like 16:9 for TV shows and movies, or 2.35:1 for a true cinematic experience. Fixed frame screens also come in different materials, such as matte white for bright rooms or high-contrast gray for rooms with some ambient light. The frame itself is usually made of lightweight aluminum and can be painted to match your ceiling.
Retractable Drop-Down Screens
A retractable drop-down screen or pull-down screen rolls up into a case mounted on the ceiling. When not in use, it disappears, freeing up the room. This is ideal for multipurpose spaces like living rooms or bedrooms. You can choose between manual pull-down or motorized retractable screens. The motorized version lets you lower the screen with a remote or smart home system. These screens are also known as drop-down screens or ceiling pull-down screens. They’re popular in bedrooms, offices, and family rooms where a permanent screen isn’t practical. The case can be painted to blend with the ceiling for a seamless look.
Motorized Screens
Motorized screens are the premium choice. They use a motor to raise and lower the screen silently. Many models include built-in speakers and tension systems that keep the screen perfectly flat. They integrate well with home automation setups like Alexa or Google Home. If you want the ultimate convenience, a motorized ceiling screen is worth the investment. You can also find ceiling tension rod systems that hold the screen taut without a visible case. These screens often come with a remote control and can be programmed to lower automatically when you turn on the projector.
Ceiling Tile vs Solid Ceiling Considerations
If you have a drop ceiling with removable tiles, you’ll need a different mounting approach. You can use suspension rods that hang from the ceiling grid, or you can mount directly into the structural ceiling above the tiles. For solid ceilings like drywall or plaster, you’ll need to find the joists or use heavy-duty anchors. Always check the weight capacity of your ceiling material before purchasing a mount. A drop ceiling offers easy access for wiring, which is a big advantage for cable management.
Comparison Table: Mount Types
| Type | Best For | Installation Difficulty | Price Range | Key Feature |
|---|---|---|---|---|
| Fixed Frame | Permanent home theater | Medium | $$ | Best image quality, no wrinkles |
| Retractable Drop-Down | Multipurpose rooms | Easy to Medium | $ to $$ | Space-saving, disappears when not in use |
| Motorized | Luxury setups, automation | Medium | $$$ | Remote control, quiet motor, tension system |
Key Takeaways: Choosing the Right Screen
- Fixed frame: Best image quality, permanent install, ideal for dedicated theaters.
- Retractable drop-down: Saves space, versatile, great for rooms that serve multiple purposes.
- Motorized: Ultimate convenience, higher cost, perfect for smart home integration.
Step-by-Step Installation Guide
Now let’s walk through the actual process. Follow these steps carefully, and you’ll have your screen up in no time. Even if you’re not a DIY expert, this guide makes it simple. Take your time and enjoy the process.
Essential Tools and Materials
Before you start, make sure you have everything ready. Here’s a complete checklist to keep you organized.
- Drill with appropriate bits for wood and drywall
- Screwdriver set (Phillips and flathead)
- Measuring tape
- Spirit level or laser level
- Stud finder or ceiling joist detector
- Heavy-duty drywall anchors (if not hitting joists)
- Ladder or stable step stool
- The screen mount bracket and screen itself
- Pencil for marking
- Cable ties or raceway for wire management
- Screws and bolts that came with your mount
Step 1: Find the Perfect Ceiling Spot
Choose a location that centers the screen in the room. Consider the projector throw distance so the image fits the screen perfectly. Use a tape measure to find the right spot from the projector’s position. Mark the ceiling with a pencil. If you’re using a projector, place it on a low table or ceiling mount and measure the distance to the screen. A throw distance calculator can help you determine the exact screen size you’ll get. Also, make sure the spot is away from any ceiling fans or light fixtures that might interfere.
Step 2: Locate Ceiling Joists or Use Drywall Anchors
Run your stud finder along the ceiling to find the joists. Joists provide the strongest support. Most ceilings have joists spaced 16 or 24 inches apart. If you can’t hit a joist, use heavy-duty drywall anchors rated for the screen’s weight. For a drop ceiling, you may need special suspension rods that attach to the grid. Never rely on ceiling tiles alone—they can’t hold weight. Always double-check that your anchors are rated for the combined weight of the screen and bracket.
Step 3: Install the Mounting Bracket
Hold the bracket against the ceiling at your marked spot. Use a level to ensure it’s perfectly straight. Drill pilot holes, then screw the bracket into the joists or secure it with anchors. Tighten all screws firmly. If you’re installing a motorized screen, make sure the bracket can support the motor’s weight. Double-check that the bracket is level before moving on. A crooked bracket will result in a crooked screen, which is hard to fix later.
Step 4: Attach the Screen
Depending on the screen type, attach it to the bracket. Fixed frame screens usually have a hanging mechanism or hooks. Drop-down screens attach to a roller system. Motorized screens often come pre-assembled with a mounting plate. Follow the manufacturer’s instructions carefully. If you’re unsure, watch a quick online tutorial for your specific model. Having a second person to hold the screen while you secure it makes the process much easier.
Step 5: Adjust and Test
Once the screen is mounted, adjust the tension if needed. For retractable screens, test the raise and lower mechanism several times. Check the screen size and aspect ratio from your viewing position. Make sure the image is centered and sharp. Turn on the projector and adjust the focus and keystone settings. A properly installed screen should have no wrinkles or sagging. Also, test the screen from different seating positions to ensure everyone gets a great view.
Common Mistakes to Avoid During Installation
- Skipping joist detection: Mounting into drywall alone can cause the screen to fall. Always find the joists or use rated anchors.
- Ignoring ceiling height: A low ceiling can make a large screen feel cramped. Measure your ceiling height before buying the screen.
- Poor cable management: Exposed wires look messy and can be a safety hazard. Use cable ties or raceways to hide them.
- Wrong screen size: A screen that’s too large for the room causes eye strain. Match the size to your viewing distance using the throw ratio.
- Forgetting to level the bracket: A crooked screen ruins the viewing experience. Take the extra minute to use a level.
- Not testing the setup: Always test the screen before finalizing the mount. Make sure the retract mechanism works smoothly and the image is centered.
Common Mistakes to Avoid (Summary)
Even with the best guide, mistakes can happen. Here are the most common errors people make when hanging a projector screen from the ceiling, and how to avoid them.
Skipping Joist Detection
Many people assume drywall can hold the weight of a screen. It can’t, not for long. Always use a stud finder to locate joists. If you must use drywall anchors, choose ones rated for at least twice the screen’s weight. This ensures a safe, long-lasting mount. A falling screen can damage your ceiling and ruin the projector.
Ignoring the Room’s Purpose
A fixed frame screen looks great in a dedicated home theater, but it’s out of place in a living room that doubles as a guest room. Choose a screen type that matches how you use the room. A retractable screen offers flexibility for multipurpose spaces. Think about whether you need the screen to be visible all the time or only for movie nights.
Neglecting Cable Management
Exposed cables are an eyesore and a tripping hazard. Plan your cable route before you mount the screen. You can run cables through the ceiling, along the wall, or use a decorative raceway. A ceiling tile cutout can hide cables in drop ceilings. Good cable management keeps your setup clean and safe. Use cables rated for in-wall or in-ceiling installation if they’ll be hidden.
Overlooking Ambient Light
Even the best projector screen can wash out in direct sunlight. If your room has large windows, consider blackout curtains or an ambient light rejection screen. The right screen material makes a huge difference in image quality, especially in bright rooms. A simple set of blackout blinds can transform your viewing experience without a big expense.
Wrong Mounting Height
Mounting the screen too high or too low causes neck strain. The center of the screen should be at seated eye level. Measure from the floor to the center of the screen and adjust accordingly. A common mistake is mounting the screen too high, forcing viewers to look up for the entire movie. This can cause discomfort and headaches. Keep the screen at a comfortable height for everyone in the room.
Expert Tips for the Perfect Setup
Take your installation to the next level with these professional insights. These tips will help you create a truly immersive home theater experience that rivals a commercial cinema.
Choosing the Right Screen Size
Measure the distance from the screen to your seating area. A general rule is to multiply the distance by 0.84 for a 16:9 screen. For example, if you sit 10 feet away, a 7 to 8-foot wide screen is ideal. Consider the ambient light in the room. A screen with an ambient light rejection coating works well in bright rooms. Also, think about the screen aspect ratio. 16:9 is standard for most content, while 2.35:1 is perfect for movies. The right size ensures you get a cinematic experience without eye strain.
Managing Ambient Light
Even the best projector screen can wash out in direct sunlight. Use blackout curtains or shades to control light. If you can’t block light, choose a screen with a high gain rating. This reflects more light back to the viewer, improving contrast. A gray screen can help boost contrast in rooms with some ambient light. For dedicated home theaters, a ambient light rejection (ALR) screen is the gold standard. These screens use special materials to reflect only the projector’s light while absorbing ambient light. The result is a vibrant, detailed image even in a bright room.
Keeping Cables Hidden
Run cables through the ceiling or use a cable management system. You can install a conduit box in the ceiling and feed the cables down a hollow wall. This keeps your setup looking clean and professional. A tension rod can also help route cables neatly along the ceiling edge. For drop ceilings, you can run cables between the tiles and the structural ceiling. Always use cables rated for in-wall or in-ceiling installation if they’ll be hidden. Proper cable management not only looks better but also protects your wires from damage.
Projector Placement and Throw Distance
The projector placement affects the image size and focus. A ceiling-mounted projector is a popular choice because it saves space and keeps the beam unobstructed. Calculate the throw distance using the projector’s specifications. If the projector is too close, the image will be small and blurry. If it’s too far, the image will be oversized and dim. A short-throw projector is ideal for small rooms, while a standard-throw projector works best in larger spaces. Consider a ceiling-mounted projector bracket for a clean, floating look that matches your screen mount.
Key Takeaways: Pro Setup Tips
- Do: Use a stud finder and anchor into joists whenever possible.
- Do: Measure twice, drill once.
- Do: Consider ambient light and choose the right screen material.
- Don’t: Rush the leveling step. A crooked screen ruins the viewing experience.
- Don’t: Forget to test the screen before finalizing the mount.
- Don’t: Ignore cable management. Hidden wires make a big difference.
Conclusion
Hanging a projector screen from the ceiling is a rewarding DIY project that elevates your home theater experience. With the right mount, tools, and a little patience, you can enjoy a big, cinematic picture without cluttering your walls. Whether you choose a fixed frame, retractable drop-down, or motorized screen, the process is straightforward and satisfying.
Remember to locate your ceiling joists, manage your cables, and pick the perfect screen size for your room. Follow the steps in this guide, and you’ll have a stunning setup ready for movie night. So grab your drill, and get started on your ceiling-mounted projector screen today! Your living room will never feel the same again.
Frequently Asked Questions
Can I hang a projector screen from a drop ceiling?
Yes, you can hang a projector screen from a drop ceiling using suspension rods or by mounting directly into the structural ceiling above the tiles. Just make sure your anchors can handle the weight, and always check the ceiling tiles’ load capacity before drilling.
What tools do I need to hang a projector screen from the ceiling?
You’ll need a drill, a stud finder, a level, a measuring tape, a ladder, and the mounting bracket that comes with your screen. Heavy-duty drywall anchors are also helpful if you can’t hit a ceiling joist directly.
Is it hard to install a ceiling projector screen?
No, it’s quite easy if you follow the steps carefully. Most people can complete the installation in under an hour. The hardest part is finding the ceiling joists and keeping the bracket level, but a stud finder and a laser level make it simple.
What’s the best ceiling height for a projector screen?
A ceiling height of at least 8 feet works well for most screens. If your ceiling is lower, a retractable drop-down screen is a better choice because it disappears when not in use. Always measure your ceiling height before buying the screen to ensure a comfortable viewing experience.
Can I use a wall mount instead of a ceiling mount?
Yes, wall mounts are an option, but ceiling mounts save wall space and offer better viewing angles for a home theater. A ceiling mount also keeps the screen out of reach and creates a cleaner, more immersive look in a dedicated movie room.
How do I hide cables when hanging a projector screen from the ceiling?
You can run cables through the ceiling, use a conduit box, or install a cable raceway along the wall. For drop ceilings, you can route cables between the tiles and the structural ceiling. Using a tension rod can also help keep wires neatly along the ceiling edge for a clean, professional appearance.