How Do I Do A Screenshot On Windows Mac And Android Phone
Learning how to do a screenshot is easier than you think, no matter what device you use. This guide covers everything you need to know about taking a screenshot on Windows, a screenshot on Mac, and a screenshot on Android phone. You will find simple shortcuts, built-in tools, and expert tips that make capturing your screen a breeze.
Have you ever needed to save something on your screen but did not know how? Learning how to do a screenshot is one of the most useful skills you can pick up today. Whether you want to capture an error message, save a funny conversation, or share a recipe, knowing the right method makes all the difference. This guide walks you through every way to take a screenshot on Windows, a screenshot on Mac, and a screenshot on Android phone. By the end, you will be a screen capture pro.
Most people think screenshots are complicated. They are not. Every major device comes with built-in tools that let you grab what is on your screen in seconds. You do not need to download extra software or hire a tech expert. A few simple keyboard shortcuts or button combos do the job. Let us dive in and explore each method step by step.
Key Takeaways
- Windows users have multiple built-in options like Print Screen, Snipping Tool, and Windows Game Bar for easy screen captures.
- Mac users can use simple keyboard shortcuts like Command Shift 3 and Command Shift 4 to grab any part of the screen instantly.
- Android phone users can take screenshots using physical buttons or built-in tools like the pull-down shade and Samsung’s palm swipe gesture.
- Editing and sharing your screenshots becomes simple once you know where your saved images go and which tools to use.
- Troubleshooting tips help fix common issues when your screenshot methods stop working unexpectedly.
📑 Table of Contents
How to Take a Screenshot on Windows
Windows computers offer several built-in ways to capture your screen. You can choose the method that fits your needs best. Some methods grab the whole screen, while others let you select a specific area. Here is everything you need to know about screen capture on Windows.
Method 1: The Print Screen Button
The Print Screen button, often labeled as PrtScn, is the oldest and simplest way to take a screenshot on Windows. It sits in the upper right corner of most keyboards. When you press it, Windows copies the entire screen to your clipboard. You then paste it into an app like Paint, Word, or even an email.
Here is how it works:
- Press the PrtScn key on your keyboard.
- Open Paint or any image editor.
- Press Ctrl V to paste the image.
- Save the file wherever you want.
One thing to note: on some laptops, you need to hold the Fn key along with PrtScn. Check your keyboard manual if the basic press does not work. This screenshot shortcut is fast and requires no extra tools.
Method 2: Windows Key Plus Print Screen
This method is slightly better because it saves the screenshot directly as a file. You do not need to paste it anywhere. Your screen will briefly dim to confirm the capture worked.
Follow these steps:
- Press the Windows key and PrtScn at the same time.
- Your screen will flash or dim slightly.
- Open File Explorer and go to Pictures > Screenshots.
- Your saved image will be there, ready to use.
This is the most convenient way to take a Windows screenshot if you want the file saved automatically. No extra steps needed.
Method 3: The Snipping Tool
The Snipping Tool has been part of Windows for many years. It lets you capture a specific area of your screen instead of the whole thing. This is perfect when you only need part of what is showing.
To use it:
- Open the Start menu and type “Snipping Tool.”
- Click New to start a capture.
- Drag your cursor to select the area you want.
- Save the snip or copy it to your clipboard.
The Snipping Tool also lets you add a delay. This means you can set it to capture the screen after a few seconds. That gives you time to open a menu or hover over something you need. It is a powerful little tool that many people overlook.
Method 4: Snip & Sketch
Windows 10 and 11 introduced Snip & Sketch as a newer replacement for the Snipping Tool. It works similarly but has a cleaner interface and more editing features. You can draw on your screenshot, crop it, and share it right from the app.
Use the shortcut Windows Shift S to open it instantly. A small toolbar appears at the top of your screen. Choose from rectangular snip, freeform snip, window snip, or full-screen snip. The image goes straight to your clipboard, and a notification lets you open it for editing.
This is hands-down one of the best screenshot tools for Windows. It is fast, flexible, and built right into the operating system.
Method 5: Windows Game Bar
If you are a gamer, the Windows Game Bar is another option. It captures screenshots while you are in full-screen games or apps. Press Windows Key G to open the Game Bar, then click the camera icon or press Windows Alt PrtScn.
Your screenshots save to the Videos > Captures folder. This method works best for capturing gameplay moments but can also be useful for any full-screen app.
How to Take a Screenshot on Mac
Mac computers make taking screenshots on Mac incredibly easy. Apple built in keyboard shortcuts that work instantly. You can capture the full screen, a selected window, or a custom area. All screenshots save directly to your desktop.
Full Screen Screenshot
To capture everything on your screen, press Command Shift 3. Your Mac takes the screenshot immediately and saves it as a PNG file on your desktop. You will hear a camera shutter sound if your sound is on.
This is the fastest way to grab your entire screen. It works on every Mac, whether it is a MacBook Air, MacBook Pro, or iMac. No extra software or setup is required.
Selected Area Screenshot
Sometimes you only need part of the screen. Press Command Shift 4 to activate the crosshair selector. Your cursor turns into a crosshair that you can drag to select any rectangular area.
Here are some tips for this method:
- Press the Spacebar while dragging to switch to window selection mode.
- Hold the Shift key to lock one side of your selection.
- Press Escape to cancel the capture without saving.
This gives you precise control over exactly what you capture. It is perfect for grabbing a specific menu, error message, or section of a webpage.
Window Screenshot
To capture a single window, press Command Shift 4 and then press the Spacebar. Your cursor turns into a camera icon. Click on any window to capture just that window. The screenshot includes a nice drop shadow around the window by default.
Hold the Option key while clicking to remove the shadow. This gives you a cleaner image if you need one. This method is great for capturing dialogue boxes or specific app windows.
Using the Screenshot Toolbar (macOS Mojave and Later)
Newer Macs running macOS Mojave or later have a built-in screenshot toolbar. Press Command Shift 5 to open it. A toolbar appears at the bottom of your screen with options for:
- Capturing the entire screen.
- Capturing a selected window.
- Capturing a selected portion of the screen.
- Recording the entire screen.
- Recording a selected portion of the screen.
You can also set a timer and choose where screenshots save. This toolbar makes screen grab on a Mac incredibly flexible and user-friendly.
Where Do Mac Screenshots Save?
By default, all Mac screenshots save to your desktop. They include the date and time in the filename. If you want them to save somewhere else, use the Screenshot toolbar options. You can choose to save to Documents, Downloads, Clipboard, or even Mail.
How to Take a Screenshot on Android Phone
Capturing your screen on an Android phone is straightforward and works on virtually every device. The method depends slightly on your phone brand and Android version, but the basics are the same across the board.
Method 1: The Button Combo
The most universal way to take a screenshot on Android is by pressing two buttons at once:
- Find the Power button on the right side of your phone.
- Find the Volume Down button on the same side.
- Press both buttons at the same time.
- Hold them for about one second.
- Your screen will flash, and a thumbnail will appear.
This works on Samsung phones, Google Pixel phones, OnePlus devices, and most other Android phones. If the screenshot does not work, try holding the buttons a bit longer. Some phones need a longer press than others.
Method 2: The Pull-Down Shade
Many Android phones let you take a screenshot from the quick settings panel. Swipe down from the top of your screen to open the shade. Look for a Screenshot icon. Tap it, and your screen captures instantly.
This method is great when you do not want to fumble with button combos. It is especially helpful if your physical buttons are not working properly.
Method 3: Samsung Palm Swipe
Samsung Galaxy phones have a unique gesture feature. You can swipe the side of your hand across the screen to capture a screenshot. To enable this:
- Go to Settings > Advanced Features.
- Find Motions and Gestures.
- Toggle on Palm Swipe to Capture.
Once enabled, simply place the side of your hand on the screen and swipe left or right. The phone captures the entire screen. It feels almost magical the first time you try it.
Method 4: Google Assistant
If you use Google Assistant, you can say “Hey Google, take a screenshot.” Your phone will capture the screen automatically. This hands-free method is perfect when you are driving or have your hands busy with something else.
Where Do Android Screenshots Save?
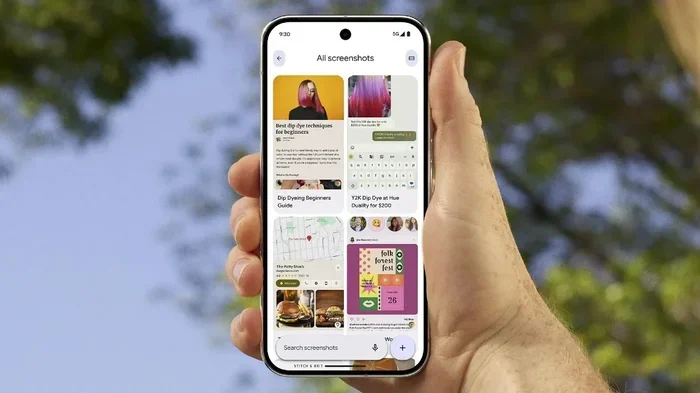
Android phones save screenshots in your Gallery app or Photos app. Look for a Screenshots album or folder. You can also find them in the Files app under Pictures > Screenshots. From there, you can edit, share, or delete them easily.
Best Screenshot Tools and Apps
While built-in tools work great for most people, sometimes you need more features. Screen capture apps can add annotation tools, scrolling capture, cloud uploads, and sharing options. Here are some of the best options available.
Greenshot
Greenshot is a free tool for Windows that lets you capture, edit, and share screenshots quickly. It offers a lightweight interface with options to highlight areas, add text, and blur sensitive information. It is a great alternative to the built-in Snipping Tool for power users.
Lightshot
Lightshot is another popular free screenshot tool. It lets you select any area of your screen and instantly edit or share it. You can upload screenshots to the cloud and get a shareable link in seconds. It works on both Windows and Mac.
ShareX
ShareX is a powerful free tool for Windows users who take lots of screenshots. It supports scrolling capture, GIF recording, and custom upload destinations. The learning curve is a bit steeper, but the features are unmatched for free software.
Snagit
Snagit is a premium screenshot and screen recording tool. It offers advanced editing, templates, and cloud sharing features. It is ideal for professionals who create tutorials, documentation, or training materials regularly.
How to Edit and Share Your Screenshots
Once you have captured a screenshot, you often need to edit or share it. Screenshot editing can be as simple as cropping out unnecessary parts or as advanced as adding arrows, text boxes, and highlights.
On Windows, you can use the built-in Paint app for basic cropping and editing. For more advanced needs, the Snip & Sketch tool lets you draw, highlight, and annotate directly on your screenshot. On Mac, the Preview app opens every screenshot and gives you built-in markup tools.
When it comes to sharing screenshots, you have many options:
- Attach the image directly to an email.
- Upload to cloud services like Google Drive or Dropbox.
- Share via messaging apps like WhatsApp or Slack.
- Post on social media or forums.
- Insert into documents or presentations.
Most phones and computers let you share screenshots right from the gallery or file explorer. Just tap the share icon and choose your preferred app. The process is quick and intuitive once you know where to look.
Troubleshooting Common Screenshot Problems
Sometimes screenshot not working issues happen. Here are the most common problems and how to fix them.
Screenshot Shortcut Does Nothing
If your keyboard shortcuts stop working, try restarting your computer first. On Windows, check that the Print Screen function is not disabled in your keyboard settings. On Mac, make sure no other app is intercepting the keyboard shortcut. Sometimes background apps interfere with screenshot tools.
Screenshot Saves to the Wrong Location
If you cannot find your saved screenshot, check your default save location. On Windows, screenshots go to Pictures > Screenshots. On Mac, they save to the desktop by default. On Android, look in your Photos or Gallery app under the Screenshots folder.
Screenshot Is Blurry or Low Quality
If your screen capture looks blurry, try taking the screenshot again. Sometimes low display resolution or scaling settings affect the output. On Windows, make sure you are not using a custom DPI scaling that reduces image quality. On Mac, check your display settings under System Preferences.
Game or Full-Screen App Blocks Screenshots
Some games and apps block screenshots for copyright or security reasons. In these cases, use the Game Bar on Windows or try a third-party tool like ShareX or Greenshot. These tools can often bypass restrictions that built-in methods cannot.
Expert Tips for Better Screenshots
Here are some pro tips that will level up your screen grab game:
- Use the delay feature. The Snipping Tool and Mac screenshot toolbar let you set a timer. This gives you time to set up your screen before the capture happens.
- Clean up your desktop first. A cluttered screen makes screenshots harder to read. Close unnecessary tabs and windows before capturing.
- Use keyboard shortcuts. Memorizing a few shortcuts saves tons of time compared to using mouse-based tools.
- Annotate before sharing. Adding arrows or text helps the viewer understand what matters in the screenshot.
- Check file format. PNG is best for screenshots because it preserves quality. JPEG works too but may compress the image slightly.
These small habits make a big difference in the quality and usefulness of your screenshots. Once you build them into your workflow, capturing your screen becomes second nature.
Conclusion
Now you know exactly how to do a screenshot on every major device. Whether you use Windows, Mac, or an Android phone, you have multiple reliable methods at your fingertips. The built-in tools are powerful and free, and they cover nearly every situation you will encounter.
Start by practicing the keyboard shortcuts on your device. Once you feel comfortable, explore the more advanced tools like the Snipping Tool, Snip & Sketch, or the Mac screenshot toolbar. You will be amazed at how quickly you can capture and share anything on your screen.
Taking screenshots is a simple skill that saves time and makes life easier. Whether you are troubleshooting a tech problem, sharing information with a colleague, or just saving something for later, the right screenshot method makes all the difference. Try these methods today and see how much easier your digital life becomes.
Frequently Asked Questions
What is the easiest way to take a screenshot on Windows?
The easiest way is to press the Windows Shift S shortcut. This opens the Snip & Sketch tool instantly. You can select any area of your screen, and the screenshot copies to your clipboard for pasting anywhere.
How do I take a screenshot on a Mac without a keyboard?
If your keyboard is not working, open the Screenshot toolbar by pressing Command Shift 5. You can use the on-screen controls to capture the full screen, a window, or a selected area. All screenshots save directly to your desktop.
Why is my screenshot not saving on my Android phone?
This usually happens when your phone storage is full or the Screenshots folder is hidden. Check your Gallery app and look for a Screenshots album. If you still cannot find it, try taking a new screenshot and checking your Files app under Pictures.
Can I take a scrolling screenshot on any device?
Scrolling screenshots are available on some devices. Samsung phones support it through the Scroll Capture option that appears after a regular screenshot. On Windows, tools like ShareX offer scrolling capture. Mac users can use third-party apps like CleanShot X for this feature.
How do I edit a screenshot after taking it?
On Windows, the Snip & Sketch tool opens automatically after a capture and gives you editing tools. On Mac, double-click the screenshot on your desktop to open it in Preview. On Android, tap the screenshot thumbnail that appears after capture to access editing tools.
Is there a free app that works better than built-in screenshot tools?
Yes, tools like Lightshot and Greenshot are free and offer more features than built-in options. They include annotation tools, cloud sharing, and customizable shortcuts. Both are excellent choices for anyone who takes screenshots regularly.