How Do I Get Photos Off My Iphone With These Simple Methods
Getting photos off your iPhone is easier than you think. You can use a USB cable, iCloud, AirDrop, or third-party apps to transfer your images to a computer, external drive, or cloud storage. This guide covers every simple method so you can free up space and keep your memories safe.
Your iPhone holds thousands of precious memories. Family vacations, birthday parties, cute pet photos — they all live inside your iPhone gallery. But what happens when storage starts running low? Or when you want to create a backup? Knowing how to get photos off your iPhone is an essential skill every user should have.
The good news is that you have many simple options. You can plug in a cable, use cloud services, or even send photos wirelessly. Whether you want to move photos to a PC, a Mac, or an external drive, this guide walks you through every method. Let’s dive in and explore the best ways to transfer photos from your iPhone.
Key Takeaways
- USB Cable Transfer: The most reliable way to move photos from your iPhone to a Windows PC or Mac.
- iCloud Photo Sync: Automatically backs up and stores your photos in the cloud for easy access.
- AirDrop: The fastest wireless method for transferring photos between Apple devices.
- Third-Party Apps: Apps like Google Photos and Dropbox offer flexible transfer and backup options.
- External Drive: Use an SD card reader or flash drive to export directly from your iPhone.
- Avoid Common Mistakes: Don’t forget to check photo formats, storage limits, and cable quality.
📑 Table of Contents
- Why Getting Photos Off Your iPhone Matters
- Method 1: Transfer Photos Using a USB Cable
- Method 2: Use iCloud to Sync Your Photos
- Method 3: AirDrop for Quick Wireless Transfers
- Method 4: Third-Party Apps for Photo Transfer
- Method 5: Export Photos to an External Drive
- Method 6: Email and Messaging Apps
- How to Free Up iPhone Storage After Transferring Photos
- Choosing the Best Method for Your Needs
- Final Thoughts
Why Getting Photos Off Your iPhone Matters
Many people don’t think about exporting photos until their phone runs out of space. But there are much better reasons to move your images off your device. First, it protects your memories. If your phone gets lost, stolen, or damaged, your photos stay safe in a backup location.
Second, freeing up storage makes your iPhone run faster. When your iPhone storage fills up, everything slows down. Apps take longer to open, and your phone may even stop working properly. Moving photos to another device or cloud storage keeps things running smoothly.
Third, sharing becomes much easier. When photos live on your computer or in the cloud, you can share them with family and friends without sending large files through messages.
How iPhone Photos Are Stored
Your iPhone saves photos in a special format. Most newer iPhones use the HEIC photo format, which takes up less space than older JPEG files. But this format can cause problems when you try to open photos on a Windows PC or older devices.
Understanding this helps you choose the right transfer method. Some tools automatically convert HEIC files to JPEG during transfer. Others let you keep the original format. Knowing what you’re working with makes the whole process much simpler.
Method 1: Transfer Photos Using a USB Cable
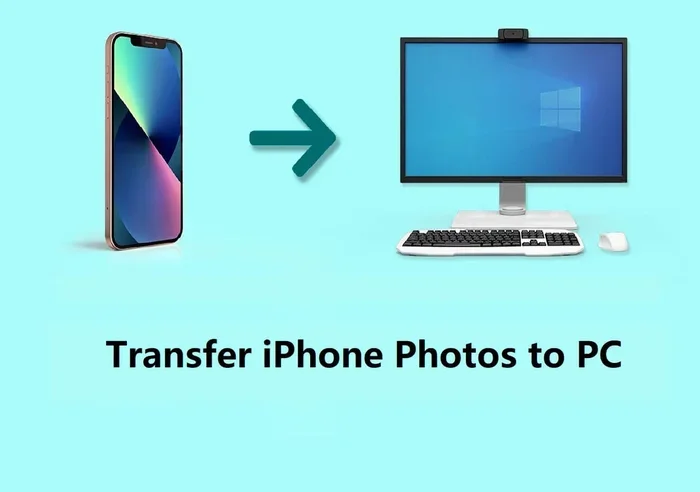
The USB cable method is the most direct way to move photos from your iPhone to a computer. It works with both Windows PCs and Macs. You just need the right cable and a few minutes.
How to Transfer Photos to a Windows PC
Follow these simple steps to export photos from your iPhone to a Windows computer:
- Plug one end of your USB cable into your iPhone.
- Connect the other end to an available USB port on your PC.
- Unlock your iPhone and tap Trust when prompted.
- Open File Explorer on your PC.
- Look for your iPhone under This PC or My Computer.
- Navigate to Internal Storage > DCIM > 100APPLE.
- Copy the photos you want and paste them into a folder on your computer.
How to Transfer Photos to a Mac
Mac users have an even easier experience. The Photos app on macOS is designed to work seamlessly with iPhones:
- Connect your iPhone to your Mac using a USB cable.
- Unlock your iPhone and tap Trust.
- Open the Photos app on your Mac.
- Your iPhone should appear in the sidebar.
- Select the photos you want to import.
- Click Import Selected or Import All New Photos.
Quick Tips
- Always use the original Apple cable or a certified MFi cable for reliable transfers.
- If your PC doesn’t recognize your iPhone, try a different USB port or restart both devices.
- Enable iPhone photo transfer settings on your device before connecting.
Common Mistakes When Using USB Cable Transfer
People often run into problems during cable transfers. One common mistake is using a low-quality or non-certified cable. Cheap cables may not transfer data properly, even if they charge your phone.
Another mistake is not unlocking your iPhone after connecting. Your phone will not appear on the computer until you trust the device. Always check that your iPhone photo library is accessible before starting the transfer.
Expert Insight
Tech experts recommend always creating a second backup after transferring photos. A simple copy-paste job is not the same as a proper backup. Use a backup tool or cloud service to ensure your photos are truly safe.
Method 2: Use iCloud to Sync Your Photos
iCloud photo sync is one of the most convenient ways to get your photos off your iPhone. It works automatically in the background, so you don’t have to think about it once it’s set up. Your photos appear on all your Apple devices and in a web browser.
Setting Up iCloud Photos
Here’s how to turn on iCloud photo syncing:
- Open Settings on your iPhone.
- Tap your name at the top of the screen.
- Select iCloud.
- Tap Photos.
- Turn on Sync This iPhone.
Once enabled, your photos upload to iCloud automatically. You can then access them from any device logged into your Apple ID. This includes iPads, Macs, and even Windows PCs through iCloud.com.
Managing iCloud Storage
Apple gives you 5 GB of free iCloud storage. That fills up fast if you have lots of photos. You may need to upgrade to a paid plan for more space. iCloud+ plans start at 50 GB and go up to 2 TB.
Consider using iPhone storage management tools to review what’s taking up space. You can also optimize your photo storage so that full-resolution photos stay in the cloud while smaller versions remain on your phone.
| Storage Plan | Price (Monthly) | Best For |
|---|---|---|
| 5 GB Free | $0 | Light photo users |
| 50 GB | $0.99 | Occasional backup needs |
| 200 GB | $2.99 | Moderate photo collections |
| 2 TB | $9.99 | Heavy photo and video users |
Quick Tips for iCloud Users
- Check your iCloud storage regularly to avoid running out of space.
- Use Optimize iPhone Storage to save room on your device.
- Enable iCloud photo library on all your Apple devices for seamless access.
- Remember that deleting a photo from your iPhone also removes it from iCloud unless you’ve set up backup separately.
Method 3: AirDrop for Quick Wireless Transfers
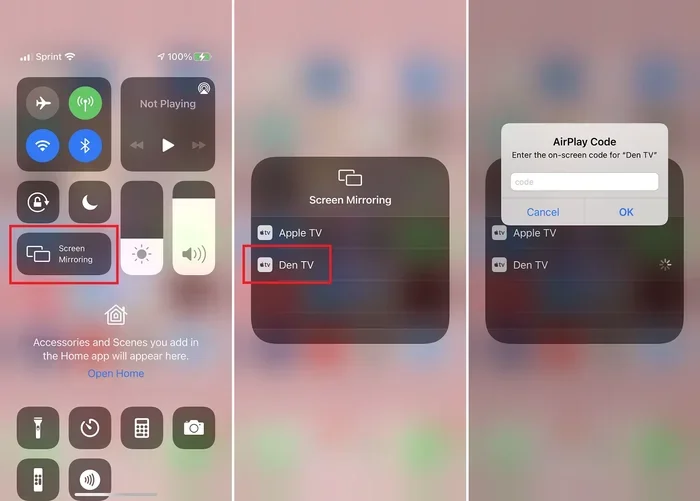
If you need to move photos between Apple devices, AirDrop is the fastest method. It uses Bluetooth and Wi-Fi to send files instantly without any cables. This is perfect for sharing photos between your iPhone and iPad, or between two iPhones.
How to AirDrop Photos
Follow these steps to send photos wirelessly:
- Open Control Center on your iPhone.
- Press and hold the network settings card in the top-left corner.
- Tap AirDrop.
- Choose Contacts Only or Everyone.
- Open the Photos app and select the images you want to share.
- Tap the Share button.
- Tap the AirDrop icon next to the recipient’s name.
The photos arrive on the other device almost instantly. You can then save them to the camera roll or transfer them to a computer later.
Limitations of AirDrop
AirDrop works great for small batches of photos. But it’s not ideal for transferring hundreds or thousands of images at once. It also only works between Apple devices. If you need to send photos to a Windows PC, you’ll need a different method.
Expert Insight
For best results, keep both devices close together and make sure Wi-Fi and Bluetooth are turned on. AirDrop does not use your cellular data, so it won’t eat into your data plan.
Method 4: Third-Party Apps for Photo Transfer
Not every transfer method has to involve cables or Apple services. Many third-party apps make it easy to export photos from iPhone to any device or platform. These apps often offer extra features like automatic backup, photo editing, and cloud storage.
Google Photos
Google Photos is one of the most popular photo transfer apps available. It works on both iPhone and Android, and it gives you 15 GB of free storage. You can upload your photos from your iPhone and access them from any device with a web browser.
The app also offers powerful search features. It can recognize faces, places, and objects in your photos, making it easy to find specific images later.
Dropbox
Dropbox is another excellent option for iPhone photo backup. It offers 2 GB of free storage and integrates with many devices. You can set up automatic camera uploads so every new photo goes straight to your Dropbox account.
Snapdrop and LocalSend
For wireless transfers without cloud storage, try Snapdrop or LocalSend. These free apps let you send photos between devices on the same Wi-Fi network. They work across different platforms, including iPhone, Android, Windows, and Mac.
Comparison of Third-Party Photo Transfer Apps
| App | Free Storage | Platforms | Auto Backup |
|---|---|---|---|
| Google Photos | 15 GB | iOS, Android, Web | Yes |
| Dropbox | 2 GB | iOS, Android, Windows, Mac | Yes |
| Snapdrop | Free (No limit) | All platforms | No |
| LocalSend | Free (Open source) | All platforms | No |
| OneDrive | 5 GB | iOS, Android, Windows, Mac | Yes |
Quick Tips
- Check app permissions before granting access to your photo library.
- Use Wi-Fi when uploading large batches of photos to avoid using cellular data.
- Compare storage limits before choosing a third-party app for long-term backup.
Method 5: Export Photos to an External Drive
If you want a physical backup that doesn’t rely on the cloud, an external drive is a great choice. You can transfer photos directly from your iPhone to a USB flash drive, SD card, or portable hard drive.
Using a Lightning to USB Adapter
Apple sells a Lightning to USB adapter that lets you connect external drives directly to your iPhone. Here’s how it works:
- Plug the USB adapter into your iPhone’s charging port.
- Connect your external drive or flash drive to the adapter.
- Open the Files app on your iPhone.
- Navigate to your external drive under Locations.
- Select photos from your camera roll.
- Tap Move and choose the external drive as the destination.
This method works well for creating offline backups. It’s also great for freeing up space without relying on internet connectivity.
Using an SD Card Reader
Many cameras and iPads use SD cards. You can buy an SD card reader that connects to your iPhone’s Lightning port. This is especially useful if you also take photos with a DSLR or mirrorless camera and want to move them to your phone for editing.
Common Mistakes to Avoid
- Don’t disconnect the drive while the transfer is in progress. This can corrupt your files.
- Make sure your external drive is formatted in a compatible file system like exFAT or FAT32.
- Don’t assume all drives work with the iPhone adapter. Some require external power sources.
Method 6: Email and Messaging Apps
For quick transfers of a few photos, email and messaging apps work well. You can send photos directly from your iPhone to yourself or to others. This method is simple but has size limits.
Email Limitations
Most email providers limit attachments to 25 MB. That’s about 5 to 10 high-quality photos depending on the resolution. If you need to send more, consider compressing the photos first or using a file-sharing service.
Messaging Apps
Apps like WhatsApp, Telegram, and Signal let you send photos in higher quality. Telegram is especially good for this because it supports files up to 2 GB. You can send entire folders of photos to yourself for easy access later.
When to Use Email or Messaging
This method works best for quick, one-off transfers. It’s not ideal for backing up thousands of photos or for long-term storage. But for sharing a few favorite shots with friends or family, it’s hard to beat the convenience.
How to Free Up iPhone Storage After Transferring Photos
Once you’ve moved your photos off your iPhone, you’ll want to delete them from your device to reclaim space. Here’s how to do it safely:
- Open the Photos app on your iPhone.
- Select the photos you want to delete.
- Tap the Trash icon.
- Go to Albums > Recently Deleted.
- Tap Select All and then Delete.
Remember that deleted photos go to the Recently Deleted folder first. They stay there for 30 days before being permanently removed. If you want to free up space immediately, you need to empty this folder manually.
Using iPhone Storage Management
Apple has a built-in tool that helps you manage your storage. Go to Settings > General > iPhone Storage. This screen shows you exactly what’s taking up space and suggests ways to optimize your device.
Expert Insight
Storage experts recommend reviewing your photo library every few months. Delete blurry shots, duplicates, and screenshots you no longer need. This keeps your library lean and makes future transfers faster.
Choosing the Best Method for Your Needs
Every method has its strengths. The best choice depends on your situation. Here’s a quick guide to help you decide:
- USB Cable: Best for large transfers to a computer. Reliable and fast.
- iCloud: Best for automatic, ongoing backups across all devices.
- AirDrop: Best for quick transfers between Apple devices.
- Third-Party Apps: Best for cross-platform transfers and cloud backup.
- External Drive: Best for offline, physical backups.
- Email/Messaging: Best for sending a few photos quickly.
Many people use a combination of methods. For example, you might use iCloud for daily backups and a USB cable for occasional large transfers. Having multiple backup layers ensures your photos are always safe.
Final Thoughts
Knowing how to get photos off your iPhone gives you peace of mind. Your memories are valuable, and they deserve proper protection. Whether you choose a cable, cloud service, or wireless transfer, the important thing is to take action today.
Start with the method that feels easiest for you. Once you get comfortable, explore other options to build a complete backup system. Your future self will thank you when your phone is lost or damaged and your photos are still safe and sound.
Don’t wait until your storage is full to start thinking about this. Make photo transfer a regular habit, and you’ll never lose a precious memory again.
Frequently Asked Questions
Can I get photos off my iPhone without a computer?
Yes, you can. iCloud, AirDrop, Google Photos, and third-party apps all let you move photos without a computer. You can also use an external drive directly connected to your iPhone with an adapter.
What is the fastest way to transfer photos from iPhone to PC?
The fastest method is using a USB cable with File Explorer on Windows or the Photos app on Mac. A direct cable connection transfers photos much faster than wireless options, especially for large batches.
Will transferring photos delete them from my iPhone?
No, not automatically. Most transfer methods copy photos to the new location without removing them from your iPhone. You need to manually delete photos after confirming they were transferred successfully.
How do I transfer HEIC photos to a Windows PC?
Windows 10 and 11 now support HEIC files natively. If your PC doesn’t recognize them, you can change your iPhone camera settings to Most Compatible, which saves photos as JPEG files instead.
Is iCloud free for storing photos?
Apple provides 5 GB of free iCloud storage. This fills up quickly with photos and videos. You may need to purchase additional storage if you have a large photo library.
Can I use a wireless charger to transfer photos?
No, wireless chargers only provide power. They cannot transfer data. You need a USB cable, AirDrop, iCloud, or a third-party app to move photos from your iPhone.
=== CONCLUSION ===
Getting photos off your iPhone doesn’t have to be complicated. You have many simple methods at your fingertips. Whether you prefer a USB cable, iCloud sync, AirDrop, or a third-party app, there’s a solution that fits your needs.
Start by choosing the method that works best for you. Set up automatic backups, transfer your photos regularly, and free up valuable storage space. Your memories are worth protecting, and these simple methods make it easy to do exactly that.