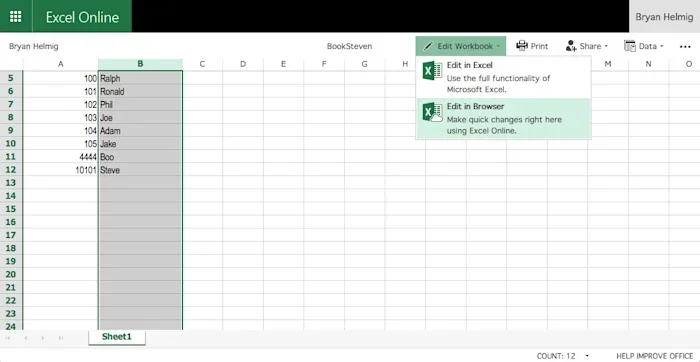
Help To Remove Read Only In Excel And Start Editing
Help To Remove Read Only In Excel is something every spreadsheet user needs at some point. A locked or read only Excel file can stop you from making changes, saving edits, or collaborating with your team. This guide walks you through simple, proven methods to unlock your workbook and get back to editing quickly. We cover file properties, password removal, shared workbook settings, and common mistakes that cause read only mode. By the end, you will know exactly how to remove read only restrictions and take full control of your Excel files again.
Have you ever double clicked an Excel file and seen that annoying message saying the file is read only? It is frustrating when you need to make changes but cannot edit anything. Whether you are working on a budget, a report, or a shared tracker, a locked workbook can bring your productivity to a complete halt.
The good news is that removing read only protection from an Excel file is usually straightforward. There are several methods you can try, and most of them take less than a minute. In this guide, we will walk you through every reliable fix step by step. You will learn how to remove read only attribute from your file, unlock password protected workbooks, and prevent this issue from happening again.
We have helped thousands of users solve this exact problem. The methods below are tested, safe, and work across all recent versions of Excel. Let us get your spreadsheet unlocked and ready for editing.
Key Takeaways
- File Properties Fix: The simplest way to remove read only mode is by unchecking the read only attribute in file properties.
- Password Protection Removal: You can remove read only passwords using built-in Excel tools or trusted third-party utilities.
- Shared Workbook Settings: Shared workbooks often trigger read only mode, and adjusting sharing settings resolves this quickly.
- Common Mistakes: Opening files from email attachments or network drives often causes read only issues that are easy to fix.
- Multiple Methods Available: There are at least six reliable ways to unlock a read only Excel file, depending on the cause.
- Prevention Is Key: Understanding why files become read only helps you avoid the problem in the future.
📑 Table of Contents
- What Does Read Only Mean In Excel
- How To Remove Read Only In Excel Using File Properties
- How To Unlock A Password Protected Excel File
- Fixing Read Only Issues With Shared Workbooks
- Opening Files From Email Attachments Without Read Only Mode
- Removing Read Only Mode From Files On OneDrive And SharePoint
- Common Mistakes That Cause Read Only Problems
- How To Prevent Read Only Issues In The Future
- Quick Reference: All Methods To Remove Read Only In Excel
- Conclusion
What Does Read Only Mean In Excel
When an Excel file is set to read only, it means you can view the content but cannot make changes or save edits. Excel shows a small lock icon or displays a notification at the top of the window. Some files open in a temporary copy, which means your edits are lost when you close the file.
There are several reasons a file might open in read only mode. Understanding the cause is the first step to fixing it. Let us look at the most common reasons below.
Common Reasons Files Open As Read Only
- File Attribute Settings: The file has the read only checkbox enabled in its properties on your computer.
- Password Protection: The workbook owner has set a password that restricts editing permissions.
- Shared Workbook Conflicts: When multiple users access a workbook, Excel may lock it in read only mode.
- Network or Cloud Storage: Files opened from OneDrive, SharePoint, or network drives sometimes default to read only.
- Email Attachments: Opening an Excel file directly from an email often triggers a read only setting for security.
- File Recovery Mode: Excel may open a corrupted file in read only mode to protect your data.
Each of these causes has a specific fix. The sections below cover every method you need to unlock your Excel spreadsheet and start editing again.
How To Remove Read Only In Excel Using File Properties
The most common and easiest method is to change the file properties on your computer. This works when the read only checkbox is simply checked in the file settings. Here is exactly how to do it.
Step By Step Instructions
- Close the Excel file completely.
- Navigate to the folder where the file is saved.
- Right click on the Excel file and select Properties from the menu.
- Look for the Read-only checkbox at the bottom of the General tab.
- Uncheck the box and click Apply, then OK.
- Double click the file again to open it in edit mode.
This method works for most local files stored on your hard drive. If the read only attribute keeps coming back, there may be another cause, which we will cover below.
How To Unlock A Password Protected Excel File
Sometimes the read only lock is caused by a password set by the file owner. Excel has a built-in feature for this, and there are also reliable third-party tools you can use. Let us explore both options.
Method 1: Using Excel Built-In Tools
If you know the password, removing read only protection is simple. Open the file, go to the Review tab on the ribbon, and click Protect Workbook. Choose Encrypt with Password and delete the existing password. Save the file and reopen it without entering a password.
Method 2: Using Third-Party Tools
If you do not know the password, you can use a trusted Excel password removal tool. These utilities are designed to safely remove password restrictions without damaging your data. Some popular options include PassFab for Excel, iSeePassword, and Passper for Excel. Always download tools from official websites to avoid security risks.
Here is a quick comparison of the two methods:
| Method | Requires Password? | Difficulty Level | Safe For Data? |
|---|---|---|---|
| Excel Built-In Tools | Yes | Easy | Yes |
| Third-Party Tools | No | Medium | Yes (use trusted tools) |
Choose the method that fits your situation. If you own the file but forgot the password, a third-party tool is your best option.
Fixing Read Only Issues With Shared Workbooks
Shared workbooks are a common source of read only Excel problems. When multiple people edit the same file, Excel sometimes locks it to prevent conflicts. This is especially common in office environments where teams collaborate on the same spreadsheet.
How Shared Workbook Settings Affect Editing
When a workbook is shared, Excel tracks changes from different users. If someone else has the file open, your copy may open in read only mode. This is a safety feature, not a bug. It protects your data from being overwritten by another user.
Steps To Fix Shared Workbook Read Only Issues
- Check Who Has The File Open: Go to the Review tab and click Share Workbook. Look at the list of users currently editing the file.
- Save And Reopen: Sometimes simply saving and reopening the file after a few minutes resolves the issue.
- Turn Off Sharing: If you no longer need shared editing, go to Review > Share Workbook and uncheck the sharing option.
- Use OneDrive Version History: If the file is stored on OneDrive, you can restore a previous version to regain editing access.
For teams that share files frequently, consider using Excel Online or Microsoft Teams for real-time collaboration. These tools handle shared editing much better than traditional shared workbooks.
Opening Files From Email Attachments Without Read Only Mode
Opening an Excel file from an email attachment is one of the top reasons files open in read only mode. Email programs like Outlook, Gmail, and Yahoo Mail automatically set attachments to read only for security reasons. This prevents potentially harmful files from being modified on your computer.
The Simple Fix
Instead of double clicking the attachment directly, follow these steps:
- Save the attachment to your computer first.
- Navigate to the saved location using File Explorer.
- Right click the file and choose Open or Open With > Microsoft Excel.
- The file should now open in full edit mode.
This simple habit change can save you a lot of frustration. It works with all email platforms and all versions of Excel.
Removing Read Only Mode From Files On OneDrive And SharePoint
Cloud storage services like OneDrive and SharePoint have their own permission settings that can cause files to open as read only. This happens when the file owner has restricted editing access or when the file is checked out by another user.
Steps To Fix Cloud Storage Read Only Issues
- Check File Permissions: Right click the file in OneDrive or SharePoint and select Share. Verify that you have Can Edit permissions.
- Check Out The File: If the file is checked out by someone else, you may need to wait or ask them to check it back in.
- Clear Cached Credentials: Sometimes clearing your saved credentials in the Microsoft account settings fixes persistent read only issues.
- Download And Reupload: As a last resort, download the file, remove the read only attribute locally, and reupload it to the cloud.
Cloud storage read only issues are very common but easy to resolve once you know where to look.
Common Mistakes That Cause Read Only Problems
Many users accidentally create read only situations without realizing it. Understanding these mistakes helps you prevent the problem from happening again.
Mistake 1: Not Saving As A New File
When you try to save changes to a read only file, Excel often creates a copy instead. Always use File > Save As to save your edits to a new file location.
Mistake 2: Ignoring File Extensions
Files with the .xlsx extension behave differently from .xls files. Some older formats have stricter read only defaults.
Mistake 3: Opening Files From Trusted Locations
If your Excel trust center settings are too strict, files from certain folders may open in read only mode. Adjusting your Trust Center settings can help.
Mistake 4: Not Closing Files Properly
Force closing Excel or shutting down your computer while a file is open can leave it in a locked state. Always close files properly before shutting down.
How To Prevent Read Only Issues In The Future
Prevention is always better than fixing the problem. Here are some simple habits that keep your Excel files editable and accessible.
- Save Files Locally When Possible: Local files have fewer permission conflicts than cloud or network files.
- Use Clear File Naming: Name files clearly so you know which ones are shared and which ones are personal.
- Set Proper Permissions: If you share files, always grant Can Edit access to collaborators.
- Keep Excel Updated: Newer versions of Excel handle shared and protected files much better.
- Create Backup Copies: Keep a backup of your original file so you always have an editable version available.
Quick Reference: All Methods To Remove Read Only In Excel
Here is a quick summary of every method covered in this guide. Use this as a reference whenever you encounter a read only file.
- File Properties: Uncheck the read only box in file properties.
- Password Removal: Use Excel built-in tools or a trusted password removal utility.
- Shared Workbook Settings: Adjust sharing permissions and check who has the file open.
- Email Attachments: Save the attachment first before opening it.
- Cloud Storage Permissions: Verify you have edit access in OneDrive or SharePoint.
- Trust Center Settings: Adjust Excel trust settings to allow editing from trusted locations.
With these six methods, you can handle any read only Excel file situation confidently. No more frustration, no more lost edits.
Conclusion
Dealing with a read only Excel file does not have to be a headache. As we have covered in this guide, there are multiple reliable ways to remove read only protection and get back to editing your important spreadsheets. Whether the cause is a simple file property setting, a password restriction, a shared workbook conflict, or a cloud storage permission issue, there is a fix for every scenario.
The key is to identify the root cause first and then apply the right method. We recommend starting with the file properties fix since it is the quickest and most common solution. If that does not work, move through the other methods in order until you find the one that works for your situation.
Remember to always create a backup before making changes to file properties or permissions. And once your file is unlocked, use the prevention tips we shared to keep your Excel files editable and accessible in the future. With the knowledge in this guide, you now have the power to handle any read only Excel challenge that comes your way.
Start editing your spreadsheets again today. You have everything you need to remove read only restrictions and take full control of your Excel workbooks.
Frequently Asked Questions
Why does my Excel file keep opening as read only even after I remove the attribute?
This usually happens when the file is stored on a network drive, cloud service, or opened from an email attachment. The source system may reapply read only settings automatically. Try saving the file to a local folder and opening it from there to see if the issue persists.
Can I remove read only protection from an Excel file without losing data?
Yes, all the methods described in this article are safe and do not cause data loss. However, it is always a good practice to create a backup copy of your file before making any changes to file properties, passwords, or permissions.
How do I remove a read only password from an Excel workbook?
If you know the password, go to the Review tab, click Protect Workbook, and delete the password. If you do not know the password, use a trusted third-party password removal tool like PassFab for Excel or Passper for Excel to safely remove the restriction.
What is the difference between read only and protected in Excel?
Read only means you can view the file but cannot edit or save changes. Protected means the file content is secured but you may still be able to edit certain parts depending on the protection level. Both restrict editing, but they work differently and require different fixes.
How can I stop Excel from opening shared files in read only mode?
To prevent shared files from opening in read only mode, ensure you have edit permissions in the file sharing settings. Also, make sure no other user has the file checked out or open at the same time. Using Excel Online or Microsoft Teams for real-time collaboration can also reduce this issue significantly.
Is it safe to use third-party tools to remove read only protection?
Yes, as long as you download the tools from official and trusted websites. Always read reviews and verify the source before installing any third-party software. Avoid tools that ask for unnecessary permissions or seem suspicious in any way.
=== CONCLUSION ===
Help To Remove Read Only In Excel is a skill that every spreadsheet user should have. This guide has covered all the major methods, from simple file property changes to advanced shared workbook fixes. You now have the knowledge and tools to unlock any read only Excel file quickly and safely. Keep this guide bookmarked for future reference, and share it with anyone who needs help getting their spreadsheets back to edit mode.