How to Connect Two Ethernet Cables Together the Right Way
Connecting two Ethernet cables together is a simple process that lets you extend your network cable when one is too short. Whether you need to reach a farther router, set up a new desk location, or fix a damaged cable, knowing the right method saves time and keeps your internet speed strong. This guide covers every method, tool, and tip you need to connect two Ethernet cables together like a pro.
This is a comprehensive guide about Connect Two Ethernet Cables Together.
Key Takeaways
- Multiple methods exist: You can use an Ethernet coupler, splice cables, or use a patch cable to connect two Ethernet cables together effectively.
- Matching cable categories matter: Always pair Cat5e with Cat5e and Cat6 with Cat6 to maintain your network speed.
- Proper tools make the job easier: A crimping tool, cable tester, and RJ45 connectors are essential for clean connections.
- Avoid common mistakes: Mixing cable categories and skipping the tester can cause signal loss and slow speeds.
- Signal loss is real: Each connection point can reduce your signal strength, so keep extra connections to a minimum.
- PoE compatibility is important: If you use Power over Ethernet, check that your coupler supports it before buying.
[FEATURED_IMAGE_PLACEHOLDER]
Have you ever been setting up your home network and realized your Ethernet cable just is not long enough? Maybe you moved your desk to a new spot, or you are trying to reach a router that is across the room. Whatever the reason, the need to connect two Ethernet cables together comes up more often than most people think.
The good news is that this is a task almost anyone can handle. You do not need to be a networking expert or a professional technician. With the right tools and a bit of patience, you can connect two Ethernet cables together in minutes and get your network running smoothly again.
In this guide, we will walk you through every method, every tool, and every tip you need. We will cover everything from using a simple Ethernet coupler to splicing cables end to end. By the time you finish reading, you will feel confident tackling any Ethernet cable extension project on your own.
Why You Might Need to Connect Two Ethernet Cables Together
There are many real-world situations where joining two Ethernet cables makes perfect sense. Let us look at the most common reasons people need to do this.
Your Cable Is Too Short
This is the number one reason. You bought a cable that looked long enough on paper, but once you start running it across the room, it falls short. Instead of buying a whole new long cable, you can simply connect two Ethernet cables together to reach your destination.
You Are Extending a Network Run
Home offices and small businesses often need cables to travel long distances. Walls, floors, and ceilings can make the path longer than expected. Joining cables lets you extend your LAN connection without pulling entirely new wiring through walls.
You Have a Damaged Cable
Sometimes a cable gets cut, crushed, or chewed by a pet. If the damage is near one end, you can cut off the bad section and connect two Ethernet cables together to salvage the remaining good parts.
You Want a Backup Connection
Some people join two cables to create a longer backup line. If your main cable fails, you have a ready-made replacement already wired up and tested.
Tools and Materials You Will Need
Before you start, gather everything you need. Having the right tools on hand makes the whole process much smoother and faster.
Essential Tools
- Ethernet cable stripper — This tool removes the outer jacket without cutting the inner wires.
- RJ45 crimping tool — Used to attach new connectors to the cut ends of your cables.
- RJ45 connectors — Buy the right type for your cable category (Cat5e, Cat6, etc.).
- Cable tester — This checks that all eight wires are properly connected and in the right order.
- Wire snips or flush cutters — For trimming wires cleanly before crimping.
Optional but Helpful Items
- Ethernet coupler — A small adapter that joins two cables without any splicing or crimping.
- Cable management clips — These keep your joined cables neat and secure along walls or desks.
- Heat shrink tubing — Used to insulate spliced connections if you go the splicing route.
- Label maker — Helpful for marking which cable goes where, especially in complex setups.
Quick Tip
Always buy connectors and couplers that match your cable category. Using a Cat5e coupler on a Cat6 cable can reduce your Gigabit Ethernet speed and cause signal loss. Match the category exactly for the best results.
Methods to Connect Two Ethernet Cables Together
There are three main ways to connect two Ethernet cables together. Each method has its own strengths, and the right choice depends on your situation, skill level, and how permanent you want the connection to be.
Method 1: Using an Ethernet Coupler
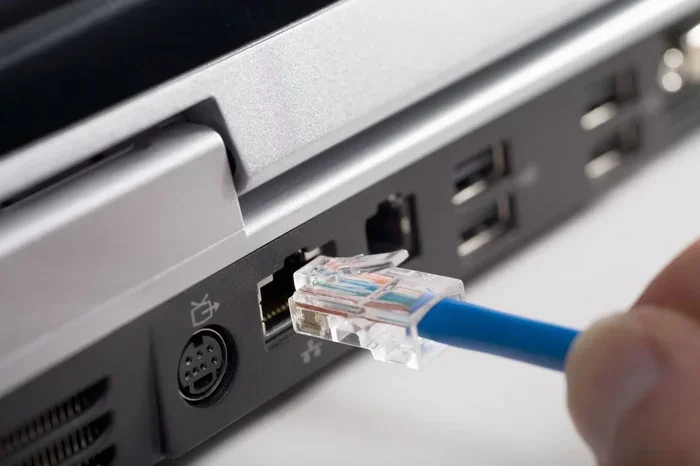
An Ethernet coupler is the easiest and fastest way to join two cables. It is a small plastic or metal adapter with two female RJ45 ports on one side and two male pins that plug into your cables.
How it works: You plug one cable into each end of the coupler. That is it. No cutting, no crimping, no wiring. The coupler simply bridges the gap between the two cable ends.
When to use this method:
- You need a quick and temporary connection.
- You are not comfortable with crimping tools.
- You want to avoid any signal degradation from extra connection points.
- You plan to disconnect and reuse the cables later.
Pros: Fast, reversible, no tools needed, and no wiring skills required.
Cons: Adds one extra connection point, which can introduce slight signal loss. Also, cheap couplers may not support PoE (Power over Ethernet) properly.
Quick Tip: Buy a coupler rated for the same category as your cables. A Cat6 coupler on Cat6 cables will maintain your full speed and keep network troubleshooting to a minimum.
Method 2: Splicing Cables End to End
Splicing means cutting both cables and joining the internal wires together to create one continuous cable. This is the most permanent method and gives you a single long cable with no coupler in the middle.
How it works: You strip back the outer jacket of both cables, match and connect each of the eight wires, then solder or use crimp connectors to secure them. Finally, you add new RJ45 connectors to each end.
When to use this method:
- You want a permanent, clean single cable run.
- You do not want the bulk of a coupler in the middle.
- You are comfortable with basic cable crimping and cable termination skills.
Pros: Creates one seamless cable, no extra adapter to fail, and the connection is very reliable when done correctly.
Cons: Requires more skill and tools, is not easily reversible, and mistakes can lead to poor data transfer speed.
Common Mistakes to Avoid:
- Mixing up wire colors when connecting the two cables.
- Not keeping the twisted pairs intact during the splice.
- Skipping the cable tester after completing the splice.
- Using different cable categories on each end.
Method 3: Using a Patch Cable with a Coupler
This method combines a short patch cable with an Ethernet coupler. You use the patch cable to bridge from your existing cable to a second longer cable. It is a great middle-ground option.
How it works: You plug your existing cable into one end of the coupler, then plug a patch cable into the other end of the coupler, and finally plug the patch cable into your destination device.
When to use this method:
- You need a flexible setup that can be adjusted easily.
- You already have a spare patch cable lying around.
- You want to test a connection before committing to a permanent splice.
Pros: Flexible, easy to change, and requires no special skills.
Cons: Adds two connection points (coupler plus patch cable), which can slightly reduce your LAN connection quality.
Step-by-Step Guide to Connecting Two Ethernet Cables
Now let us walk through the process of connecting two Ethernet cables together using the most popular method: the Ethernet coupler. Then we will cover the splice method for those who want a more permanent solution.
Using an Ethernet Coupler — Step by Step
- Gather your cables and coupler. Make sure both cables are the same category (both Cat5e or both Cat6).
- Inspect both cable ends. Check that the RJ45 connectors are not damaged or bent. Clean any dust from the connector pins.
- Plug the first cable in. Insert the male RJ45 end of the first cable firmly into one port of the coupler. You should feel a click when it locks in place.
- Plug the second cable in. Insert the male RJ45 end of the second cable into the other port of the coupler. Again, listen for the click.
- Test the connection. Plug the coupler into your router or switch on one end and your computer or device on the other. Check that the link light turns on and your device gets a network connection.
- Use a cable tester (optional but recommended). If you have a network cable tester, run it through both cables and the coupler to verify all eight wires are transmitting properly.
That is it! You have successfully connected two Ethernet cables together using a coupler. Your network should work at full speed if everything is matched correctly.
Splicing Two Ethernet Cables — Step by Step
- Cut both cables at a convenient point. Use your cable cutter to make a clean, straight cut on each cable.
- Strip the outer jacket. Use your cable stripper to remove about two inches of the outer jacket from each cut end. Be careful not to nick the inner wires.
- Untwist and arrange the wires. Untwist the pairs and arrange the eight wires in the correct order (T568B is the most common standard). Keep the twists as close to the connector as possible.
- Join the wires. Match each wire from cable one to the corresponding wire from cable two. Solder each connection and cover it with heat shrink tubing for insulation.
- Crimp new RJ45 connectors. Slide the jacket into an RJ45 connector crimp housing, insert the wires in the correct order, and crimp firmly with your crimping tool.
- Test the finished cable. Use your cable tester to check all eight wires for proper continuity and correct pinout.
Expert Insight: Splicing is the most advanced method, and it is where most people make mistakes. Take your time with the wire ordering. A single misplaced wire can cause your connection to fail or your data transfer speed to drop significantly.
Matching Cable Categories for Best Performance
One of the most important things to understand when you connect two Ethernet cables together is that cable categories matter a lot. Your overall speed is limited by the slowest cable in the chain.
Cat5e vs Cat6 vs Cat6a
- Cat5e supports speeds up to 1 Gigabit Ethernet at 100 MHz. It is the most common cable found in older homes.
- Cat6 supports speeds up to 10 Gigabit Ethernet at 250 MHz and has better shielding against interference.
- Cat6a supports 10 Gigabit Ethernet at 500 MHz and is ideal for high-performance networks.
If you join a Cat5e cable with a Cat6 cable, the entire run will default to Cat5e speeds. You lose the benefits of the higher-category cable. Always match your cable categories when you connect two Ethernet cables together.
| Cable Category | Max Speed | Max Bandwidth | Best For |
|---|---|---|---|
| Cat5e | 1 Gbps | 100 MHz | Basic home networking |
| Cat6 | 10 Gbps (up to 55m) | 250 MHz | Modern home and office |
| Cat6a | 10 Gbps (up to 100m) | 500 MHz | High-performance setups |
Quick Tip: Check the printing on the outer jacket of your cables. The category is always printed there. If you cannot find it, look at the cable specifications on the original packaging.
Common Mistakes to Avoid When Joining Ethernet Cables
Even experienced users sometimes make mistakes when they connect two Ethernet cables together. Here are the most common errors and how to avoid them.
Mixing Cable Categories
This is the number one mistake. Joining a Cat5e cable with a Cat6 cable will slow your entire network to Cat5e speeds. Always verify both cables before joining them.
Using a Cheap Coupler
Not all couplers are created equal. A poorly made coupler can cause signal loss and intermittent connections. Invest in a quality coupler from a reputable brand. Look for ones that are rated for the same cable category and support PoE if you need it.
Skipping the Cable Tester
After splicing or using a coupler, always test your connection. A network cable tester costs very little and can save you hours of frustration. It will tell you immediately if a wire is misconnected or if there is a break in the line.
Ignoring Cable Bend Radius
Ethernet cables should not be bent sharply. Sharp bends can damage the internal twisted pairs and cause signal loss. Always maintain a gentle curve in your cables, especially at the connection points.
Overlooking Cable Length Limits
A single Ethernet cable run should not exceed 100 meters (about 328 feet). When you join two cables, the total length of both cables combined must stay under this limit. Going over 100 meters will cause your data transfer speed to drop or the connection to fail entirely.
Expert Tips for a Reliable and Fast Connection
Want your joined cables to perform just as well as a single factory-made cable? Follow these expert tips.
Keep Your Twists Intact
The twisted pairs inside Ethernet cables are designed to reduce interference. When you strip back the jacket for splicing, keep the twists as close to the RJ45 connector as possible. Untwisting too much wire can degrade your Gigabit Ethernet performance.
Use Quality Connectors
Cheap RJ45 connectors are a common source of connection problems. Buy connectors that are rated for your cable category. Gold-plated connectors also resist corrosion and provide a more reliable connection over time.
Label Your Cables
If you have multiple cables running through your home or office, label each one. This makes network troubleshooting much faster when something goes wrong. A simple label maker costs under fifteen dollars and saves a lot of headaches.
Secure Your Cables Properly
Use cable clips or management strips to keep your joined cables neat and secure. Loose cables can get pulled out accidentally or create trip hazards. Good cable management also helps airflow around your networking equipment.
Check for PoE Compatibility
If you use Power over Ethernet devices like IP cameras, VoIP phones, or wireless access points, make sure your coupler or splice supports PoE. A non-PoE coupler will block the power signal and your devices will not turn on.
Test Before You Hide the Cable
Always test your joined cable thoroughly before running it inside a wall or under a carpet. It is much easier to fix a problem when the cable is still accessible. Once a cable is hidden, finding and fixing issues becomes a real chore.
Frequently Asked Questions
Can I connect two different Ethernet cable categories together?
Yes, you can physically connect a Cat5e cable to a Cat6 cable, but your network will run at the speed of the lower category. In this case, it would default to Cat5e speeds. For the best performance, always match your cable categories when you connect two Ethernet cables together.
Does using an Ethernet coupler reduce internet speed?
A good quality coupler should not noticeably reduce your speed. However, every extra connection point introduces a small amount of signal loss. Using a cheap or damaged coupler can cause more noticeable speed drops. Stick with reputable brands and match the coupler to your cable category.
How long can my combined Ethernet cable be?
The maximum recommended length for a single Ethernet cable run is 100 meters (about 328 feet). This limit applies to the total combined length of all cables you join together. Going beyond this distance will cause signal degradation and potential connection loss.
Can I use a coupler for Power over Ethernet (PoE)?h3>
Yes, but only if the coupler is rated for PoE. Standard couplers may not pass the electrical power needed for PoE devices. Check the product specifications before buying, especially if you are powering IP cameras, wireless access points, or VoIP phones through your joined cable.
What is the difference between splicing and using a coupler?
A coupler is a plug-and-play adapter that joins two cables without any cutting or wiring. Splicing involves cutting both cables, connecting the internal wires, and crimping new connectors. Couplers are faster and reversible, while splicing creates a single permanent cable with fewer connection points.
Do I need any special skills to connect two Ethernet cables together?
Using a coupler requires no special skills at all — just plug and play. Splicing cables requires basic knowledge of wire ordering and some practice with a crimping tool. If you are new to networking, start with a coupler and graduate to splicing once you feel comfortable.
Conclusion
Connecting two Ethernet cables together is a straightforward task that anyone can learn. Whether you choose a simple Ethernet coupler for quick and easy extension or decide to splice cables for a permanent solution, the key is to match your cable categories, use quality tools, and always test your connection before hiding the cables away.
Remember to avoid common mistakes like mixing cable categories, skipping the cable tester, or using a coupler that does not support PoE. These small details make a big difference in keeping your LAN connection fast and reliable. With the right approach, your joined cables will perform just as well as a single factory-made cable, and you will have the satisfaction of solving the problem yourself.
Now that you know how to connect two Ethernet cables together the right way, go ahead and fix that short cable, extend your network run, or salvage that damaged line. Your network will thank you for it.
Frequently Asked Questions
What is Connect Two Ethernet Cables Together?
Connect Two Ethernet Cables Together is an important topic with many practical applications.