Can I Transfer Photos Straight From Phone To Usb Now
Yes, you can transfer photos straight from phone to USB using several simple methods. Whether you have an Android or iPhone, a USB flash drive, or an OTG adapter, moving your pictures takes just minutes. This guide walks you through every option so you can back up, share, or free up space on your device with confidence.
You have hundreds — maybe thousands — of photos sitting on your phone. Your storage is full, and you need a simple way to move them somewhere safe. The most obvious question is, can I transfer photos straight from phone to USB? The short answer is yes. You absolutely can, and it is easier than most people think.
Whether you want to back up memories, free up space, or share photos with someone else, plugging your phone directly into a USB flash drive is a practical solution. You do not always need a laptop or desktop computer in the middle. With the right cable, adapter, or even a wireless method, you can move your pictures in minutes.
In this guide, we will walk you through every method, every tip, and every mistake to avoid. By the end, you will know exactly how to transfer photos from phone to USB the right way — no guesswork, no hassle.
Key Takeaways
- Direct USB transfer works on both Android and iPhone with the right cable or adapter.
- OTG adapters let you plug a USB drive directly into your phone for wireless-free transfers.
- Wireless options like Wi-Fi USB bridges exist if you prefer not to use cables.
- Formatting matters — FAT32 and exFAT are the most compatible file systems for USB drives.
- You do not need a computer as a middleman in most cases.
- Speed depends on your USB drive class — look for USB 3.0 or higher for fast transfers.
- Always eject your USB safely to avoid corrupting your photo files.
📑 Table of Contents
- Understanding How Photo Transfer From Phone To USB Works
- Methods To Transfer Photos Directly To USB
- How To Transfer Photos From Android To USB
- How To Transfer Photos From iPhone To USB
- Choosing The Right USB Drive For Your Phone
- Common Problems And How To Fix Them
- Best Practices For Organizing And Backing Up Photos
- Frequently Asked Questions
- Conclusion
Understanding How Photo Transfer From Phone To USB Works
Before you grab a USB drive and start copying files, it helps to understand what is actually happening. When you transfer photos from phone to USB, you are moving digital image files from your phone’s internal storage or SD card to an external storage device. The USB drive acts like a portable hard drive that holds your pictures safely.
Your phone uses a file system to organize data. The USB drive also uses a file system. For the two to communicate smoothly, they need to speak the same language. This is why file format matters — we will cover that in detail later. The connection between your phone and the USB drive can happen through a cable, an adapter, or even wirelessly.
Why Direct USB Transfer Is So Popular
Direct USB transfer has become a go-to method for several reasons. First, it is fast. You are not uploading files to the cloud and waiting for them to download somewhere else. Second, it is private. Your photos stay on a physical device you control, not on someone else’s servers. Third, it is simple. One cable, a few taps, and your photos are on the USB drive.
Another big reason is independence. You do not need Wi-Fi, and you do not need a computer. This makes USB transfer ideal for travel, quick backups, or sharing photos at events where internet access is limited. If you have ever struggled with slow uploads or cloud storage limits, direct photo transfer to a USB stick will feel like a breath of fresh air.
Methods To Transfer Photos Directly To USB
There is no single right way to move photos from your phone to a USB drive. The best method depends on your phone type, the USB drive you have, and what tools you are comfortable using. Here are the most effective approaches.
Method 1: USB Cable Direct Connection
This is the simplest method for most people. You take a USB cable that fits your phone — usually a USB-C cable for newer phones or a Lightning cable for iPhones — and connect your phone directly to a USB drive. But here is the catch: most phones cannot read standard USB drives on their own.
For Android phones, many newer models support USB On-The-Go, commonly called OTG. This feature lets your phone act as a host device, meaning it can connect to and read from USB peripherals like flash drives. If your Android phone supports OTG, you can plug a USB drive straight into your phone using a simple adapter or a USB drive with a built-in phone connector.
For iPhones, the process is a bit different. Apple uses a proprietary Lightning connector, so you need a special adapter. Apple sells its own Lightning to USB 3 Camera Adapter, which lets you connect USB drives directly to your iPhone. Third-party options work too, but make sure they are MFi certified — this means Apple has approved them for safe use.
Method 2: Wireless USB Transfer Devices
If you do not want to deal with cables at all, wireless USB transfer devices are a great alternative. These small gadgets plug into your USB drive and create a local Wi-Fi network. Your phone connects to this network through an app, and you can transfer files without any physical connection.
Popular brands like SanDisk iXpand and Kingston Wireless offer drives with built-in wireless capabilities. You just download their app, connect your phone to the drive’s Wi-Fi signal, and start moving photos. These devices are especially handy for people who do not want to carry extra cables or adapters around.
The downside is speed. Wireless transfers are generally slower than wired connections. If you are moving a large batch of high-resolution photos, a cable-based method will be noticeably faster. But for everyday backups or sharing a handful of images, wireless works perfectly fine.
Method 3: Using A Computer As A Bridge
This is the traditional approach, and it still works well. You connect your phone to your computer using a USB cable, then connect your USB drive to another USB port on the same computer. From there, you drag and drop photos from your phone to the USB drive.
Some people prefer this method because it gives them more control over file management. You can preview photos, organize them into folders, and check file sizes before copying. The trade-off is that you need a computer nearby, which defeats the purpose if you want a quick, on-the-go transfer.
That said, if you are already sitting at a desk and your phone is charging, using your computer as a bridge is a perfectly valid way to move photos to USB. It is reliable and does not require any extra adapters.
How To Transfer Photos From Android To USB
Android phones make USB photo transfer fairly straightforward. Most modern Android devices running Android 6.0 or later support OTG functionality. Here is a step-by-step walkthrough for the direct cable method.
- Get a USB OTG adapter or a USB drive with a built-in phone connector. These are inexpensive and widely available online or at electronics stores.
- Plug the USB drive into the OTG adapter. Then connect the adapter to your phone’s charging port.
- Your phone should recognize the USB drive. You will see a notification that a new storage device is connected. Tap on it.
- Open your phone’s file manager. This could be “Files” on Samsung, “Files by Google,” or your device’s default file app.
- Navigate to your Photos folder. Look for the DCIM folder — this is where your camera photos are stored.
- Select the photos you want to transfer. You can tap and hold to select multiple images, or select entire folders.
- Choose the copy or move option. Then navigate to the USB drive and paste the files.
- Wait for the transfer to finish. Then safely eject the USB drive before unplugging it.
This process usually takes less than five minutes for a few hundred photos. If you are transferring thousands of high-resolution images, it might take longer depending on your USB drive’s speed.
Tips For Android Users
- Check OTG compatibility first. Not all Android phones support USB OTG. Check your phone’s specifications or look for a setting called “OTG” in your connectivity options.
- Use a USB 3.0 drive for faster speeds. Standard USB 2.0 drives work fine, but USB 3.0 drives transfer data much more quickly.
- Format your USB drive as FAT32 or exFAT. Android phones read these formats most reliably. We will explain more about formatting in the next section.
- Avoid pulling the USB drive out while transferring. This can corrupt your photo files and cause data loss.
How To Transfer Photos From iPhone To USB
iPhone users have a slightly different path, but transferring photos from iPhone to USB is absolutely doable. Apple’s ecosystem is more closed than Android, which means you need the right adapter or a compatible drive.
The official Apple Lightning to USB 3 Camera Adapter is the most reliable option. It has a Lightning connector on one end and a standard USB port on the other. You plug your USB flash drive into the adapter, then plug the adapter into your iPhone.
Once connected, open the Photos app on your iPhone. Go to the album or select the photos you want to move. Look for the share icon and choose “Save to Files.” Then select your USB drive as the destination. Your photos will be copied directly to the drive.
iPhone-Specific Tips
- Make sure your USB drive is formatted as exFAT or FAT32. iPhones do not read NTFS drives, which is the default format for Windows computers.
- Use an MFi-certified adapter. Non-certified adapters may not work or could damage your iPhone.
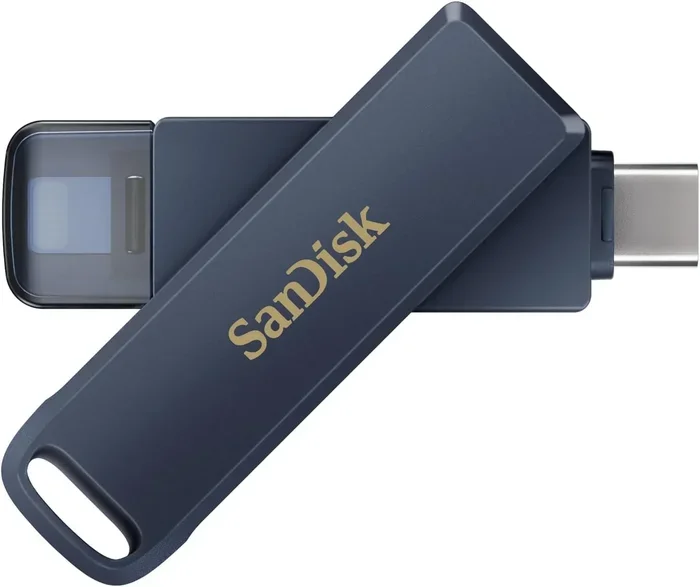
- Consider the SanDisk iXpand Flash Drive. This drive is specifically designed for iPhones and has a Lightning connector built in. It is one of the most popular options for iPhone users who want to transfer photos straight from phone to USB without carrying extra cables.
- The Files app on iPhone is your best friend. It manages all external storage connections and gives you a simple interface for copying files back and forth.
Choosing The Right USB Drive For Your Phone
Not all USB drives are created equal. If you want a smooth photo transfer experience, picking the right drive matters more than you might think. Here is what to look for.
File System Compatibility
This is the most important factor. USB drives come pre-formatted in different file systems, and your phone can only read certain ones. FAT32 is the most universally compatible format. It works with Android, iPhone, Windows, and Mac computers. The one limitation of FAT32 is that it cannot handle individual files larger than 4 GB.
exFAT is the next best option. It removes the 4 GB file size limit and works with most modern phones and computers. If you are dealing with large video files or very high-resolution photos, exFAT is the way to go. NTFS, the default Windows format, is not readable by most phones without extra software.
Speed And Performance
USB drive speed is measured by its class rating. USB 2.0 drives are the slowest but still work fine for small batches of photos. USB 3.0 drives offer significantly faster transfer speeds — often 10 times quicker than USB 2.0. If you regularly transfer large photo libraries, a USB 3.0 drive will save you a lot of waiting time.
Look for drives that advertise “USB 3.0” or “SuperSpeed” on the packaging. The read and write speeds are usually printed on the drive itself or in the product description. Aim for at least 30 MB/s write speed for comfortable photo transfers.
Drive Size And Capacity
USB flash drives come in sizes ranging from 8 GB to 256 GB or more. For photos, 32 GB is usually enough for several thousand images. If you shoot in RAW or store lots of high-resolution JPEGs, go for 64 GB or 128 GB. The price difference is small, and having extra space gives you room to grow.
Phone-Specific USB Drives
Some USB drives are designed specifically for phone-to-phone or phone-to-drive transfers. The SanDisk iXpand line, for example, has a Lightning connector on one end and a standard USB connector on the other. These drives eliminate the need for a separate adapter, which makes the whole process cleaner and more portable.
For Android users, drives with a USB-C connector built in are becoming more popular. You plug them straight into your phone — no adapter needed. Brands like Samsung and Kingston offer these in various capacities. They are slightly more expensive than standard drives, but the convenience is worth it for many people.
Common Problems And How To Fix Them
Even with the right setup, USB photo transfer does not always go smoothly. Here are the most common issues and how to solve them.
Phone Does Not Recognize The USB Drive
This is the number one complaint people have. If your phone does not detect the USB drive, the first thing to check is compatibility. Make sure your phone supports OTG if you are using an Android device. For iPhones, confirm you are using an MFi-certified adapter.
Next, check the file format of your USB drive. If it is formatted as NTFS, your phone will not read it. You can reformat the drive to FAT32 or exFAT using a computer. Remember that reformatting erases all data on the drive, so back up any existing files first.
Sometimes the problem is simply a loose connection. Try a different cable or a different port on your phone. Dust or debris in the charging port can also interfere with the connection. A quick blow or a gentle brush can fix this.
Transfer Speed Is Too Slow
If your photos are taking forever to copy, your USB drive might be the bottleneck. USB 2.0 drives are slow by today’s standards. Upgrading to a USB 3.0 drive can dramatically improve transfer speed.
Another cause is having too many files selected at once. Some phones struggle with bulk transfers of thousands of files. Try transferring in batches of 200 to 500 photos at a time. This keeps the process stable and often faster overall.
Photos Look Corrupted After Transfer
If your photos open but look glitchy or incomplete, the transfer may have been interrupted. Always wait for the transfer to fully complete before ejecting the USB drive. On Android, pull down the notification panel and tap “Eject.” On iPhone, remove the drive after the Files app confirms the copy is done.
Also, make sure your USB drive has enough free space. If the drive is nearly full, files may not copy completely, resulting in corrupted images.
Best Practices For Organizing And Backing Up Photos
Transferring photos to a USB drive is only half the battle. Keeping them organized and safe ensures your memories stay accessible for years to come.
Create A Folder System
When you plug your USB drive into a computer, create folders by date or event. For example, “2024-01-Vacation” or “2024-03-Family Reunion.” This makes it easy to find specific photos later without scrolling through thousands of files.
On your phone, you can also use the file manager to create folders on the USB drive before transferring. Name each folder clearly so you know exactly what is inside without opening it.
Back Up Your USB Drive Too
A USB drive is a physical object. It can be lost, damaged, or stolen. For important photos, always keep at least one additional backup. This could be a cloud storage service like Google Photos, iCloud, or Dropbox. The 3-2-1 backup rule is a good guideline: keep three copies of your photos, on two different types of media, with one copy stored offsite.
Eject Safely Every Time
This sounds basic, but it makes a huge difference. Always use the eject or safely remove option before unplugging your USB drive. Pulling it out while data is still writing can corrupt files and make your photos inaccessible.
On Android, the eject option appears in your notification panel. On iPhone, you remove the drive from the Files app. On a computer, right-click the drive icon and select “Eject” or “Safely Remove.”
Frequently Asked Questions
Do I Need Any Special Equipment To Transfer Photos From My Phone To A USB Drive?
For most Android phones, you need either a USB drive with a built-in phone connector or a USB OTG adapter. For iPhones, you need Apple’s Lightning to USB Camera Adapter or a compatible MFi-certified alternative. Both adapters cost between $10 and $25, making this an affordable solution.
Can I Transfer Photos From Phone To USB Without A Computer?
Yes, absolutely. If your Android phone supports OTG, or if you use an iPhone with the right adapter, you can connect a USB drive directly to your phone and transfer photos without a computer. Wireless USB drives also eliminate the need for a computer entirely.
What File Format Should My USB Drive Be In For Phone Compatibility?
FAT32 and exFAT are the two most compatible file formats. FAT32 works with virtually all phones and computers but has a 4 GB file size limit. exFAT removes that limit and works with most modern devices. Avoid NTFS unless you are using a Windows computer as a bridge.
How Long Does It Take To Transfer Photos To A USB Drive?
For a few hundred standard-resolution photos, the transfer usually takes less than two minutes. Larger batches or high-resolution images may take 5 to 15 minutes depending on your USB drive speed. USB 3.0 drives are significantly faster than USB 2.0 drives for bulk transfers.
Is It Safe To Store Photos Long-Term On A USB Flash Drive?
USB flash drives are convenient for short- to medium-term storage, but they are not designed for decades of archival storage. The flash memory can degrade over time, especially if the drive is left unplugged for years. For long-term photo preservation, use the USB drive alongside a cloud backup or an external hard drive.
Can I Transfer Videos Along With Photos Using These Methods?
Yes, you can transfer videos the same way you transfer photos. The process is identical — just select video files in your file manager and copy them to the USB drive. Keep in mind that video files are much larger than photos, so they take longer to transfer and require more storage space on your USB drive.
Conclusion
The answer to can I transfer photos straight from phone to USB is a clear and definitive yes. Whether you use an Android phone or an iPhone, there is a method that works for you. Direct USB cable connections, OTG adapters, wireless transfer devices, and even using your computer as a bridge — all of these options get your photos onto a USB drive quickly and safely.
The key is choosing the right tools. A compatible USB drive, the correct adapter, and the right file format make all the difference. Follow the steps in this guide, avoid the common mistakes, and you will have your photos backed up and your phone storage freed up in no time.
Start today. Plug in your USB drive, move a few photos over, and feel the satisfaction of knowing your memories are safe, organized, and easy to access whenever you need them. Transferring photos from phone to USB is one of the simplest and most rewarding tech skills you can learn, and now you know exactly how to do it.