Can I Install Windows 11 From A USB Hard Drive Now
You can absolutely install Windows 11 from a USB hard drive. This method works great when your PC has no DVD drive or when you want a portable installation setup. Installing Windows 11 from a USB hard drive gives you more storage space for drivers and tools. Follow our simple guide to create a bootable USB, change your BIOS settings, and complete the setup in under an hour. Whether you are upgrading or doing a clean install, a USB hard drive makes the process easy and reliable.
So you want to know if you can install Windows 11 from a USB hard drive. The short answer is yes. You absolutely can. Many people prefer this method over using a USB flash drive because a USB hard drive offers more storage space. It also lets you carry extra drivers and tools alongside your Windows 11 setup files.
Installing Windows 11 from a USB hard drive is not complicated. You do not need to be a tech expert. With the right tools and a few simple steps, you can have a bootable USB hard drive ready to go. This guide walks you through everything from start to finish. You will learn what you need, how to prepare your drive, and how to install Windows 11 without any headaches.
Whether you are building a new PC, upgrading an old one, or fixing a computer that will not turn on, a USB hard drive is a great option. Let us dive into the full process and get you set up.
Key Takeaways
- USB Hard Drive Works: You can use a USB hard drive to install Windows 11 just like a USB flash drive.
- Create Bootable Media First: Use the Media Creation Tool or manual methods to make your USB hard drive bootable.
- BIOS Setup Matters: Changing the boot order in your BIOS is the key step many people miss.
- Check System Requirements: Your PC must meet Windows 11 requirements like TPM 2.0 and Secure Boot before you start.
- USB 3.0 Is Faster: Always use a USB 3.0 port for quicker installation times and fewer errors.
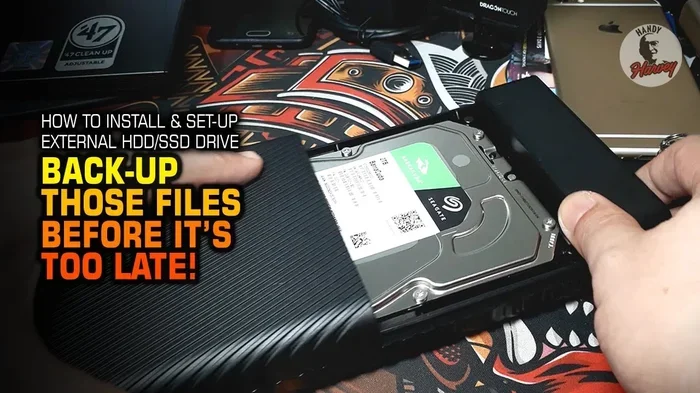
- Back Up Your Data: Always save your important files before starting any Windows installation.
📑 Table of Contents
- What You Need Before You Start
- How to Create a Bootable USB Hard Drive for Windows 11
- Step-by-Step Windows 11 Installation From USB
- USB Hard Drive vs USB Flash Drive for Windows 11
- Common Mistakes to Avoid During Installation
- Expert Tips for a Smooth Windows 11 Setup
- Can You Install Windows 11 From a USB Hard Drive on Any PC?
- Final Thoughts on Installing Windows 11 From a USB Hard Drive
What You Need Before You Start
Before you begin, make sure you have everything ready. Skipping this step can cause delays and frustration later on. Here is what you need to gather before you start installing Windows 11 from a USB hard drive.
USB Hard Drive Requirements
Not just any USB hard drive will work. Here are the basic requirements:
- Storage Space: You need at least 64 GB of free space. Windows 11 ISO files take up about 6 GB, but you want extra room for drivers and updates.
- USB Connection: A USB 3.0 or USB 3.1 connection is highly recommended. It makes the installation much faster than USB 2.0.
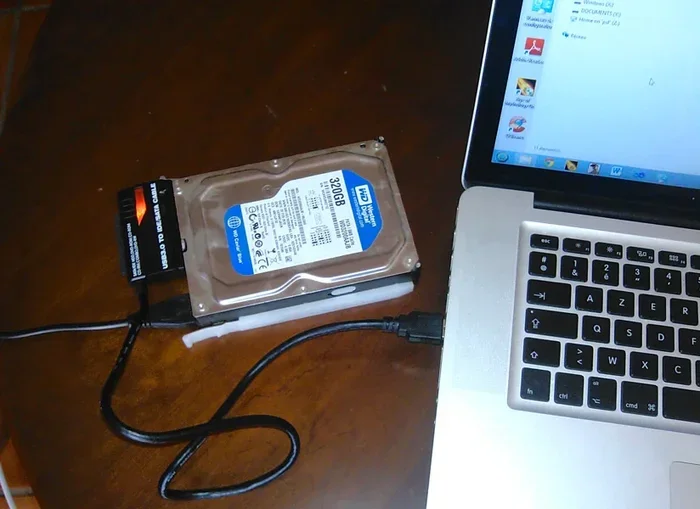
- External Hard Drive: A portable external USB hard drive works perfectly. You can also use an internal hard drive connected through a USB adapter.
- Reliable Brand: Use a trusted brand like Western Digital, Seagate, or Toshiba. Cheap, unknown brands can fail during installation.
Windows 11 System Requirements
Your PC must meet the Windows 11 system requirements before you try to install it. Here are the key ones:
- Processor: 1 GHz or faster with at least two cores on a compatible 64-bit processor.
- RAM: At least 4 GB of memory.
- Storage: 64 GB or larger storage device.
- TPM: Trusted Platform Module version 2.0.
- Secure Boot: UEFI firmware with Secure Boot capability.
- Graphics: Compatible with DirectX 12 or later with a WDDM 2.0 driver.
- Display: At least 9 inches with HD resolution (720p).
You can run the PC Health Check tool from Microsoft to verify your PC is compatible. This tool checks all the requirements automatically and tells you if your system is ready.
Tools You Will Need
Here is a quick list of tools to have on hand:
- A working computer to create the bootable USB hard drive
- Another USB port for the target PC you are installing Windows 11 on
- A Windows 11 product key (optional during setup but required for activation)
- An internet connection for downloading the ISO file
- A backup of your important files on the target PC
Quick Tip
Always back up your personal files before starting any Windows installation. Even if you are doing an upgrade, things can go wrong. A simple copy to an external drive saves a lot of stress.
How to Create a Bootable USB Hard Drive for Windows 11
Now comes the important part. You need to make your USB hard drive bootable. This means turning it into a drive that can start the Windows 11 setup process. There are two main ways to do this.
Method 1: Use the Media Creation Tool
The easiest way is to use Microsoft’s free Media Creation Tool. Here is how:
- Go to the official Microsoft Windows 11 download page on a working computer.
- Click the Download Now button for the Media Creation Tool.
- Run the tool and accept the license terms.
- Choose Create installation media for another PC.
- Select your language, edition, and architecture (64-bit is standard now).
- Choose USB flash drive as the media type.
- Plug in your USB hard drive and select it from the list.
- Wait for the tool to download and prepare the bootable drive.
This method takes about 15 to 30 minutes depending on your internet speed. The Media Creation Tool handles everything for you. It downloads the Windows 11 ISO file and copies it to your USB hard drive automatically.
Method 2: Use the ISO File Manually
If you prefer more control, you can create the bootable drive manually. Here is what to do:
- Download the Windows 11 ISO file from the Microsoft website.
- Download a tool like Rufus or BalenaEtcher on your working computer.
- Plug in your USB hard drive.
- Open Rufus and select your USB hard drive from the device dropdown.
- Click SELECT and choose the Windows 11 ISO file you downloaded.
- Leave the partition scheme as GPT and the target system as UEFI.
- Click START and wait for the process to finish.
The manual method gives you more flexibility. You can also add extra drivers or files to the USB hard drive before booting. This is helpful if your PC needs specific drivers that Windows 11 does not include by default.
Formatting Your USB Hard Drive Correctly
Before you make your USB hard drive bootable, you should format it properly. Here is the best way to do it:
- Plug your USB hard drive into your computer.
- Open File Explorer and right-click on the USB drive.
- Select Format from the menu.
- Choose NTFS as the file system.
- Give it a name like Windows11Setup.
- Click Start and wait for the format to complete.
Formatting erases everything on the drive. Make sure you do not have any important files on it before you start. If you need to keep files on the drive, back them up first.
Expert Insight
Some people ask if they can use a USB hard drive with multiple partitions. Yes, you can. But for the smoothest experience, format the entire drive as a single NTFS volume. This avoids boot errors and compatibility issues during the Windows 11 setup process.
Step-by-Step Windows 11 Installation From USB
Now that your USB hard drive is ready, it is time to install Windows 11 on your target PC. This section walks you through the entire process step by step.
Change the Boot Order in BIOS
The most important step is telling your PC to boot from the USB hard drive instead of the internal hard drive. Here is how:
- Plug your USB hard drive into the target PC.
- Turn on or restart the PC.
- Press the BIOS key repeatedly as soon as the PC starts. Common keys are F2, F12, Del, or Esc. Check your PC manufacturer’s website if you are unsure.
- Find the Boot Order or Boot Priority section in the BIOS menu.
- Move your USB hard drive to the top of the boot list.
- Save the changes and exit BIOS.
Your PC should now restart and boot from the USB hard drive. You will see the Windows 11 setup screen appear. If you do not, go back into BIOS and double-check the boot order.
Start the Windows 11 Setup
Once your PC boots from the USB hard drive, follow these steps:
- Select your language, time format, and keyboard layout.
- Click Install Now.
- Enter your product key if you have one. You can also click I do not have a product key to install first and activate later.
- Choose the edition of Windows 11 you want to install.
- Accept the license terms.
- Choose Custom: Install Windows only for a clean install.
Select the Drive and Complete Installation
You will now see a list of drives on your PC. Here is what to do:
- Select the drive where you want to install Windows 11.
- If the drive has an old operating system, you can delete the partitions first. Click Delete and then select the unallocated space.
- Click Next and Windows 11 will start installing.
- The process takes about 20 to 40 minutes. Your PC will restart several times during this process.
After the installation finishes, you will go through the Out-of-Box Experience (OOBE). This is where you set up your user account, privacy settings, and connect to Wi-Fi. Follow the on-screen prompts to complete the setup.
Quick Tip
If your PC does not recognize the USB hard drive during setup, try pressing Shift + F10 at the driver selection screen. This opens a command prompt where you can run diskpart commands to make the drive visible.
USB Hard Drive vs USB Flash Drive for Windows 11
You might wonder whether a USB hard drive is really better than a USB flash drive for installing Windows 11. Let us compare the two options side by side.
Speed and Performance
USB flash drives are generally faster for booting and installing Windows 11. They have no moving parts, so they read data quickly. USB hard drives have spinning disks, which makes them slightly slower. However, modern USB 3.0 external hard drives are fast enough for a smooth installation experience.
Storage Capacity
This is where USB hard drives shine. A typical USB flash drive holds 32 GB to 128 GB. A USB hard drive can hold 500 GB, 1 TB, or even more. With a USB hard drive, you can store the Windows 11 ISO file, all your drivers, backup tools, and even additional software in one place.
Which One Should You Choose?
| Feature | USB Flash Drive | USB Hard Drive |
|---|---|---|
| Speed | Faster | Slightly slower |
| Capacity | 32 GB – 128 GB | 256 GB – 4 TB |
| Durability | More durable (no moving parts) | Less durable (moving parts) |
| Price | Cheaper for small sizes | Better value for large storage |
| Portability | Very portable | Slightly bulkier |
| Best For | Quick installations | Carrying extra tools and drivers |
For most people, a USB flash drive is the go-to choice for a simple Windows 11 installation. But if you want a portable toolkit with drivers, recovery tools, and the ISO file all in one place, a USB hard drive is the better option.
Common Mistakes to Avoid During Installation
Even with a good guide, people still make mistakes. Here are the most common ones and how to avoid them.
Skipping the PC Health Check
Many people jump straight into the installation without checking if their PC is compatible. This leads to errors and frustration. Always run the PC Health Check tool first. It takes less than a minute and saves you a lot of trouble.
Using the Wrong USB Port
Plugging your USB hard drive into a USB 2.0 port instead of a USB 3.0 port is a common mistake. USB 2.0 is much slower and can cause timeouts during the installation. Always look for the blue USB port or the USB 3.0 symbol on your motherboard or PC.
Forgetting to Back Up Data
This one is obvious but still happens all the time. A clean install of Windows 11 erases everything on the selected drive. If you have important files, pictures, or documents, back them up to another drive or cloud storage before you start.
Not Updating BIOS Before Installation
An outdated BIOS can cause compatibility issues with Windows 11. Check your motherboard or PC manufacturer’s website for BIOS updates before you begin. Updating the BIOS is simple and can prevent many installation problems.
Choosing the Wrong Drive During Setup
It sounds simple, but selecting the wrong drive during Windows setup can erase important data. Double-check which drive you are selecting. If you are unsure, unplug other drives temporarily and only keep the target drive connected.
Common Mistakes Summary
- Not checking PC compatibility before starting
- Using USB 2.0 instead of USB 3.0
- Skipping data backups
- Ignoring BIOS updates
- Selecting the wrong target drive
Expert Tips for a Smooth Windows 11 Setup
Here are some expert-level tips that will make your installation of Windows 11 from a USB hard drive even smoother. These tips come from years of experience helping people set up Windows on their PCs.
Use a USB 3.0 Port for Faster Installation
USB 3.0 ports are clearly marked, usually with a blue color inside the port. Using USB 3.0 instead of USB 2.0 can cut your installation time in half. The faster data transfer speed means the setup files load quicker and the installation progresses faster.
Keep Your Drivers Ready
Before you start, download the latest drivers for your PC from the manufacturer’s website. This includes graphics drivers, network drivers, and audio drivers. Store them on your USB hard drive alongside the Windows 11 ISO file. After installation, you can install them right away without needing internet access.
Update Windows 11 Immediately After Setup
Once Windows 11 is installed and you are at the desktop, go to Settings and check for updates. Install all available updates before you start using your PC. This ensures you have the latest security patches and bug fixes right from the start.
Create a System Restore Point
After installation, create a system restore point. This is a snapshot of your PC’s current state. If something goes wrong later, you can restore your PC to this point. Go to Control Panel, search for Create a restore point, and follow the prompts.
Keep Your USB Hard Drive for Future Use
Your USB hard drive with the Windows 11 setup files is a valuable tool. Keep it in a safe place. You never know when you might need to reinstall Windows 11. Having a bootable USB hard drive ready saves you time and effort whenever you need to fix a PC problem.
Pro Tip from the Experts
Consider creating a full system image of your freshly installed Windows 11 setup. You can store this image on your USB hard drive alongside the setup files. If your PC ever crashes, you can restore the entire system to exactly how it was. Tools like Macrium Reflect or Windows built-in backup make this easy.
Can You Install Windows 11 From a USB Hard Drive on Any PC?
The short answer is yes, with a few exceptions. Installing Windows 11 from a USB hard drive works on most modern PCs. Here are some situations where it works especially well:
- Older PCs without a DVD drive: Many modern PCs do not come with optical drives anymore. A USB hard drive is a perfect replacement for installing Windows.
- Multiple PCs: You can use the same USB hard drive to install Windows 11 on several different computers. Just boot from it on each PC.
- PCs with failed internal drives: If your internal hard drive has failed, you can install Windows 11 on a new drive using your USB hard drive as the source.
- Building a new PC: When you build a custom PC, you do not have an operating system pre-installed. A USB hard drive with Windows 11 makes the first boot easy.
There are a few situations where you might run into issues. Very old PCs from before 2015 might not support USB booting from a hard drive. Some older laptops have BIOS limitations that prevent booting from external USB storage. Always check your PC’s manual or manufacturer website if you are unsure.
What About Secure Boot and UEFI?
Windows 11 requires Secure Boot and UEFI firmware. Most PCs made after 2012 support these features. If your PC is older, you might need to update the BIOS or enable these features manually. The process varies by manufacturer, but you can usually find instructions on the manufacturer’s support website.
To check if your PC supports UEFI and Secure Boot:
- Press Windows Key + R to open the Run dialog.
- Type msinfo32 and press Enter.
- Look for BIOS Mode. It should say UEFI.
- Look for Secure Boot State. It should say On.
If both of these are set correctly, you should have no trouble booting from your USB hard drive and installing Windows 11.
Final Thoughts on Installing Windows 11 From a USB Hard Drive
Installing Windows 11 from a USB hard drive is a practical, flexible, and reliable method. It gives you more storage space than a flash drive and lets you carry all your installation tools in one place. Whether you are doing a clean install or upgrading an existing PC, this approach works well for most users.
The process might seem intimidating at first, but it is really quite simple once you break it down. Create your bootable USB hard drive, change the boot order in BIOS, and follow the on-screen prompts. You will have Windows 11 up and running in no time.
Remember to always back up your data first, check your PC compatibility, and use a USB 3.0 connection for the best experience. Keep your USB hard drive with the Windows 11 setup files handy. It is a tool you will be glad to have whenever you need to reinstall or fix Windows 11 on any computer.
Now that you know how easy it is to install Windows 11 from a USB hard drive, there is no reason not to try it. Gather your materials, follow the steps in this guide, and enjoy your fresh Windows 11 installation.
Frequently Asked Questions
Can I use any external USB hard drive to install Windows 11?
Yes, most external USB hard drives work for installing Windows 11. The drive should have at least 64 GB of storage and connect via USB 3.0 for the best performance. Make sure the drive is formatted as NTFS and is recognized by your PC before you start the process.
Do I need a product key to install Windows 11 from a USB hard drive?
You can install Windows 11 without entering a product key during setup. However, you will need a valid Windows 11 product key to activate the operating system and access all features. You can purchase a product key from Microsoft or an authorized retailer.
Is it better to use a USB hard drive or a USB flash drive for Windows 11 installation?
A USB flash drive is faster and more durable for the actual installation process. A USB hard drive offers more storage space, which is useful if you want to store extra drivers, recovery tools, or the ISO file on the same drive. Choose based on your specific needs.
Can I install Windows 11 from a USB hard drive on an older PC?
It depends on your PC’s hardware and BIOS support. Most PCs made after 2012 support booting from USB external hard drives. However, Windows 11 also requires TPM 2.0 and Secure Boot, which may not be available on very old PCs. Check your PC compatibility before attempting the installation.
How long does it take to install Windows 11 from a USB hard drive?
The installation process typically takes 20 to 40 minutes. The time varies based on your PC’s hardware, the speed of your USB connection, and whether you are doing a clean install or an upgrade. Using a USB 3.0 port significantly reduces installation time.
What should I do if my PC does not boot from the USB hard drive?
First, check that the USB hard drive is plugged into a USB 3.0 port. Then restart your PC and enter the BIOS settings. Make sure the USB hard drive is set as the first boot device. If the issue persists, try recreating the bootable USB hard drive using the Media Creation Tool or Rufus.
=== CONCLUSION ===
Installing Windows 11 from a USB hard drive is a straightforward and effective method for setting up or reinstalling Windows 11 on any compatible PC. You now know everything you need, from the hardware requirements to the step-by-step installation process. You also understand the differences between USB hard drives and flash drives, common mistakes to avoid, and expert tips to ensure a smooth experience.
The key to success is preparation. Have your USB hard drive ready, check your PC compatibility, back up your data, and follow each step carefully. With a bootable USB hard drive in hand, you are ready to install Windows 11 anytime, anywhere, on almost any PC.
Start your project today. Create your bootable USB hard drive, and enjoy the speed, security, and features that Windows 11 brings to your computer. You have got this.