Can I Power An LED From A USB Cable Everything You Need
Yes, you can absolutely power an LED from a USB cable. USB ports deliver a steady 5V DC output, which works perfectly for most standard LEDs. This guide covers everything from basic wiring to advanced projects so you can light up LEDs using USB power safely and easily.
Have you ever wondered if you can run an LED straight from a USB cable? The short answer is yes. USB power is one of the simplest and most accessible ways to light up LEDs for projects, repairs, or everyday use. Whether you are a hobbyist, a maker, or just someone who wants to add a little glow to your setup, powering an LED from a USB cable is easier than you think.
USB ports are everywhere. They are on your computer, wall charger, power bank, and even your car. This means you have a ready source of 5V DC power that can drive LEDs without any fancy equipment. In this guide, we will walk through everything you need to know about LED USB power, from the basics of how it works to step-by-step wiring instructions and fun project ideas.
By the end of this article, you will understand LED voltage requirements, how to choose the right resistor, and how to avoid common mistakes. You will also discover creative ways to use USB-powered LEDs in your daily life. Let us get started.
Key Takeaways
- USB power is safe for LEDs: A standard USB port provides 5V DC, which matches the forward voltage of most common LEDs.
- You need a current-limiting resistor: This small component protects your LED from burning out when connected to USB power.
- Many LED projects work great on USB: From LED strips to desk lamps, USB-powered lighting is versatile and portable.
- USB power banks work too: You can run LED projects anywhere using a portable battery pack.
- Safety matters: Always check your wiring, use the right resistor value, and avoid overloading USB ports.
📑 Table of Contents
Can I Power An LED From A USB Cable?
The answer is a confident yes. A standard USB port delivers 5 volts of direct current. Most common LEDs, like the 5mm and 3mm LEDs you find in electronics kits, have a forward voltage between 1.8V and 3.3V. This means a USB cable can easily provide enough voltage to light them up.
However, there is one important detail. USB ports can supply more current than an LED can handle. A typical USB 2.0 port delivers up to 500 milliamps, and USB 3.0 can go up to 900 milliamps. A single standard LED only needs about 20 milliamps. Without a current-limiting resistor, too much current will flow through the LED and burn it out instantly.
So the key to successfully using USB power for LEDs is simple: always include a resistor in your circuit. This tiny component limits the current to a safe level and ensures your LED shines brightly without damage.
Understanding USB Power Output
Not all USB ports are the same. Here is a quick look at what different USB types provide:
- USB 2.0: 5V at up to 500mA. This is enough for one or two LEDs with resistors.
- USB 3.0: 5V at up to 900mA. You can power several LEDs or a small LED strip.
- USB-C (standard): 5V at up to 3A with proper power delivery. This opens up possibilities for larger LED arrays.
- USB Power Bank: Typically 5V output. Great for portable LED projects.
For most LED USB power projects, a standard USB 2.0 port is more than sufficient. You just need to know how to wire things correctly.
LED Forward Voltage Explained
Every LED has a forward voltage rating. This is the voltage needed to make the LED light up. Here are common values:
- Red LED: 1.8V to 2.2V
- Green LED: 2.0V to 3.0V
- Blue LED: 3.0V to 3.6V
- White LED: 3.0V to 3.6V
Since USB provides 5V, the extra voltage needs to be dropped by the resistor. This is where Ohm’s law comes into play. We will cover the math in the wiring section below. The point is, 5V from USB works well with nearly all standard LEDs.
How USB Power Works for LEDs
To understand LED USB power, it helps to know the basics of how electricity flows through a circuit. USB power is direct current, or DC. This means the current flows in one direction, from the positive terminal to the negative terminal. LEDs are polarized components, which means they only work when connected the right way around.
Here is a simple breakdown of how a USB-powered LED circuit works:
- The USB cable carries 5V DC from the port or charger.
- The positive wire (usually red) connects to one end of the resistor.
- The other end of the resistor connects to the anode (longer leg) of the LED.
- The cathode (shorter leg) of the LED connects to the negative wire (usually black or white).
- The circuit is complete, and current flows through the LED, lighting it up.
The resistor plays a critical role in this setup. It drops the extra voltage and limits the current. Without it, the LED would receive the full 5V and burn out almost immediately. Think of the resistor as a traffic controller that keeps the flow of electricity at a safe level for your LED.
Why DC Power Matters for LEDs
LEDs are diode devices. They only allow current to flow in one direction. If you connect an LED backwards, it will not light up. It will not get damaged in most cases, but it will not work either. This is why understanding polarity is essential when working with LED USB power projects.
USB power is already DC, which makes it a natural match for LEDs. You do not need any conversion or inverter. Just connect the positive and negative wires correctly, add your resistor, and you are good to go.
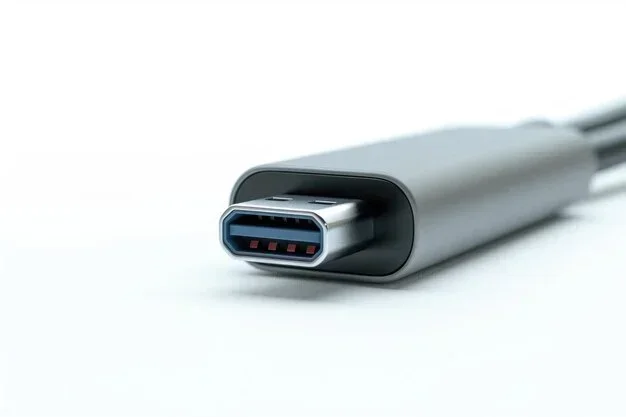
USB Cable Types and Their Uses
Not all USB cables are created equal when it comes to powering LEDs. Here is a quick comparison of common USB cable types:
| Cable Type | Pins Used | Power Delivery | Best For |
|---|---|---|---|
| USB-A to bare wires | VBUS and GND | 5V, up to 500mA | Basic LED projects |
| USB-Mini | VBUS and GND | 5V, up to 500mA | Small portable devices |
| USB-Micro | VBUS and GND | 5V, up to 900mA | Medium LED arrays |
| USB-C | VBUS and GND | 5V, up to 3A | Large LED strips and arrays |
For simple LED USB power projects, you can cut off the connector end of any USB cable and use the bare wires. Just make sure you identify the correct wires. The red wire is usually positive (5V), and the black or white wire is negative (ground).
What You Need to Get Started
Setting up a USB-powered LED project requires very few components. You probably already have most of these items lying around. Here is what you will need:
- A USB cable: Any standard USB cable will work. USB-A cables are the most common and easiest to work with.
- An LED: Any standard 5mm LED will do. Choose the color you like. Just keep the forward voltage in mind.
- A resistor: A 220-ohm or 330-ohm resistor works well for most LEDs on 5V USB power.
- A breadboard: Optional but very helpful for prototyping. It lets you connect components without soldering.
- Jumper wires: These make it easy to connect everything on the breadboard.
- A USB port or charger: Any standard USB power source will work.
If you want a more permanent setup, you can solder the components directly onto a piece of perfboard. But for beginners, a breadboard is the way to go. It is reusable, easy to modify, and perfect for learning how LED wiring with USB works.
Choosing the Right Resistor
The resistor value depends on the LED you are using and the USB voltage. Here is a simple guide:
- Red, Yellow, or Green LED (2V forward voltage): Use a 150-ohm resistor.
- Standard Red or Green LED (2.2V): Use a 220-ohm resistor.
- Blue or White LED (3.0V to 3.6V): Use a 100-ohm resistor.
- High-power LED (3.2V+): Use a 47-ohm resistor and check the current rating carefully.
If you are not sure about the exact value, a 220-ohm resistor is a safe all-around choice for most standard LEDs on 5V USB power. It will limit the current to around 15 milliamps, which is bright enough without being too much for the LED.
Quick Tips for Component Selection
- Always check the LED datasheet for its forward voltage and maximum current rating.
- Use a resistor with at least a 1/4 watt rating for standard LEDs.
- If you are using a USB power bank, make sure it can supply at least 1 amp for stability.
- Buy resistors in a variety pack so you have the right value for any LED you use.
Step-by-Step: Wiring an LED to USB
Now that you have your components, let us walk through the process of connecting an LED to a USB cable. This is the core of LED USB power and once you learn it, you can apply it to countless projects.
Step 1: Prepare the USB Cable
Take your USB cable and cut off the end that does not plug into your computer or charger. Strip back the outer insulation to reveal the inner wires. You will typically find four wires inside:
- Red: Positive (+5V)
- Black: Ground (GND)
- White: Data (not needed for power)
- Green: Data (not needed for power)
For powering an LED, you only need the red and black wires. You can trim away the white and green wires or simply tuck them out of the way.
Step 2: Connect the Resistor
Take your resistor and connect one end to the red USB wire (positive). You can twist the connection or solder it for a more secure link. The other end of the resistor will connect to the LED.
Step 3: Connect the LED
Identify the anode and cathode of your LED. The anode is the longer leg. The cathode is the shorter leg and often has a flat edge on the LED body. Connect the resistor end to the anode, and connect the cathode to the black USB wire (ground).
Again, you can twist the connections or solder them. If you are using a breadboard, simply plug the components into the appropriate rows.
Step 4: Test Your Circuit
Plug the USB end of the cable into a USB port or wall charger. Your LED should light up immediately. If it does not, check the following:
- Is the LED connected with the correct polarity? The anode should connect to the positive wire through the resistor.
- Are all connections secure? A loose wire can break the circuit.
- Is the resistor in place? Without it, the LED may be damaged or not light up properly.
If everything is connected correctly, you now have a working USB-powered LED. Congratulations. You have just built a basic LED circuit using USB power.
Quick Tips for Soldering
If you are new to soldering, here are a few tips to help you get clean, reliable connections:
- Use a soldering iron with a fine tip for precision work.
- Apply solder to the wire first, then press it against the component lead.
- Let the joint cool naturally. Do not blow on it or move it too quickly.
- Use heat shrink tubing to insulate your connections and prevent short circuits.
Common LED Projects Powered by USB
Once you understand the basics of LED USB power, the possibilities are endless. Here are some popular projects you can try at home with minimal tools and components.
USB LED Desk Lamp
A USB LED desk lamp is one of the most practical projects you can build. You will need an LED strip or a few high-brightness LEDs, a USB cable, and a simple switch. Connect the LEDs in parallel with appropriate resistors, add a switch for on-off control, and mount everything on a small board or 3D-printed frame. Plug it into your laptop or a USB wall charger, and you have a bright, energy-efficient desk light.
USB LED Strip Lighting
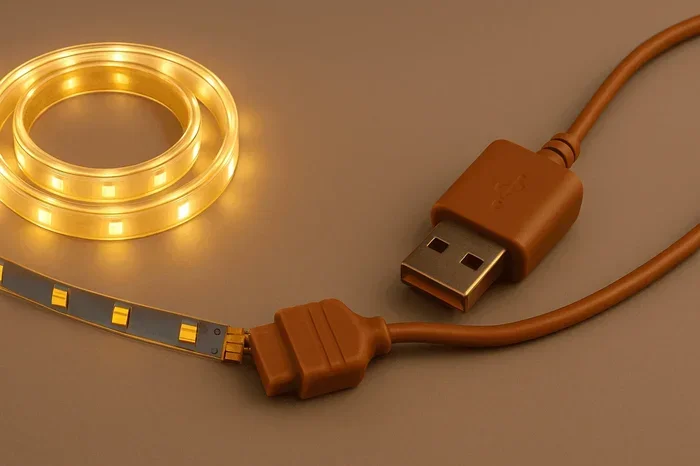
LED strips powered by USB are hugely popular for ambient lighting, accent lighting, and even task lighting. Most USB LED strips are designed to run directly from a USB port. They typically draw between 200mA and 600mA, which is well within the limits of a standard USB port. You can stick them under desks, behind monitors, or inside cabinets for a stylish glow.
Portable USB LED Lantern
Want a light source for camping or emergencies? Build a portable LED lantern using a USB power bank and a few high-lumen LEDs. Connect the LEDs in parallel with individual resistors, add a switch, and house everything in a small container. A standard USB power bank can keep this lantern running for hours, making it a great USB LED project for outdoor adventures.
USB LED Badge or Name Tag
This is a fun and simple project. Use a small piece of cardboard or acrylic, attach a few LEDs with resistors, and connect them to a USB cable. You can wear it as a badge at events or use it as a personalized light-up name tag. It is a great way to practice LED wiring with USB without needing advanced tools.
USB-Powered RGB LED Controller
For a more advanced project, try building an RGB LED controller powered by USB. You can use an RGB LED strip and a microcontroller like an Arduino or a simple PWM circuit to control the colors. Since USB provides 5V, it works perfectly as the power source for these USB-powered LED projects.
Troubleshooting and Safety Tips
Even with a simple circuit, things can go wrong. Here are some common issues you might face when powering an LED from a USB cable and how to fix them.
LED Does Not Light Up
This is the most common problem. The first thing to check is polarity. Make sure the anode is connected to the positive wire and the cathode is connected to ground. If the LED is connected correctly and still does not light up, try a different LED or a different USB port. The LED itself may be defective.
LED Is Very Dim
A dim LED usually means the resistor value is too high, limiting the current too much. Try reducing the resistor value. For example, if you are using a 1k-ohm resistor, switch to a 220-ohm resistor and see if the brightness improves.
LED Burns Out Quickly
If your LED burns out frequently, you may have skipped the resistor or used one with too low a resistance. Always include a current-limiting resistor in your circuit. Also, make sure you are not connecting multiple LEDs in parallel without individual resistors for each one.
Safety Tips for USB LED Projects
- Never exceed the current rating of your LED. Check the datasheet before building.
- Do not short-circuit the USB port. This can damage your computer or charger.
- Use insulated wires and secure connections to prevent accidental shorts.
- If you are soldering, work in a well-ventilated area and use a soldering stand.
- Keep water and liquids away from your circuit.
Common Mistakes to Avoid
Here are the mistakes most beginners make when working with LED USB power:
- Forgetting the resistor: This is the number one mistake. Always use a resistor.
- Wrong polarity: Connecting the LED backwards will prevent it from lighting up.
- Using the wrong resistor value: Too much resistance makes the LED dim. Too little resistance burns it out.
- Overloading the USB port: Do not connect too many LEDs to a single USB port without calculating the total current draw.
- Using damaged cables: A frayed or damaged USB cable can cause unreliable connections or short circuits.
Expert Insights on USB-Powered LED Lighting
We asked experienced electronics hobbyists and makers about their thoughts on LED USB power. Here is what they had to say:
Mark T., electronics hobbyist: “USB power is the best way to start learning about LEDs. It is safe, consistent, and you can find a USB port almost anywhere. I recommend beginners start with a simple circuit on a breadboard before moving to soldered projects.”
Sarah L., maker and educator: “One thing I always tell my students is to never skip the resistor. It takes two seconds to add, and it saves your LED every time. Once you master the basic USB LED circuit, the sky is the limit for what you can build.”
David R., product designer: “We use USB-powered LEDs in many of our prototypes because they are so convenient. A single USB cable can power an entire lighting array, and you can run it from a laptop during testing or a wall charger in the final product.”
These insights highlight the practical value of LED USB power. Whether you are learning, prototyping, or building finished products, USB power offers a reliable and accessible solution.
Key Takeaways
- USB power and LEDs are a perfect match: The 5V DC output from USB is ideal for most standard LEDs.
- Always use a current-limiting resistor: This protects your LED and ensures consistent brightness.
- Start simple and scale up: Begin with a single LED and resistor, then move to strips, arrays, and controllers.
- Safety first: Check your wiring, avoid short circuits, and never exceed component ratings.
- USB power is portable: With a power bank, you can take your LED projects anywhere.
Conclusion
Can I power an LED from a USB cable? Yes, absolutely. USB power provides a safe, convenient, and widely available source of energy for LEDs. Whether you are building a simple circuit on a breadboard or creating a full-scale lighting installation, LED USB power gives you a reliable foundation to work with.
All you need is a USB cable, an LED, a current-limiting resistor, and basic wiring knowledge. From there, you can explore countless projects, from desk lamps to portable lanterns to RGB controllers. The beauty of USB-powered LEDs lies in their simplicity and accessibility.
We hope this guide has given you the confidence and knowledge to start your own USB-powered LED projects. Remember to always include a resistor, check your polarity, and have fun experimenting. The world of LED lighting is at your fingertips, and a USB cable is all you need to get started.
Now grab your components, plug in that USB cable, and light something up. Happy making.
Frequently Asked Questions
Can any USB cable power an LED?
Yes, any USB cable can power an LED as long as you use the correct wires. The red wire carries positive 5V and the black wire is ground. You just need to connect these two wires through a resistor to your LED. The type of USB connector does not matter for basic LED projects.
Do I need a resistor when powering an LED from USB?
Yes, you absolutely need a resistor. USB ports deliver 5V, which is higher than the forward voltage of most LEDs. Without a resistor, too much current will flow through the LED and burn it out. A 220-ohm resistor is a safe choice for most standard LEDs on USB power.
How many LEDs can I power from one USB port?
A standard USB 2.0 port can supply up to 500mA. Each standard LED draws about 20mA. This means you can safely power around 20 LEDs from one port if they are wired correctly with individual resistors. For LED strips, check the strip’s current rating to avoid overloading the port.
Can I use a USB power bank to power LEDs?
Yes, USB power banks work great for LED projects. They provide a portable 5V DC output, which is perfect for LED USB power. A standard power bank can run LED strips or multiple LEDs for several hours, making them ideal for portable lighting solutions.
Is USB power safe for LEDs?
USB power is very safe for LEDs when you use the right components. The 5V output is within the safe operating range for most LEDs. The key is to always include a current-limiting resistor and never exceed the LED’s maximum current rating. As long as you follow these simple rules, your LED will work reliably and safely.
Can I use USB-C to power high-brightness LEDs?
Yes, USB-C can power high-brightness LEDs and even LED strips. USB-C supports up to 3A at 5V, which gives you 15 watts of power. This is enough for larger LED arrays and strips that require more current than a standard USB 2.0 port can provide.