Can I Install Macos From A Usb Yes You Absolutely Can
Yes, you can absolutely install macOS from a USB drive. Whether you want to do a clean install, reinstall your operating system, or set up a new Mac, a bootable USB installer is the fastest and most reliable method. You will need a USB flash drive, the macOS installer, and a few simple steps to get it all working. This guide walks you through the entire process in plain language, so anyone can follow along.
Have you ever wondered if you can install macOS from a USB drive? The answer is a resounding yes. A bootable USB installer is one of the most useful tools any Mac user can have. Whether your computer is running slow, you need to do a clean install, or you are setting up a brand new machine, a USB installer makes the whole process smooth and straightforward.
Creating a bootable USB installer might sound intimidating, but it is actually quite simple. You do not need to be a tech expert. With a USB flash drive, the macOS installer from the App Store, and a few easy steps, you can have a working installation drive in less than an hour. This guide will walk you through every single step, from choosing the right USB drive to finishing the installation.
Many people ask about USB installation because it offers real advantages over other methods. A bootable USB lets you install macOS on any compatible Mac without relying on an internet connection during the setup. It also gives you a clean slate, which is perfect when your Mac is running slowly or acting up. Let us dive into everything you need to know about installing macOS from a USB drive.
Key Takeaways
- You can install macOS from a USB drive: A bootable USB installer is the best way to do a clean install or reinstall macOS on any compatible Mac.
- You only need a USB flash drive: An 8GB or larger USB drive, preferably USB-C or USB 3.0, is all you need to create the installer.
- The process is simple and free: Apple provides the macOS installer for free through the App Store, and the Terminal commands to create the bootable drive are straightforward.
- You can use it on multiple Macs: A bootable USB installer works on any compatible Mac, making it a handy tool to keep on hand for troubleshooting.
- Back up your data first: Always back up your files before installing macOS, since a clean install erases everything on the target drive.
- USB-C drives work best: Modern Macs use USB-C or Thunderbolt ports, so a USB-C flash drive ensures faster and more reliable installation.
- Recovery Mode is your safety net: If anything goes wrong, macOS Recovery Mode lets you reinstall or repair your system easily.
📑 Table of Contents
Why Install macOS From a USB Drive?
There are several great reasons to use a USB installer instead of other methods. Some people prefer to download the installer directly, but a bootable USB gives you more control and flexibility. Here are the main benefits of using a USB flash drive for your macOS installation.
Clean Install Without Internet
When you install macOS from a USB drive, you do not need to stay connected to the internet during the entire process. The installer is already on the drive, so everything happens locally. This is a huge advantage if your internet connection is slow or unreliable. A clean install means you start fresh, which can dramatically improve your Mac’s performance.
Works on Multiple Macs
A bootable USB installer is a one-time setup that you can use over and over again. You can use it on different Mac computers as long as they are compatible with that version of macOS. This makes it a great tool to keep in your tech bag for emergencies or when you are helping friends and family with their Macs.
Faster Installation
Installing from a USB drive is significantly faster than downloading the installer on the spot. A USB 3.0 or USB-C flash drive can transfer data at high speeds, which means your macOS installation completes quickly. You spend less time waiting and more time using your Mac.
Easy Troubleshooting
If your Mac is having problems, a bootable USB installer lets you boot into a fresh copy of macOS. You can test whether the issue is with your software or hardware. This is incredibly helpful for diagnosing problems without affecting your existing data on the internal drive.
What You Need to Get Started
Before you start creating your bootable USB installer, gather everything you need. Having the right tools ready saves you time and frustration. Here is a simple checklist of what you will need for a successful USB installation.
USB Flash Drive
You need a USB flash drive with at least 16GB of storage. A 32GB drive is even better because it gives you extra room. Make sure your drive is USB 3.0 or USB-C for the fastest transfer speeds. Avoid using very old USB 2.0 drives, as they will be much slower and may cause issues during the installation process.
Important tip: creating a bootable USB will erase everything on the drive. Make sure you do not have any important files on it before you start. Back up any data you want to keep to another location first.
macOS Installer from the App Store
Apple makes the macOS installer available for free through the App Store. You can download the latest version of macOS, such as macOS Ventura or macOS Sonoma, directly from Apple’s website. The installer file is usually around 12GB to 15GB, so make sure you have enough free space on your Mac before downloading.
A Compatible Mac
You need a Mac that can run the version of macOS you want to install. Check Apple’s compatibility list to make sure your Mac supports the latest version. You can also use the USB installer to install older versions of macOS if needed, as long as your Mac supports that version.
Basic Terminal Knowledge
The process of creating a bootable USB installer uses the Terminal app on your Mac. Do not worry if you have never used Terminal before. We will walk you through every command step by step. You just need to be comfortable copying and pasting text commands.
How to Create a Bootable USB Installer
Now for the main event. Creating a bootable macOS installer from a USB drive is the most important step in the whole process. Follow these steps carefully, and you will have a working installer ready to go.
Step 1: Download the macOS Installer
Open the App Store on your Mac and search for the latest macOS version. Click Get to download the installer. The download may take some time depending on your internet speed. Once the download is complete, the installer will launch automatically. Quit the installer at that point so it stays in your Applications folder. You do not want to run the installation yet.
Step 2: Format Your USB Drive
Open Disk Utility on your Mac. You can find it by searching in Spotlight. Select your USB flash drive from the list on the left side. Click the Erase button at the top of the Disk Utility window. Choose the format as Mac OS Extended (Journaled) or APFS, depending on your macOS version. Name the drive something simple like MyUSB or macOSInstaller. Click Erase to format the drive. This will delete everything on the USB, so make sure you have backed up any important files.
Step 3: Open Terminal
Go to your Applications folder, then open the Utilities folder, and launch Terminal. Alternatively, you can search for Terminal using Spotlight. The Terminal window will look like a simple black screen with a blinking cursor. This is where the magic happens.
Step 4: Run the Terminal Command
Copy and paste the following command into Terminal, replacing the path with the actual name of your USB drive and the macOS installer:
sudo /Applications/Install\ macOS\ Ventura.app/Contents/Resources/createinstallmedia --volume /Volumes/MyUSB --nointeraction
Press Enter. Terminal will ask for your Mac administrator password. Type your password (it will not show any dots or characters as you type) and press Enter again. The process will begin, and you will see a progress bar. This can take anywhere from 15 to 30 minutes depending on your USB drive speed.
Step 5: Verify the Bootable Installer
Once the Terminal process finishes, your USB drive is now a bootable macOS installer. You can verify it by checking the drive in Finder. It should show the macOS installer files. You now have a fully functional bootable USB that you can use to install macOS on any compatible Mac.
Quick Tips for Creating the Installer
- Always use a fresh USB drive that has been formatted specifically for this purpose.
- Make sure your Mac is plugged into power during the creation process.
- Do not unplug the USB drive while Terminal is running.
- If the command fails, double-check the drive name and installer path for any typos.
- Use a USB-C drive for the fastest results on modern Macs.
How to Install macOS Using the USB Drive
Now that you have your bootable USB installer ready, it is time to actually install macOS on your Mac. The process is straightforward, and we will guide you through each step.
Step 1: Connect the USB Drive
Plug your bootable USB drive into your Mac. Make sure the Mac is turned off before you connect the drive. If your Mac is already on, it is still okay, but starting fresh is always a good idea.
Step 2: Boot into Startup Manager
Turn on or restart your Mac. Immediately press and hold the Option key on your keyboard. Keep holding it until you see the Startup Manager screen. This screen shows all the available boot drives, including your USB installer.
Step 3: Select the USB Installer
In the Startup Manager, you should see your USB drive listed with a macOS installer icon. Use the arrow keys on your keyboard to select it, then press Enter. Your Mac will now boot from the USB drive.
Step 4: Start the Installation
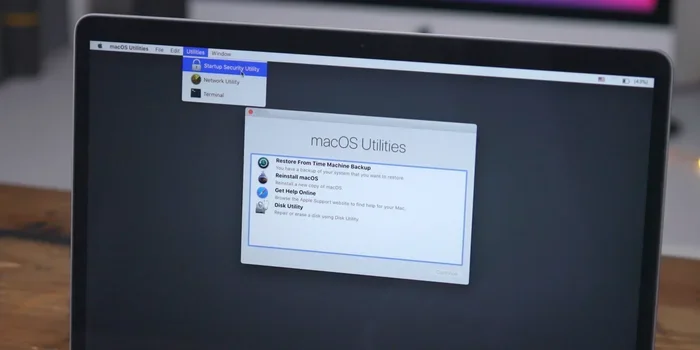
The macOS Installer will open. Follow the on-screen instructions to select your language and continue. You will be given options to install macOS on your Mac’s internal drive. Before you proceed, make sure you have backed up all your important files. The installation will erase the target drive, so there is no going back once it starts.
Step 5: Wait for the Installation to Complete
The installation process takes some time, usually between 20 minutes and an hour. Your Mac may restart several times during this process. Do not unplug the USB drive until the setup assistant prompts you to remove it. Once the installation is complete, your Mac will restart and you will see the welcome screen for your fresh macOS installation.
Common Mistakes to Avoid
Even though creating a bootable USB installer is not difficult, there are some common mistakes that can cause problems. Being aware of these pitfalls helps you avoid frustration and wasted time.
Using the Wrong USB Drive Format
One of the most common mistakes is not formatting the USB drive correctly. If your USB drive is formatted as FAT32 or ExFAT, the Terminal command may fail. Always format your drive as Mac OS Extended or APFS before creating the bootable installer. This ensures compatibility with the macOS installer tools.
Skipping the Backup Step
Some people jump straight into installation without backing up their data. This is a huge mistake. A clean install erases everything on the target drive. Use Time Machine or another backup solution to save your files before you begin. Trust us, it is much better to be safe than sorry.
Using a Slow or Old USB Drive
Using a USB 2.0 drive or a very old flash drive can cause slow transfer speeds and installation errors. Invest in a reliable USB 3.0 or USB-C flash drive for the best results. Your patience will thank you when the installation completes quickly and smoothly.
Not Checking Mac Compatibility
Not every Mac can run every version of macOS. Before you download the installer, check whether your Mac model supports the version you want to install. Installing an incompatible macOS version can lead to errors or a non-functional system.
Interrupting the Installation Process
Do not unplug the USB drive or turn off your Mac during the installation. Interrupting the process can corrupt the installer or damage your system. Let the installation run its course without any interruptions.
Expert Tips for a Smooth Installation
Here are some expert insights to make your macOS USB installation go as smoothly as possible. These tips come from years of experience helping Mac users get the most out of their machines.
First, always download the macOS installer on a Mac that is connected to a stable internet connection. A dropped connection during the download can corrupt the installer file. If the download fails, delete the installer from your Applications folder and try again.
Second, keep your USB drive plugged in throughout the entire process, from creation to installation. USB disconnections are one of the leading causes of failed installations. If you are using a laptop, make sure it is on a stable surface and plugged into a power source.
Third, after the installation is complete, go to System Settings and check for any available macOS updates. Apple frequently releases patches and security updates that fix bugs and improve performance. Running the latest version of macOS ensures the best experience.
Finally, consider keeping your bootable USB drive in a safe place. You never know when you might need it again. Whether it is for a friend’s Mac, your own troubleshooting, or setting up a new computer, a bootable USB installer is an invaluable tool to have on hand.
Key Takeaways
- Installing macOS from a USB drive is simple and reliable: A bootable USB installer gives you full control over the installation process and does not require an internet connection during setup.
- You need an 8GB or larger USB flash drive: USB 3.0 or USB-C drives offer the best performance and reliability for creating a bootable macOS installer.
- The Terminal command is the key step: Using the createinstallmedia command in Terminal converts your USB drive into a bootable macOS installer quickly and efficiently.
- Always back up your data first: A clean install erases everything on the target drive, so use Time Machine or another backup tool before you begin.
- Recovery Mode is your backup plan: If anything goes wrong during installation, macOS Recovery Mode lets you reinstall or repair your system without starting over.
- Keep your bootable USB for future use: A bootable installer works on any compatible Mac, making it a handy tool for troubleshooting, clean installs, and helping others.
Frequently Asked Questions
Can I use any USB flash drive to install macOS?
You can, but it is best to use a USB 3.0 or USB-C flash drive with at least 16GB of storage. Older USB 2.0 drives work but are much slower and may cause issues. Make sure the drive is formatted as Mac OS Extended or APFS before creating the bootable installer.
Do I need an internet connection to install macOS from USB?
No, you do not need an internet connection during the installation itself. The macOS installer is already on the USB drive. However, you will need the internet to download the installer initially and to download any updates after the installation is complete.
Can I use the same bootable USB on multiple Macs?
Yes, you can use the same bootable USB installer on multiple Macs, as long as each Mac is compatible with the version of macOS on the installer. This makes a bootable USB a great tool to keep on hand for troubleshooting or setting up new computers.
What happens if the Terminal command fails?
If the Terminal command fails, check that you have typed it correctly, including the exact name of the macOS installer app and the USB drive name. Make sure the USB drive is properly formatted and connected. You can also try re-downloading the macOS installer from the App Store and running the command again.
Is it safe to erase my Mac’s internal drive during installation?
Yes, it is safe as long as you have backed up your data first. A clean install erases everything on the internal drive, which can resolve many software issues and improve performance. Always use Time Machine or another backup solution before erasing any drive.
Can I install an older version of macOS from a USB drive?
Yes, you can. Simply download the older macOS installer from the App Store (you may need to sign in with your Apple ID and find the specific version) and follow the same process to create a bootable USB installer. Older macOS versions can be installed on Macs that support them.
Conclusion
Installing macOS from a USB drive is one of the most practical skills any Mac user can learn. The process is straightforward, completely free, and gives you a powerful tool for troubleshooting, clean installs, and setting up new machines. With just a USB flash drive and a few simple steps, you can create a bootable installer that works reliably every time.
Remember to back up your data, use a quality USB drive, and follow the Terminal commands carefully. Once you have your bootable USB installer ready, you will wonder how you ever managed without one. It is a game-changer for anyone who uses a Mac regularly.
So yes, you can absolutely install macOS from a USB drive. Now you have all the knowledge and confidence to do it yourself. Grab your USB flash drive, download the macOS installer, and get started today. Your Mac will thank you for it.