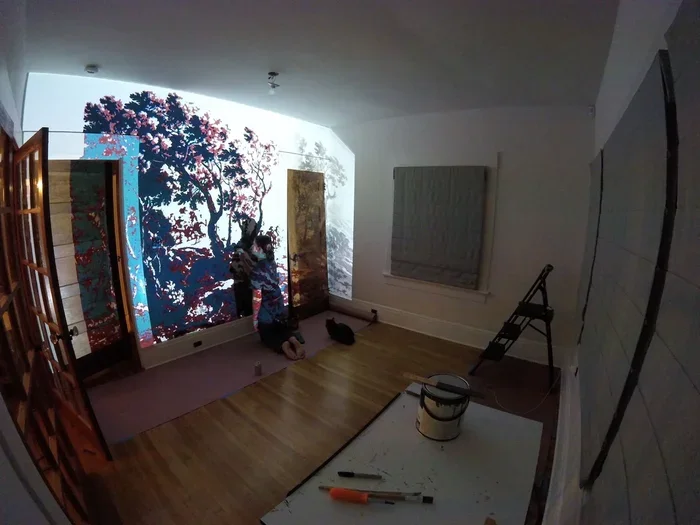
Can I Use A Projector For Art To Create Stunning Murals
Yes, you can absolutely use a projector for art to create stunning murals. This technique lets you trace and project images directly onto walls, canvas, or any surface, making the creative process faster and more precise. Whether you are a beginner or a seasoned artist, projector art opens up new possibilities for large wall art and mural painting with ease and accuracy.
Have you ever stood in front of a blank wall and wondered how to turn it into a masterpiece? The good news is that using a projector for art makes this dream much easier than you might think. Artists of all levels have discovered that a simple projector can transform how they create large wall art and mural painting. This guide will walk you through everything you need to know about projector art, from setup to finished piece.
Whether you want to paint a bold mural on your bedroom wall or transfer a detailed design onto canvas, a projector gives you a reliable art projection tool. You do not need to be a tech expert or a professional painter to get started. With the right projector setup and a bit of patience, you can produce stunning murals that look like they took days to complete. Let us dive into how this works and how you can do it too.
Key Takeaways
- Projector art is a proven technique: Artists have used projectors for decades to transfer images onto walls and canvases with precision.
- You need the right projector: Brightness, resolution, and portability matter when choosing a projector for art and mural work.
- Setup and alignment are key: Proper positioning and keystone correction ensure your projected image looks clean and accurate.
- Multiple art styles benefit: From mural painting to stencil art and digital art transfer, a projector fits many creative processes.
- Common mistakes are easy to avoid: Skipping test runs, ignoring ambient light, and poor tracing techniques can ruin your results.
- It is not cheating: Many professional muralists and wall art creators use projectors as a tool, not a shortcut.
📑 Table of Contents
- What Is Using A Projector For Art?
- How To Use A Projector For Art To Create Stunning Murals
- Best Projectors For Art And Mural Work
- Tips For Perfect Art Projections
- Common Mistakes To Avoid With Projector Art
- Expert Insights On Projector Art And Mural Creation
- How Projector Art Fits Into Different Creative Styles
- Conclusion
What Is Using A Projector For Art?
Projector art is a creative technique where you use a projector to display an image onto a surface. You then trace, paint, or transfer that image to create your final piece. This method has been used by artists for over a century. In fact, famous painters like Monet and Andy Warhol used early versions of this approach to scale up their designs.
Today, digital projectors make the process even simpler. You can load any image onto a laptop or phone and beam it onto a wall, a canvas, or even a sidewalk. The projected image acts as a guide. You follow the lines with paint, pencil, or marker to build your mural painting or wall art piece by piece.
Why Artists Love Projector Art
There are many reasons why projector art has become so popular. First, it saves a huge amount of time. Instead of drawing everything freehand, you project the design and trace it. Second, it allows for incredible accuracy. Complex patterns, faces, and landscapes become much easier to reproduce. Third, it opens the door to large wall art that would be nearly impossible to plan and draw from scratch.
Another big advantage is flexibility. You can resize your image to fit any wall or surface. You can adjust colors, flip the image, or crop it before projecting. This level of control makes projector for art a favorite tool among hobbyists and professionals alike.
How To Use A Projector For Art To Create Stunning Murals
Creating a stunning mural with a projector is a step-by-step process. Each step matters, and skipping one can lead to frustrating results. Here is a clear roadmap to follow.
Step 1: Choose Your Design
Start by picking the image you want to project. High-resolution images work best. Look for pictures with clear lines and strong contrast. If you are creating mural painting for a specific wall, measure the wall size first. This helps you pick a design that fits perfectly.
You can find free images online or create your own using digital art software. Popular choices include nature scenes, abstract patterns, portraits, and geometric designs. The more detailed your source image, the better your final wall art will look.
Step 2: Set Up Your Projector
Place your projector on a stable surface or mount it on a tripod. Position it so the beam hits the wall squarely. The closer you are to the wall, the sharper the image will be. Use the projector’s keystone correction to make the image rectangular if it looks skewed.
Most artists recommend projecting from a distance of 6 to 12 feet for the best image quality. If your room has windows, close the blinds or curtains. Ambient light can wash out your projected image and make tracing much harder.
Step 3: Trace and Paint
Once your image is projected and aligned, start tracing the main outlines with a light pencil or washable marker. Work section by section. Do not try to trace the entire image at once. This keeps your lines accurate and your focus sharp.
After tracing, begin filling in with paint. Use acrylics for walls and canvas. They dry fast, cover well, and come in vibrant colors. For detailed work, use fine brushes. For large areas, use rollers or sponges. Build up layers slowly for the best art transfer results.
Step 4: Add Details and Finish
Once the base layers are dry, go back and add fine details. This is where your mural painting really comes to life. Add shading, highlights, and small accents. Step back frequently to check the overall look from a distance.
When you are happy with the result, seal your work with a clear protective coat. This is especially important for wall art that will be exposed to sunlight or moisture. A good sealant can keep your mural looking fresh for years.
Best Projectors For Art And Mural Work
Not all projectors are created equal when it comes to art projection. The right projector makes a big difference in image quality and ease of use. Here are the key features to look for.
Brightness Matters
Brightness is measured in lumens. For indoor projector art, aim for at least 2,000 lumens. If you work in a bright room or near windows, go higher — 3,000 lumens or more. A brighter projector gives you a crisp, clear image that is easy to trace.
Resolution and Clarity
Resolution determines how sharp your projected image looks. For detailed mural painting, a projector with at least 1080p (Full HD) resolution is ideal. 4K projectors offer even more detail but cost more. For most wall art projects, Full HD strikes a great balance between quality and price.
Portability and Size
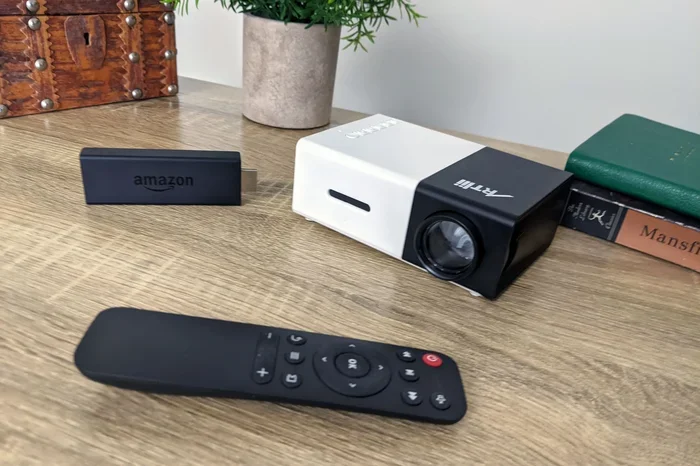
If you plan to work on murals in different locations, a portable projector is a must. Look for lightweight models that weigh under 5 pounds. Some compact projectors are small enough to fit in a backpack. This makes outdoor mural art and on-site projects much more convenient.
Connectivity Options
Make sure your projector has the right inputs. HDMI is the most common and reliable connection for laptops and phones. Some models also offer USB, Wi-Fi, or Bluetooth. Wireless connectivity lets you project without cables, which gives you more freedom when setting up your art projection workspace.
Quick Comparison Table
| Projector Type | Brightness | Best For | Price Range |
|---|---|---|---|
| Portable Mini | 500-1,500 lumens | Small art projects, tracing | $50-$200 |
| Home Theater | 2,000-3,000 lumens | Indoor mural work, detailed art | $300-$800 |
| Ultra Short Throw | 3,000+ lumens | Large murals, bright rooms | $500-$1,500 |
| Outdoor Portable | 2,500-4,000 lumens | Outdoor murals, events | $400-$1,200 |
For most projector for art beginners, a home theater model in the $300-$600 range offers the best value. It gives you enough brightness and resolution without breaking the bank.
Tips For Perfect Art Projections
Getting great results with projector art comes down to a few practical tips. These small details can make a huge difference in your final mural or wall art piece.
Use a Stable Surface
Your projector must stay perfectly still while you work. Even a slight shift can distort your image and ruin your tracing. Use a sturdy tripod or mount your projector on a shelf. Never place it on an uneven surface where it might slide or wobble.
Turn Off the Lights
Dim the room lights as much as possible. The darker the room, the sharper and more vivid your projected image will be. Some artists work at night or cover windows with blackout curtains. This simple step dramatically improves your art projection quality.
Do a Test Run
Before you start tracing, project your image and walk around it. Check for any distortions, dark spots, or alignment issues. Fix these before you pick up a brush. A quick test run saves hours of rework later.
Work in Sections
Large murals can be overwhelming. Break your design into smaller sections and work on one area at a time. Complete each section before moving to the next. This keeps you focused and ensures consistent quality across the entire mural painting.
Keep Your Projector Clean
Dust on the projector lens creates blurry spots in your projected image. Clean the lens gently with a microfiber cloth before each session. Also, make sure the projector vents are not blocked. Overheating can reduce image quality and shorten your projector’s lifespan.
Use the Right Tracing Tools
For tracing, use a light-colored pencil or a water-soluble marker. These are easy to see against most wall surfaces and can be erased or washed away later. For darker walls, use a white chalk pencil or a light-colored washable marker. The right tool makes tracing much easier and cleaner.
Common Mistakes To Avoid With Projector Art
Even experienced artists make mistakes when starting with projector for art. Knowing what to avoid saves time, money, and frustration.
Skipping the Alignment Step
One of the most common errors is rushing the alignment process. A misaligned projector creates a distorted image that is impossible to trace accurately. Always take the time to center and level your projector before you begin any mural painting or wall art project.
Ignoring Ambient Light
Working in a bright room washes out your projected image. You will struggle to see the lines clearly, and your tracing will suffer. Always control the lighting in your workspace. Close curtains, turn off overhead lights, and work when the room is as dark as possible.
Using Low-Resolution Images
Blurry or pixelated source images lead to poor-quality murals. Always use high-resolution images for your art projection. If your image looks fuzzy on your screen, it will look even fuzzier when projected at a larger size. Start with the clearest image you can find or create.
Not Testing the Projection Size
Before you commit to a design, test the projected size on your wall. Make sure the image fits the space and looks the way you want. Resize or crop your source image if needed. A little planning upfront prevents big problems later.
Overlooking the Surface
The surface you project onto matters a lot. Rough or textured walls scatter the light and blur the image. Smooth, light-colored walls work best for projector art. If your wall is dark or heavily textured, consider projecting onto a temporary white screen or paper taped to the wall.
Expert Insights On Projector Art And Mural Creation
Professional muralists and digital art creators share valuable insights about using projectors in their creative process. Here is what the experts want you to know.
It Is a Tool, Not a Shortcut
Many people wonder if using a projector for art is “cheating.” Professional muralist Sarah Chen explains that projector art is simply a tool, like a brush or a palette. “A projector helps you scale up your vision accurately,” she says. “The skill still comes from your design choices, color mixing, and painting technique.”
Start Simple and Build Up
Experienced artists recommend starting with small projects before tackling a full wall mural. Try projecting a simple design onto a canvas or a small wall section. Practice your tracing and painting skills. As you grow more confident, you can take on larger and more complex mural painting projects.
Combine Projector Art With Freehand Techniques
Many top muralists use a mix of projected outlines and freehand painting. They project the basic shapes and major lines, then add details, shading, and textures by hand. This hybrid approach gives you the precision of art projection with the creative freedom of mural painting. The result is a piece that looks both polished and personal.
Experiment With Different Light Sources
Some artists experiment with colored light projections to create unique effects. Instead of a white image, they project colored outlines or gradients onto the wall. This adds a dynamic, artistic element to the creative process and can produce truly one-of-a-kind large wall art.
How Projector Art Fits Into Different Creative Styles
Projector for art is not limited to one style. It works across many creative disciplines and opens doors for different types of projects.
Mural Painting: This is the most common use of projector art. Artists project their design onto a large wall surface and paint over it. Murals for businesses, schools, and public spaces often start with a projected outline.
Canvas Art: You can also use a projector to transfer images onto canvas. This is great for creating detailed canvas painting pieces without spending hours on the initial sketch. Portrait artists and landscape painters find this especially helpful.
Stencil Art: Projectors help you design and position stencils perfectly. Project your design onto cardboard or stencil paper, cut it out, and use it to create repeat patterns or bold wall art pieces.
Art Classes and Workshops: Teachers use projectors to demonstrate techniques and help students trace designs. It makes art education more accessible and fun for beginners of all ages.
Home Decor: You can use projector art to create custom wall art for your home. Project a favorite quote, a family portrait, or a nature scene onto your wall and paint it. The result is a personalized piece that adds character to any room.
Conclusion
Using a projector for art is one of the most practical and exciting tools available to creative people today. Whether you are painting a small canvas or a massive mural on a building wall, a projector gives you precision, speed, and creative freedom. The steps are simple, the equipment is accessible, and the results can be truly breathtaking.
Start with a simple project to build your confidence. Choose the right projector for art, set up your workspace carefully, and follow the process step by step. As you practice, you will develop your own style and workflow. Soon, you will be creating stunning murals and large wall art that impress everyone who sees them.
The beauty of projector art is that it meets you where you are. You do not need years of experience or expensive supplies. You just need a projector, a design, some paint, and the willingness to try. So grab a projector, pick your favorite image, and start creating your next masterpiece today.
Frequently Asked Questions
Can any projector be used for art?
Most projectors can be used for basic projector art, but brighter and higher-resolution models produce much better results. Look for at least 2,000 lumens and 1080p resolution for the best mural painting experience.
What type of projector is best for mural art?
A home theater projector with 2,500 to 3,500 lumens and Full HD resolution is ideal for indoor mural painting. For outdoor work, choose a projector with higher brightness and good portability.
Do I need special software to project art?
No special software is required. You can use standard programs like PowerPoint, Keynote, or free image viewers. Some artists use dedicated art projection apps that offer rotation, scaling, and color adjustment features.
Can I use a projector outdoors for murals?
Yes, but you need a bright projector — at least 3,000 lumens — and you should work during overcast conditions or in the evening. Outdoor projector art can create amazing large-scale wall art on building sides and fences.
How do I trace art from a projector accurately?
Start by projecting your image and aligning it carefully. Use a light pencil or washable marker to trace the main outlines first. Work in small sections, and step back frequently to check your progress. This method gives you clean, accurate art transfer results.
Is using a projector for art considered cheating?
Absolutely not. Many professional artists use projectors as a creative process tool. It helps with scaling and accuracy, but your artistic skills in color choice, composition, and painting technique are what make the final piece truly yours.