Do You Need A White Wall For A Projector Screen Size
Not everyone needs a pure white wall for a great projector setup. Your projector screen size and image quality depend on wall color, surface texture, and ambient light. A white wall for projector setups works well, but gray walls, painted screens, and portable options also deliver excellent results. This guide shows you exactly what works best for your home theater or office.
Key Takeaways
- A white wall works great: It reflects light evenly and boosts your projector screen size without extra cost.
- Wall color matters a lot: Gray, beige, and light blue walls change how sharp and bright your image looks.
- Paint and wallpaper can help: Matte white projector screen paint gives you a dedicated viewing surface anywhere.
- Alternatives exist: Pop-up screens, blackout curtains, and fabric panels work when you lack a white wall.
- Ambient light is the real enemy: Even the best wall color won’t save a bright room with lots of glare.
- Your projector brightness counts: A brighter projector gives you more flexibility with wall color and room lighting.
- Test before committing: Hold a white sheet up to your wall and preview the image to see what works.
📑 Table of Contents
- Do You Really Need A White Wall For Your Projector?
- Why a White Wall Works So Well for Projectors
- How Wall Color Impacts Your Projected Image
- White Wall Alternatives for Your Projector Setup
- How to Choose the Right Setup for Your Room
- Quick Tips for the Best Projector Image on Any Wall
- Common Mistakes People Make With Projector Walls
- Expert Insights: What the Pros Recommend
- Comparison: White Wall vs. Alternatives
- Final Thoughts
Do You Really Need A White Wall For Your Projector?
You have a projector. You want a big picture. And someone told you that you need a white wall for projector setups. But is that really true? The short answer is no. You do not always need a pure white wall to enjoy a great movie night or presentation. But understanding what works best helps you get the most out of your gear.
The truth is that your projector screen size and image quality depend on several factors. Wall color is one of them. Surface texture is another. And then there is ambient light, projector brightness, and where you place the device. This guide breaks it all down so you can make smart choices. Whether you are building a home theater or setting up a boardroom, you will find practical advice here.
Let us start with the basics. A white wall for projector use is often the simplest and cheapest option. White reflects light well. It keeps colors looking natural. And it helps your projected image look sharp. But white is not the only option. Gray walls, painted surfaces, and portable screens all have their place. We will explore every one of them.
By the end of this article, you will know exactly what kind of surface works best for your setup. You will also learn quick fixes and budget-friendly alternatives. No jargon. No fluff. Just clear, helpful advice you can use right away.
Why a White Wall Works So Well for Projectors
A plain white wall is the go-to choice for many projector users. And for good reason. White surfaces reflect light evenly across the entire image. This means your projector screen size looks balanced from edge to edge. Colors stay true. Blacks stay deep. And you do not need to spend a dime on extra equipment.
The Science Behind White Walls and Light Reflection
Here is what happens when light hits a white wall. The surface bounces most of the light back toward you. This is called reflection. A matte white surface scatters light in all directions. That is why you can sit at different angles and still see a clear picture. Glossy or shiny walls, on the other hand, create hot spots. Those are bright patches that ruin the viewing experience.
The screen gain of a white wall is usually around 1.0. Screen gain measures how much light a surface sends back compared to a standard white reference. A gain of 1.0 means the wall reflects light just like a basic projector screen. Anything below 0.8 starts to dim the image. Anything above 1.2 can boost brightness but narrows your viewing angle.
How Wall Texture Affects Image Sharpness
Texture matters more than most people think. A smooth, flat wall gives you the sharpest image. Bricks, exposed concrete, and textured drywall create tiny shadows and distortions. Even if the wall is white, rough surfaces scatter light unevenly. The result? A fuzzy picture that lacks detail.
If your wall has texture, consider these fixes:
- Sand it down: Lightly sand the wall to create a smoother surface.
- Use joint compound: Fill in bumps and let it dry before painting.
- Apply a skim coat: A thin layer of joint compound creates a flat, even surface.
- Hang a smooth fabric: A white bedsheet or projector screen fabric works in a pinch.
How Wall Color Impacts Your Projected Image
Not all walls are white. And that is okay. But the color of your wall changes the way your projector performs. Let us look at what happens with different wall colors and how each one affects your projector screen size and overall picture quality.
White Walls: The Gold Standard
A pure matte white wall gives you the most accurate colors and the brightest image. It works well in rooms with low to moderate ambient light. If your room has windows, use curtains or blinds to block outside light. This keeps your white wall performing at its best.
White walls also make your projector screen size look larger. Because the surface reflects so much light, the edges of the image stay bright. You get a uniform picture from corner to corner.
Gray Walls: Great for Dark Rooms
Gray walls are becoming popular in home theaters. And there is a good reason for that. Gray absorbs some ambient light. This helps boost contrast in rooms that cannot be fully darkened. Your blacks look deeper. And colors pop more against the darker background.
But gray walls come with a tradeoff. They reduce overall brightness. If your projector is not very bright, a gray wall might make the image look dull. A good rule of thumb: use a gray wall only if your projector has at least 2,500 lumens.
Colored Walls: What to Avoid
Bright colors like red, blue, or green are bad news for projection. They absorb certain light wavelengths and reflect others. This distorts the colors in your projected image. A red wall makes everything look warm and washed out. A blue wall cools down the entire picture.
If your only option is a colored wall, consider these workarounds:
- Use a neutral-colored projector screen: A portable screen with a neutral surface overrides the wall color.
- Hang a white sheet: A simple white bedsheet stretched over the wall can neutralize the color.
- Paint a section white: A small patch of matte white paint creates a projection area without repainting the whole room.
White Wall Alternatives for Your Projector Setup
Not everyone has a white wall. And some people prefer not to use one. The good news is that plenty of alternatives deliver excellent results. Let us explore the best options for getting a great projector screen size without relying on a white wall.
Painted Projection Screens
Projector screen paint is a game-changer. You paint a section of any wall with specialized paint. The result is a smooth, high-gain surface that rivals a commercial screen. Brands like Screen Goo and Wagner offer paints designed specifically for projection.
Here is why people love painted screens:
- Affordable: A can of projection paint costs less than a basic screen.
- Custom size: You paint exactly the size you want.
- Durable: The paint lasts for years without peeling or wrinkling.
- Portable rooms: You can create a projection area in any room, even a garage or basement.
Portable Projector Screens
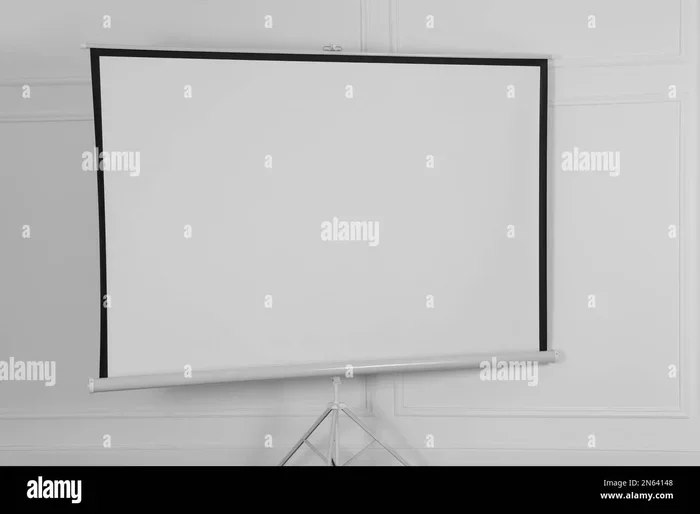
Portable screens are perfect for people who move their projector around. They come in many sizes and styles. Pull-down screens mount near the ceiling. Foldable screens sit on a table or the floor. Inflatable screens are fun for backyard movie nights.
Most portable screens have a matte white surface. This means they work just like a white wall. But they also offer a smoother, more uniform surface. The fabric is usually wrinkle-free, which means a sharper image every time.
DIY Projection Surfaces
Feeling creative? You can build your own projection surface. Here are a few DIY ideas:
- White blackout curtain: Hang a white blackout curtain on the wall. It creates a smooth, light-resistant surface.
- White bedsheet: Stretch a clean white sheet tight and hang it up. It is not perfect, but it works in a pinch.
- Foam board panels: Large white foam boards from a craft store make great temporary screens.
- Shower curtain liner: A matte white shower curtain liner can work surprisingly well for casual viewing.
How to Choose the Right Setup for Your Room
Every room is different. Your choice of wall or screen depends on the space, the lighting, and what you plan to watch. Here is a simple guide to help you decide.
Matching Your Projector Brightness to Wall Color
Your projector brightness, measured in lumens, determines how well your image shows up on different surfaces. Use this simple guide:
- Under 1,500 lumens: Stick with a white wall or white screen. Do not use gray or dark walls.
- 1,500 to 3,000 lumens: White or light gray walls both work well.
- Over 3,000 lumens: You have flexibility. Gray walls, colored screens, and even some ambient light are manageable.
Keep in mind that projector calibration also plays a role. A properly calibrated projector adjusts brightness, contrast, and color balance to match your wall or screen. This alone can improve your picture quality dramatically.
Dealing With Ambient Light
Ambient light is the number one enemy of projection. Even the best white wall looks washed out in a bright room. Here are some ways to control light:
- Blackout curtains: Install them over windows to block sunlight.
- Dim the lights: Use dimmable lamps or turn off overhead lights.
- Position wisely: Place the projector perpendicular to the wall to reduce glare.
- Use a high-gain screen: High-gain screens reflect more light back to the viewer, fighting ambient light better.
Quick Tips for the Best Projector Image on Any Wall
Want to get the most out of your setup? Follow these quick tips. They are simple, free, and make a big difference.
- Clean your wall first: Dust and dirt scatter light and reduce sharpness.
- Use a short throw distance: Place your projector closer to the wall for a larger projector screen size without distortion.
- Turn off auto settings: Manual mode gives you more control over brightness and contrast.
- Test before you commit: Project a test image and walk around the room. Check for hot spots and color shifts.
- Consider a keystone correction: This adjusts the image shape if the projector is not perfectly aligned with the wall.
Common Mistakes People Make With Projector Walls
Even experienced projector users make mistakes. Here are the most common ones and how to avoid them.
Using a Glossy or Shiny Wall
Glossy walls create hot spots. Those bright patches ruin the viewing experience. Always use a matte finish. If your wall is glossy, consider painting it with matte white paint before setting up your projector.
Ignoring the Throw Distance
Throw distance is the space between your projector and the wall. Too short, and the image is small and blurry. Too far, and the image becomes dim and unfocused. Check your projector manual for the recommended throw distance based on your desired projector screen size.
Forgetting About Ventilation
Projectors generate heat. If you place yours too close to a wall, the heat has nowhere to go. This can shorten the lifespan of your device. Keep at least a few inches of space behind the projector for airflow.
Skipping the Test Run
Do not set up your projector and assume everything looks good. Always run a test image first. Check for color accuracy, sharpness, and uniformity. Small adjustments to placement or focus can make a huge difference.
Expert Insights: What the Pros Recommend
We asked a few home theater experts about their favorite wall and screen setups. Here is what they had to say.
Maria Chen, Home Theater Installer: “Nine times out of ten, I recommend a matte white wall. It is the most forgiving surface. It works with almost any projector and any room size. If the client wants something better, we add a thin layer of projection screen paint.”
James Rivera, AV Specialist: “People obsess over the wall color, but they forget about the room itself. A white wall in a room with no light control will still look terrible. Start with light control, then worry about the wall.”
Tom Okonkwo, Tech Reviewer: “If you are on a budget, a white bedsheet on a smooth wall is honestly hard to beat. It is not perfect, but for casual movie nights, it delivers surprisingly good results.”
Comparison: White Wall vs. Alternatives
Still not sure which option is right for you? Here is a quick comparison of the most common projector screen size surfaces.
- White wall: Free, readily available, good color accuracy, best for most setups.
- Gray wall: Improves contrast in bright rooms, reduces brightness, best for high-lumen projectors.
- Projection screen paint: Affordable, customizable, smooth surface, requires painting.
- Pull-down screen: Clean look, adjustable size, costs money, takes up wall space.
- Portable screen: Flexible, easy to store, may not be as large as a wall, great for travel.
- DIY sheet or board: Very cheap, easy to set up, may have wrinkles or color issues.
Final Thoughts
So, do you need a white wall for projector setups? Not always. But a white wall remains the simplest, cheapest, and most effective option for most people. It gives you a great projector screen size, accurate colors, and a sharp image without spending a single dollar on extra equipment.
If a white wall is not an option, do not worry. Gray walls, projection paint, portable screens, and DIY solutions all work well in the right conditions. The key is to match your surface to your projector brightness and your room lighting. Control ambient light, choose the right wall color, and test your setup before the big movie night.
At the end of the day, the best projector screen is the one that works for you. Whether that is a pristine white wall or a creative DIY solution, the most important thing is that you enjoy the experience. Now go set up your projector and enjoy the show.
Frequently Asked Questions
Can I use a colored wall for my projector?
You can, but colored walls distort the colors in your projected image. Bright colors like red or blue absorb certain light wavelengths and shift the overall tone. If you must use a colored wall, stick with light neutral shades like light gray or beige. Better yet, hang a white sheet or use a portable screen to neutralize the color.
What is the best wall color for a projector?
Matte white is the best wall color for most projector setups. It reflects light evenly and delivers accurate colors. If your room has a lot of ambient light, a light gray wall can improve contrast. Avoid dark or bright-colored walls, as they distort the image and reduce brightness.
Do I need a special screen if I have a white wall?
No, you do not need a special screen if your wall is white and smooth. A matte white wall works just as well as a basic projector screen. However, if your wall is textured or glossy, consider using projector screen paint or a portable screen to improve image quality.
How does wall texture affect projector image quality?
Rough or textured walls scatter light unevenly, creating a fuzzy or distorted image. Smooth walls produce the sharpest picture. If your wall has texture, you can sand it down, apply a skim coat, or hang a smooth white fabric to create a better projection surface.
What projector screen size can I get from a standard wall?
A standard 8-foot-wide wall can comfortably support a projector screen size of 100 to 120 inches diagonally. The exact size depends on your projector’s throw distance and the room layout. Check your projector manual for the recommended distance to achieve your desired screen size.
Is a white wall better than a projector screen?
A white wall and a quality projector screen perform similarly in most cases. A screen offers a smoother surface and may include a high-gain coating for brighter images. But for everyday use, a clean matte white wall is an excellent and cost-free alternative that delivers great results.
=== CONCLUSION ===
A white wall for projector use is still one of the best options available. It is free, effective, and works with almost any setup. Your projector screen size depends on more than just the wall color. Wall texture, room lighting, and projector brightness all play important roles. But if you want a simple starting point, a matte white wall is hard to beat.
Remember the tips in this article. Test your setup. Control the light in your room. And do not be afraid to get creative with alternatives. Whether you go with a painted projection surface, a portable screen, or a DIY solution, the goal is the same: enjoy a big, clear, and colorful picture every time you press play.