Do You Need A Screen For Outdoor Projector Setup Today
You do not always need a dedicated outdoor projector screen, but using one dramatically improves your image quality and viewing experience. A proper screen boosts brightness, color accuracy, and contrast compared to a plain wall or white sheet. Whether you choose an inflatable screen, a tripod model, or a DIY wall, the right surface makes every outdoor movie night better.
Have you ever set up an outdoor projector and wondered if a screen is really necessary? Maybe you have a smooth white wall or a big bedsheet lying around. The question do you need a screen for outdoor projector setups comes up all the time. The short answer is no, you do not always need one. But the longer answer is that a proper screen can transform your entire viewing experience.
Outdoor movie nights are one of the best ways to enjoy entertainment at home. Whether you are hosting a backyard movie party or just want a quiet evening under the stars, the setup you choose matters a lot. Many people assume a wall or a bedsheet is enough. And sometimes it is. But there is a big difference between a quick fix and a truly great picture. In this guide, we will walk through everything you need to know about outdoor projection surfaces. You will learn when a screen helps, when you can skip it, and how to pick the right option for your space.
Key Takeaways
- You can skip a screen: A smooth white wall or bedsheet works in a pinch for casual viewing.
- A dedicated screen is better: It delivers sharper images, truer colors, and higher contrast in any lighting.
- Many screen types exist: Inflatable screens, tripod screens, fixed frames, and DIY options all have pros and cons.
- Ambient light matters a lot: The more light in your yard, the more you need a quality screen to see a clear picture.
- Size and placement are key: Pick the right screen size and position your projector correctly for the best experience.
- Budget options work well: You do not need to spend a fortune to enjoy great outdoor projection.
📑 Table of Contents
Why a Screen Matters for Outdoor Projecting
Let us start with the basics. A projector sends light onto a surface. That surface creates the image you see. Not all surfaces are created equal, though. A flat, white wall looks fine in a dark room. But outdoors, things change fast. Light from the sky, streetlights, and even your porch lights all compete with the projected image.
This is where a proper outdoor projector screen earns its place. A dedicated screen is designed to reflect light back toward the viewers in a controlled way. It boosts brightness and sharpness. It also improves color accuracy and contrast. Without a good surface, your picture can look washed out or dull. Even a powerful projector will struggle on a rough or colored wall.
The Science Behind Projection Surfaces
Here is a simple way to think about it. When you shine a flashlight on a flat white wall, the light spreads out in all directions. Some of it bounces toward you, and some goes elsewhere. A projection screen works similarly but with a key difference. It focuses more light back toward the audience. This is called gain. A screen with higher gain reflects more light to the viewers. That means a brighter, clearer image, especially in less-than-perfect conditions.
When you do you need a screen for outdoor projector decisions, understanding gain helps a lot. A matte white screen usually has a gain of about 1.0. That means it reflects light evenly. Some screens have a gain of 1.3 or higher, which makes the image noticeably brighter. But higher gain can narrow the viewing angle. So you need to balance brightness with how many people are watching.
Your Options: Screen vs. Wall vs. Sheet
Now let us compare your main options. You basically have three choices when setting up an outdoor projector. You can use a wall, a bedsheet, or a dedicated screen. Each has its own strengths and weaknesses.
Option 1: Using a White Wall
A smooth white wall is the easiest option. If you have a clean, flat wall on the side of your house or a garage, you can project right onto it. The biggest advantage is cost. You do not need to buy anything extra. The image quality is usually decent, especially at night when there is little ambient light.
But walls have limits. Most walls are not perfectly smooth. Small bumps, cracks, and paint textures create tiny distortions in the image. The color of the wall matters too. A cream-colored wall will make the picture look warm and yellowish. A dark wall will absorb light and make the image very dim. For the best results, you want a flat, white, smooth surface.
Option 2: Hanging a Bedsheet
A white bedsheet is a popular DIY choice for backyard movie nights. It works surprisingly well for casual use. You can hang it from a clothesline, a fence, or even a pair of chairs. The cost is basically zero, and you can set it up in minutes.
The downside is wrinkles. Even after ironing, a bedsheet tends to have some uneven spots. These create dark patches or bright spots in the image. The material also may not be completely opaque. Light can bleed through, especially if the sheet is thin. This reduces contrast and makes the picture look faded. Still, for a one-time event or a fun family night, a bedsheet gets the job done.
Option 3: Using a Dedicated Outdoor Projector Screen
A dedicated screen is the best option for consistent, high-quality images. These screens are made from special materials that optimize light reflection. They are smooth, wrinkle-free, and designed specifically for projection. The result is a crisp, bright, and vibrant picture that looks nothing like a wall or sheet setup.
Dedicated screens also come in many sizes and styles. You can find small portable screens for camping trips. You can find large inflatable screens for backyard parties. There are even fixed-frame screens that look like a real home theater setup outdoors. If you take outdoor movies seriously, a proper screen is worth every penny.
Types of Outdoor Projector Screens
If you decide a screen is right for you, you have several options to choose from. Each type fits different needs, budgets, and spaces. Let us break them down.
Inflatable Screens
Inflatable screens are the most popular choice for backyard movie nights. They are easy to set up and take down. You just plug them into a pump, and they inflate in a few minutes. Most inflatable screens come with a built-in fan that keeps them taut during use.
These screens look great and feel festive. They are perfect for parties and gatherings. The downside is they can be affected by wind. A strong breeze can make the screen sway, which distorts the image slightly. They also tend to be heavier and bulkier than other options. But for most families, the convenience and fun factor far outweigh these issues.
Tripod and Portable Screens
Tripod screens are lightweight and easy to carry. They fold up and fit in a bag, making them great for camping or picnics. You set up the tripod legs, attach the screen, and you are ready to go. Setup usually takes less than five minutes.
The image quality on a good tripod screen is surprisingly excellent. The material is tight and wrinkle-free. These screens work well for small groups. The main limitation is size. Most tripod screens max out around 80 to 100 inches diagonally. If you need a huge screen for a big crowd, you might want to look at other options.
Fixed-Frame and DIY Screens
A fixed-frame screen is the closest thing to a real theater setup. You build or buy a frame and stretch a projection material over it. The result is a perfectly taut, wrinkle-free surface that delivers the best possible image quality.
DIY fixed screens are popular among hobbyists. You can build a frame from PVC pipes or wood and attach a projector screen material from a craft store. This is a budget-friendly way to get great results. The trade-off is permanence. A fixed frame stays in one place, so it is not ideal if you need to move it often.
Retractable and Motorized Screens
If you want a more permanent outdoor setup, consider a retractable or motorized screen. These roll up when not in use and pull down when you are ready to watch. They look clean and professional. Some models can even be controlled with a remote.
Motorized screens are more expensive than other options. They also require a power source for the motor. But they offer the best convenience for regular use. If you host outdoor movies often, this type of screen saves you a lot of setup time.
Key Factors to Consider When Choosing
Picking the right screen is not just about picking the biggest one. Several factors affect how well your outdoor projector setup performs. Here is what to keep in mind.
Ambient Light and Screen Material
The amount of light in your viewing area is the single biggest factor. If you are watching after sunset in a dark backyard, almost any screen will work. But if you want to start the movie before it gets fully dark, you need a screen that handles ambient light well.
Some screen materials are designed to reject ambient light. They use a special coating that focuses the projector light toward the viewers while blocking light from other directions. These screens are called ambient light rejecting, or ALR, screens. They are more expensive but make a huge difference in bright conditions.
Screen Size and Viewing Distance
Bigger is not always better. The right screen size depends on how far your viewers sit from the screen. A common rule is to sit about 1.5 to 2 times the diagonal screen size away. So for a 100-inch screen, your seating should be 150 to 200 inches away, which is about 12 to 16 feet.
Measure your available space before buying. You want the screen to fill your field of view without being so large that you have to move your head to see the edges. Also consider the throw ratio of your projector. This tells you how far the projector needs to be from the screen to produce a given image size.
Portability and Storage
How often do you plan to use your setup? If you only watch movies a few times a summer, a portable screen makes sense. Inflatable and tripod screens are easy to store and transport. If you set up a permanent backyard theater, a fixed-frame or retractable screen works better.
Budget
Your budget plays a big role in your choice. Inflatable screens start around 50 to 80 dollars. Tripod screens range from 60 to 200 dollars. Fixed-frame and ALR screens can cost 200 to 1,000 dollars or more. You do not need to spend a lot to enjoy great outdoor projection. Even a budget screen beats a wrinkled bedsheet in most conditions.
Wind and Weather Resistance
If you live in a windy area, stability matters. Inflatable screens can flap and shift in the breeze. Look for models with stakes, sandbags, or tie-downs. Tripod screens are naturally more stable because they are grounded. For permanent setups, a fixed frame is the most wind-resistant option.
Setting Up Your Outdoor Projector Screen
Once you have your screen, proper setup makes all the difference. Follow these tips for the best results.
Choose the Right Location
Pick a flat, level area for your screen. Uneven ground causes the screen to tilt, which distorts the image. If you are using an inflatable screen, make sure there are no sharp objects underneath that could puncture it. A clear, open space also prevents shadows from trees or fences from falling on the screen.
Position the Projector Correctly
Place the projector at the right distance based on your screen size. Most projectors have a throw ratio listed in the manual. Use an online throw distance calculator if you are unsure. The projector should be level with the center of the screen for the best image shape.
If your projector has lens shift or keystone correction, use these features to fine-tune the image. But try to avoid heavy keystone adjustment, as it reduces image quality. The best setup is a projector positioned directly in front of the screen at the correct distance.
Adjust Your Projector Settings
Most projectors have a brightness or lumens rating. For outdoor use, you want at least 2,000 to 3,000 lumens. More is better if you are watching in twilight or in a yard with some ambient light. Set the projector mode to brightest or dynamic for outdoor viewing.
Turn off any ambient light sources near the screen. If you cannot avoid porch lights or streetlights, position the screen so those light sources are behind the projector or to the side. This reduces glare and improves contrast.
Common Mistakes to Avoid
Even experienced outdoor movie lovers make setup mistakes. Here are the most common ones and how to avoid them.
- Using a wrinkled or dirty surface. Any wrinkle or stain shows up on the projected image. Always use a smooth, clean surface or a proper screen.
- Ignoring ambient light. Watching in daylight without an ambient light rejecting screen leads to a very faint image. Wait for full darkness or invest in the right screen material.
- Choosing the wrong screen size. A screen that is too large for your viewing distance looks blurry on the edges. Measure your space before you buy.
- Forgetting about projector placement. If the projector is too close or too far, the image will be too small or too dim. Check the throw ratio and plan accordingly.
- Neglecting audio. A great image means nothing if the sound is poor. Use a Bluetooth speaker or a small soundbar to complement your outdoor projector setup.
- Not securing the screen. Wind can topple or shift your screen mid-movie. Always use stakes, weights, or tie-downs to keep it stable.
Expert Tips for the Best Outdoor Viewing Experience
A few extra tips can take your outdoor movie setup to the next level. Here are some insights from experienced outdoor cinema enthusiasts.
First, test your setup before the big event. Run the projector for a few minutes and check the image from different seating positions. Look for bright spots, dark patches, or distortion. Make adjustments before your guests arrive.
Second, consider the time of day. Sunset provides a magical atmosphere for outdoor movies. But the last 30 minutes before full darkness give you the best balance of natural ambiance and image quality. Start the movie just as the sun goes down for the perfect experience.
Third, keep your equipment safe from moisture. Dew and light rain can damage your projector and screen. Set up a canopy or tarp above the projector if there is any chance of moisture. A simple pop-up canopy works great for this.
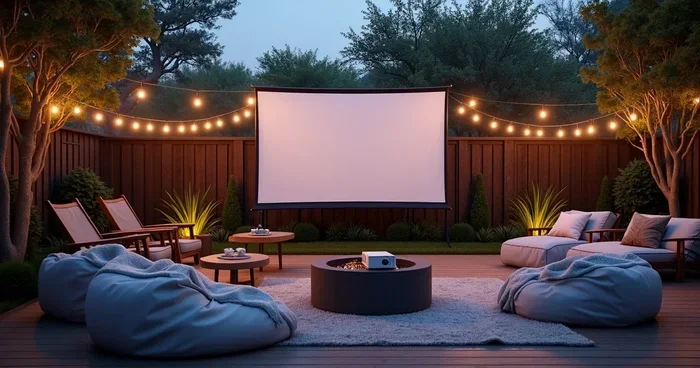
Finally, make it an event. Add string lights, popcorn machines, and cozy seating. The screen is important, but the overall atmosphere makes the night memorable. Your guests will remember the fun time, not whether you used a wall or a dedicated screen.
Conclusion
So, do you need a screen for outdoor projector setups? The answer depends on your goals and your situation. If you want a quick, casual movie night with friends, a white wall or bedsheet can work fine. But if you want a crisp, bright, and vibrant image that looks professional, a dedicated outdoor projector screen is the way to go.
The good news is there are options for every budget and every space. Inflatable screens are fun and affordable. Tripod screens are portable and practical. Fixed frames deliver the best image quality for permanent setups. Whatever you choose, the key is to match your screen to your viewing conditions and your audience size.
Take the time to plan your setup. Consider the light, the distance, and the size of your space. With the right surface and a little preparation, you can turn any backyard into an outdoor cinema. Start planning your next outdoor movie night today, and you will see the difference a proper screen makes.
Frequently Asked Questions
Can I use a white bedsheet instead of a projector screen outdoors?
Yes, a white bedsheet works for casual outdoor viewing, especially after dark. The image will not be as sharp or bright as with a dedicated screen, but it is a fine option for occasional use. Make sure the sheet is as smooth and wrinkle-free as possible for the best results.
What is the best outdoor projector screen for a backyard movie night?
Inflatable screens are the most popular choice for backyard movie nights. They are easy to set up, affordable, and look great. For smaller groups, a tripod screen works well. If you host movies often, a fixed-frame or retractable screen offers the best long-term value.
Do I need a special screen if I am watching in daylight?
Yes, watching in daylight is very challenging without the right screen. You need an ambient light rejecting, or ALR, screen to get a visible image in bright conditions. Even with an ALR screen, a dark, shaded area works much better than direct sunlight.
How big should my outdoor projector screen be?
The right size depends on your viewing distance. A good rule is to sit 1.5 to 2 times the diagonal screen size away. For a 100-inch screen, that means seating 12 to 16 feet away. Measure your available space and choose a size that fits comfortably.
Is a wall good enough for outdoor projection?
A smooth, flat, white wall can work well for outdoor projection at night. It is not as good as a dedicated screen because walls often have texture, cracks, and uneven coloring. But for a quick setup or a casual gathering, a white wall is a perfectly acceptable option.
What budget should I expect for an outdoor projector screen?
Inflatable and basic tripod screens start around 50 to 100 dollars. Mid-range options with better materials run 150 to 300 dollars. High-end ambient light rejecting or fixed-frame screens can cost 300 to 1,000 dollars or more. You can find a great screen at almost any price point.
=== CONCLUSION ===
Do you need a screen for outdoor projector setups? You do not always need one, but a proper screen makes a huge difference. Whether you choose a simple bedsheet or a premium inflatable screen, the right surface brings your outdoor movies to life. Consider your space, your budget, and your viewing conditions, and pick the option that fits your needs best. With the right setup, every outdoor movie night becomes an unforgettable experience.