Can You Use A White Tarp As A Projector Screen For Movies
Yes, you can use a white tarp as a projector screen for movies. A white tarp works as a budget-friendly projection surface that delivers decent image quality for casual movie nights. This guide covers setup tips, image quality expectations, and how to get the most out of your DIY projector screen using a simple white tarp.
Have you ever wanted to host a backyard movie night but did not want to spend a fortune on a projector screen? Can you use a white tarp as a projector screen for movies? The short answer is yes. A simple white tarp can work surprisingly well as a projection surface for your next outdoor movie event. People have been using tarps as makeshift screens for years, and the results can be impressive when done right.
Whether you are planning a backyard cinema night with friends or looking for a cheap movie screen alternative for your garage, a white tarp offers a practical solution. It is lightweight, easy to find, and costs just a few dollars at most hardware stores. But before you hang one up and start projecting, there are a few things you should know. This guide walks you through everything you need to consider when using a white tarp as a projector screen.
We will cover setup steps, image quality tips, common mistakes, and when a tarp screen makes sense versus when you might want to invest in a proper portable screen. By the end, you will know exactly what to expect and how to get the best possible viewing experience from your tarp setup.
Key Takeaways
- A white tarp works as a projector screen: It reflects light well and can display a clear image for movies and presentations.
- Image quality depends on several factors: Tarp material, projector brightness, and ambient light all affect your viewing experience.
- Setup is simple and affordable: You need minimal tools and no special equipment to create a DIY projector screen with a tarp.
- Wrinkles matter a lot: A wrinkled tarp causes distortion, so proper stretching and ironing are essential for a smooth projection surface.
- White tarps are best for dark environments: They perform well outdoors at night or in dim rooms but struggle in bright settings.
- Not all tarps are equal: Thicker, matte-finish white tarps give better results than thin or glossy ones.
- A tarp screen is great for casual use: For movie nights, backyard cinema events, and temporary setups, it is a practical and cost-effective choice.
📑 Table of Contents
- What Is a White Tarp and Why Consider It as a Projector Screen?
- How Does a White Tarp Compare to a Traditional Projector Screen?
- Setting Up Your White Tarp Projector Screen
- Tips for Getting the Best Image Quality
- Common Mistakes to Avoid
- When a White Tarp Screen Works Best (and When It Does Not)
- How to Maintain Your Tarp Screen for Long-Term Use
- Final Thoughts
What Is a White Tarp and Why Consider It as a Projector Screen?
Understanding What a White Tarp Is
A white tarp is a large sheet of waterproof fabric, usually made from polyethylene or vinyl. People use tarps for all kinds of purposes, from covering outdoor furniture to protecting construction materials. But their smooth, white surface makes them a natural choice for a DIY projector screen. The white color reflects light rather than absorbing it, which is exactly what you need for a good projection surface.
White tarps come in different thicknesses and sizes. You can find them at hardware stores, home improvement centers, and online retailers. Most are inexpensive, and many are reusable. This makes them one of the most accessible options for anyone looking to create a movie screen alternative without spending much money.
Why People Choose a Tarp Over a Traditional Screen
There are several reasons why people turn to a white tarp instead of buying a proper projector screen. First, cost matters. A quality projector screen can cost anywhere from 50 to several hundred dollars. A basic white tarp costs between 10 and 30 dollars. For a one-time event or a casual setup, that price difference is hard to ignore.
Second, convenience plays a big role. A tarp is easy to carry, easy to set up, and easy to store. You can fold it up and toss it in a closet after your outdoor movie night. A traditional portable screen is bulkier and often requires more assembly. For people who host movie nights occasionally, a tarp is the simpler option.
Third, flexibility is a huge advantage. You can hang a tarp almost anywhere. A fence, a wall, a frame made from PVC pipes, or even a couple of trees can serve as support. This means your backyard cinema setup is not limited by where you can place a store-bought screen.
How Does a White Tarp Compare to a Traditional Projector Screen?
Image Quality Comparison
When you compare a white tarp screen to a dedicated projector screen, there are some clear differences in image quality. A purpose-built screen is designed to provide even light distribution, sharp edges, and accurate colors. A tarp, on the other hand, may show slight texture, minor color shifts, and less uniform brightness across the surface.
That said, for casual movie watching, the difference is often not noticeable. If you are sitting at a reasonable distance and using a decent projector, a white tarp can deliver a very enjoyable viewing experience. The key is to minimize wrinkles and choose the right tarp material. A matte-finish white tarp will give you better results than a glossy or thin one.
Brightness and Screen Gain
One important concept in the world of projection is screen gain. Screen gain refers to how much light a surface reflects back to the viewer. A higher gain means a brighter image. Most white tarps have a gain close to 1.0, which is similar to a basic matte white projector screen.
However, some tarps have a slight sheen or gloss that can increase gain but also create hot spots. Hot spots are bright patches in the center of the image that look unnatural. If you want even, comfortable viewing, look for a matte white tarp with no shine. This will give you the most balanced projection surface for your home theater setup.
Portability and Setup Differences
A traditional projector screen often comes with a stand or mounting bracket. While this makes setup straightforward, it also means you are tied to one location. A white tarp is far more portable. You can set it up in your backyard, take it to a park, or use it in a garage. It rolls or folds up easily and fits in a car trunk.
The trade-off is that a tarp requires more effort to keep it taut and wrinkle-free. A proper screen stays smooth on its own. With a tarp, you need to stretch it properly and secure all edges. But once you get the hang of it, the process becomes quick and easy.
Setting Up Your White Tarp Projector Screen
Choosing the Right Tarp
Not all white tarps are the same, and choosing the right one makes a big difference. Look for a tarp that is at least 8 by 10 feet for a comfortable movie-watching size. Go for a matte finish rather than a glossy one. A matte surface scatters light evenly, which reduces glare and hot spots.
Thicker tarps tend to be more durable and less see-through. If light passes through the tarp, your image will look washed out. A heavier gauge white tarp blocks more light and gives you a crisper picture. Check the weight rating, often measured in mils or grams per square meter, before you buy.
Building a Simple Frame or Support
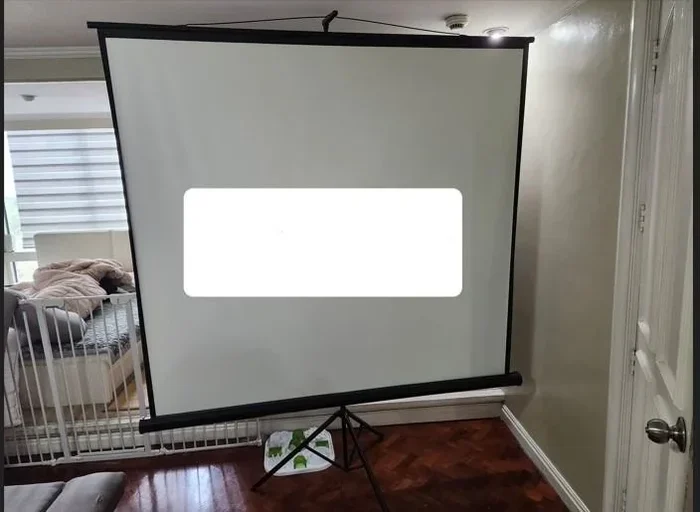
You have several options for supporting your tarp. The simplest method is to tie it between two points, like fence posts or trees. Use bungee cords or strong rope to secure the corners. Make sure the tarp is stretched tight. Any slack will create wrinkles that distort your projector image quality.
Another popular approach is to build a PVC frame. You can cut PVC pipes into lengths, connect them with elbow joints, and create a rectangular frame that holds the tarp. This gives you a freestanding DIY projector screen that you can set up anywhere. Add grommets along the edges of the tarp and zip-tie it to the frame for a secure fit.
Positioning the Projector
Where you place the projector matters just as much as the screen itself. Position the projector at the correct distance based on your tarp size and the projector’s throw ratio. Most projectors have a throw ratio chart in their manual or on the manufacturer’s website. Use this to determine how far back the projector needs to be.
Place the projector on a stable surface or a tripod. Make sure it is level and centered with the tarp. Even a slight tilt can cause the image to appear distorted at the top or bottom. If your projector has keystone correction, use it to fix minor alignment issues. But try to get the image as square as possible before relying on digital correction, since that can reduce sharpness.
Tips for Getting the Best Image Quality
Eliminate Ambient Light
Ambient light is the biggest enemy of any projection surface, including a white tarp. The more light in the room or outside, the harder it is to see a clear image. For the best results, set up your backyard cinema after sunset or in a shaded area. If you are indoors, close all curtains and blinds to block outside light.
Some people hang tarps on walls that face away from streetlights or neighbor’s windows. This simple step can dramatically improve your viewing experience. The darker the environment, the sharper and more vibrant your projected image will look on the tarp.
Use a Bright Projector
A white tarp does not boost the brightness of your projector. It simply reflects the light that hits it. If your projector is dim, the image on the tarp will look faint and washed out. For the best results, use a projector with at least 2,000 to 3,000 lumens. Higher lumens mean a brighter, more visible image, especially if there is a little ambient light.
If you only have a lower-lumen projector, keep the tarp as small as possible and sit closer to it. A smaller projection area is easier to illuminate with less light output. This trick helps you get a brighter picture even with a budget projector.
Iron or Smooth Out Wrinkles
Wrinkles are the number one enemy of a tarp projector screen. Every crease creates a distortion in the image. Before your movie night, take time to smooth out the tarp as much as possible. You can use a handheld steamer, an iron on a low setting, or even a garden hose to gently wet the tarp and let it dry flat.
Some people lay the tarp flat on a clean surface and use a heavy roller to press out wrinkles. The smoother the surface, the better your projector screen setup will look. Take this step seriously, because even small wrinkles can noticeably affect the quality of your movie screen alternative.
Test Before the Big Event
Do not wait until movie night to try your tarp setup for the first time. Set everything up a day or two in advance. Project a test image and walk around to check for hot spots, distortion, or uneven brightness. This gives you time to adjust the projector position, tighten the tarp, or make other changes before your guests arrive.
Testing also helps you figure out the best seating distance. Sit in the spot where most people will watch and check if the image looks clear and comfortable. Make adjustments as needed. A little preparation goes a long way toward a successful outdoor movie night.
Common Mistakes to Avoid
Using a Colored or Printed Tarp
This is one of the most common mistakes people make. A white tarp works because it reflects all colors of light evenly. A colored tarp, like blue or green, will tint your entire image. A printed tarp with a pattern will create visual interference that ruins the picture. Always use a plain, clean white tarp for the best results.
Ignoring the Tarp Material
Not all white tarps are suitable for projection. Thin tarps may let light pass through, creating a dim and blurry image. Tarps with a glossy finish create hot spots and uneven brightness. And tarps with heavy texture or weave patterns will show those lines on the projected image. Always choose a thick, matte-finish white tarp specifically for the best projection surface.
Setting Up in Full Sunlight
Even the best projector struggles in direct sunlight. A white tarp does not have the light-blocking properties of a dedicated screen. If you set up during the day, your image will look pale and hard to see. Always aim for evening or nighttime setups, or find a shaded area that blocks direct sunlight for your backyard cinema event.
Forgetting About Sound
While this is not about the tarp itself, many people focus so much on the visual setup that they forget about audio. A tarp screen does nothing for sound quality. Make sure your projector has decent built-in speakers or connect external speakers for a better viewing experience. Good sound makes a big difference in how enjoyable your movie night feels.
When a White Tarp Screen Works Best (and When It Does Not)
Ideal Situations for a Tarp Screen
A white tarp projector screen shines in certain situations. Casual movie nights in the backyard are a perfect match. Birthday parties, neighborhood gatherings, and camping trips all benefit from the portability and low cost of a tarp setup. It is also great for kids’ movie nights in the garage or a large indoor room where you do not want to invest in a permanent screen.
If you host outdoor movie nights regularly but do not want to spend hundreds on equipment, a tarp is a smart starting point. It gives you a functional projection surface without a big commitment. You can always upgrade later if you decide you want a more permanent setup.
When You Should Skip the Tarp
There are times when a tarp is not the right choice. If you need a high-quality image for a presentation, a business meeting, or a professional event, invest in a proper projector screen. Tarp screens are not ideal for detailed graphics, text-heavy content, or situations where image sharpness matters a lot.
Also, avoid using a tarp in bright environments where you cannot control the light. If you are setting up during the day in an open area, the image quality will be poor no matter what you do. In these cases, a high-gain screen or an indoor setup with light control works much better.
How to Maintain Your Tarp Screen for Long-Term Use
If you plan to use your white tarp as a screen more than once, proper care extends its life. After each use, fold it neatly and store it in a dry place. Moisture can cause mold and mildew, which can stain the fabric and affect its reflective properties.
Clean the tarp gently with a damp cloth before each use. Dust and dirt particles create tiny shadows on the projection surface that reduce image clarity. If the tarp gets stained, wash it according to the manufacturer’s instructions and let it dry completely before storing it. A well-maintained tarp can serve you for many movie nights to come.
Final Thoughts
Can you use a white tarp as a projector screen for movies? Absolutely. A white tarp is one of the simplest and most affordable ways to create a DIY projector screen for casual movie nights. It works well in dark environments, requires minimal setup, and costs very little. While it will not match the image quality of a dedicated projector screen, it comes close enough for most home entertainment needs.
The key to success lies in choosing the right tarp, preparing the surface properly, controlling ambient light, and using a bright enough projector. Avoid common mistakes like using colored tarps or setting up in direct sunlight, and your backyard cinema will be a hit. Whether you are a casual viewer or a movie-loving host, a white tarp screen is a practical and fun way to bring the theater experience to your own space.
Give it a try at your next movie night. You might be surprised at how good a simple white tarp can look when paired with a good projector and a little preparation. It is one of those ideas that proves you do not need expensive gear to create memorable entertainment experiences.
Frequently Asked Questions
Can any white tarp be used as a projector screen?
Not every white tarp works well. You need a matte-finish, thick white tarp that does not let light pass through. Thin or glossy tarps create poor image quality. Look for a heavy-duty matte white tarp for the best results as a projection surface.
Does a white tarp affect the brightness of the projected image?
A white tarp reflects light but does not amplify it. If your projector is dim, the image on the tarp will look faint. For the best brightness, use a projector with at least 2,000 lumens and set up in a dark environment for your outdoor movie night.
How do I remove wrinkles from a tarp before using it as a screen?
You can use a handheld steamer, a clothes iron on low heat, or lay the tarp flat and use a heavy roller. You can also lightly mist the tarp with water and let it dry flat. Smoothing out wrinkles is essential for a clear projector image quality.
Can I use a white tarp indoors as a projector screen?
Yes, a white tarp works indoors as well as outdoors. It is a great option for a garage, basement, or large room where you want a temporary movie screen alternative. Just make sure to control ambient light by closing curtains and turning off unnecessary lights.
What size tarp do I need for a good movie-watching experience?
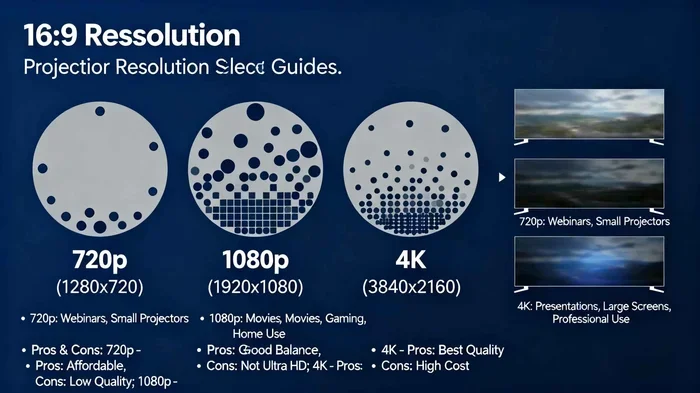
An 8 by 10-foot tarp is a good starting size for most setups. It gives you a large enough image for comfortable viewing while still being manageable to set up. For bigger groups, consider a larger tarp or a wider aspect ratio to match your projector’s native resolution.
Is a tarp screen better than a bedsheet for projection?
Generally, yes. A white tarp is thicker, more durable, and less see-through than a bedsheet. It provides a more opaque and stable projection surface, which leads to better image quality. A bedsheet may work in a pinch, but it often shows light bleed and texture that a tarp avoids.