Do You Need A Canvas For A Projector For Best Results
You do not always need a dedicated canvas for your projector, but the right surface makes a huge difference in image quality. A projector canvas enhances brightness, color accuracy, and sharpness compared to a plain white wall. Whether you are setting up a home theater or an outdoor movie night, choosing the correct projection surface matters more than most people think. This guide breaks down every option so you can make the best choice for your setup.
You just bought a projector. You are excited to set it up. Then the question hits you: do you really need a canvas for a projector? Maybe you have a blank white wall. Maybe you have a bedsheet. Maybe you have nothing at all. The good news is that you have options, and not all of them cost a lot of money. In this guide, we will walk through everything you need to know about projection surfaces. We will compare walls, screens, and canvases. We will also share practical tips to help you get the best picture every single time.
The short answer is no, you do not always need a canvas. But the longer answer is more interesting. The surface you project onto has a massive impact on how your image looks. Color accuracy, brightness, sharpness, and contrast all depend on what you are projecting onto. A projector canvas designed specifically for this purpose will almost always outperform a regular wall. That said, a well-prepared wall can work surprisingly well in the right conditions. Let us dive into the details so you can decide what works best for your situation.
Key Takeaways
- You can project on a white wall: a plain matte wall works in many situations, especially in dark rooms.
- A projector canvas improves image quality: it boosts brightness, contrast, and color vibrancy significantly.
- Screen gain matters: different materials reflect light differently, affecting how your image looks.
- Outdoor setups need special surfaces: inflatable and portable screens work best outside.
- Wrinkle-free surfaces are essential: any texture or fold distorts your projected image.
- Throw distance affects screen size: plan your projector placement before choosing a canvas or screen.
- Budget options exist for every need: you do not have to spend a fortune to get great results.
📑 Table of Contents
- What Is A Projector Canvas And Why Does It Matter?
- Can You Just Use A White Wall Instead?
- Types Of Projector Canvases You Can Choose From
- How To Choose The Right Canvas For Your Setup
- Common Mistakes People Make With Projector Surfaces
- Expert Tips For Getting The Best Projector Image
- Quick Tips For Your Projector Setup
- Final Thoughts On Whether You Need A Canvas For Your Projector
What Is A Projector Canvas And Why Does It Matter?
A projector canvas is a special fabric or material designed to display projected images at their best. Unlike a regular wall, a canvas is engineered to reflect light evenly. This means your image looks uniform across the entire surface. No hot spots. No dark patches. Just a clean, crisp picture.
You might wonder why a regular wall is not enough. The answer comes down to how walls absorb and scatter light. Most walls are not perfectly flat. They have texture, paint variations, and slight imperfections. All of these things distort your projected image. A projection surface made for this purpose eliminates those problems.
How Screen Gain Affects Your Picture
One of the most important things to understand is screen gain. Screen gain measures how much light a surface reflects back to the viewer. A high-gain canvas reflects more light, making your image brighter. A low-gain canvas absorbs more light, which can improve contrast in bright rooms. Most standard projector canvases have a gain between 1.0 and 1.3. This is a sweet spot for most home setups.
Here is a simple way to think about it. Imagine you are shining a flashlight on a white wall. The light spreads out in all directions. Now imagine shining that same flashlight on a projector canvas. The canvas directs more light back toward you. That is why the image looks sharper and more vibrant on a proper canvas.
Matte White vs. Gray Canvases
Not all canvases are the same color. Matte white canvases are the most common. They work well in dark rooms and deliver accurate colors. Gray canvases are designed for rooms with some ambient light. They boost contrast by absorbing more of the surrounding light. If you watch movies during the daytime, a gray canvas might be the better choice for your projector setup.
Can You Just Use A White Wall Instead?
Yes, you can use a white wall. In fact, many people do. A smooth, matte white wall is one of the easiest projection surfaces you can use. It costs nothing extra, and it is always available. But there are some important things to keep in mind before you skip buying a canvas entirely.
The biggest issue with walls is texture. Even walls that look smooth to the naked eye have tiny imperfections. These imperfections scatter light unevenly. The result is a slightly fuzzy or uneven image. If your wall is very smooth and freshly painted with matte white paint, you can get surprisingly good results.
When A Wall Works Great
A white wall works well in certain situations. Here are a few examples:
- Dark rooms: when you can block out all ambient light, even a basic wall looks decent.
- Temporary setups: if you only project once in a while, a wall saves you the hassle of setting up a screen.
- Casual viewing: for everyday YouTube videos or slideshows, a wall is perfectly fine.
- Tight budgets: a wall costs nothing, and that is hard to beat.
When A Wall Falls Short
On the other hand, a wall has clear limitations. If your room has windows or bright lights, the image will look washed out. Walls also tend to be smaller than most projector screens, which limits your screen size. And if the wall is not perfectly flat, you will see distortions in the corners or edges of the image.
One more thing to watch out for is wall color. Bright or colored walls will change the colors in your projected image. A blue wall will make everything look blue. A yellow wall will add a warm tint. Always stick to white or light gray matte surfaces if you are going the wall route.
Types Of Projector Canvases You Can Choose From
If you decide a canvas is right for you, you have several options. Each type has its own strengths. Let us break them down so you can find the best fit for your needs.
Fixed Frame Canvases
A fixed frame canvas is mounted to a rigid frame and stays in one place. It is the most popular choice for dedicated home theaters. These canvases are always perfectly flat, which means no wrinkles and no distortions. The image quality on a fixed frame canvas is consistently excellent. They come in various sizes, so you can pick one that matches your throw distance and room size.
The downside is that they are permanent. You cannot easily move a fixed frame canvas from room to room. If you rent or like to rearrange your furniture often, this might not be the best option.
Portable and Roll-Up Screens
Portable screens are a fantastic middle ground. They roll up for easy storage and unroll when you want to watch something. Many of them come with a lightweight tripod stand. You can set one up in minutes, and they work great for both indoor and outdoor use.
Portable screens are ideal for people who do not want a permanent installation. They are also great for outdoor movie nights and backyard gatherings. The image quality is slightly lower than a fixed frame canvas because the fabric can have minor wrinkles. But for casual viewing, they work really well.
Inflatable Screens
Inflatable screens are the easiest option for outdoor use. You just plug them in, and a fan blows them up in seconds. They are lightweight, compact, and very portable. Many families use inflatable screens for backyard movie nights or camping trips.
The trade-off is image quality. Inflatable screens are not as tight as fixed canvases, so the image can look slightly soft. They also struggle in windy conditions because the fabric moves. But for fun, casual outdoor events, they are hard to beat.
DIY Canvas Options
If you are on a tight budget, you can create your own projector canvas. Some people buy projector screen fabric and stretch it over a frame. Others use a tension rod and a large piece of white bedsheet. These DIY options can work surprisingly well if you take the time to get the fabric perfectly smooth and wrinkle-free.
Just remember that the fabric matters a lot. Regular bedsheets are not designed to reflect light evenly. They can create hot spots and uneven brightness. If you go the DIY route, invest in proper projection fabric. It makes a real difference in the final picture.
How To Choose The Right Canvas For Your Setup
Choosing the right canvas depends on several factors. Let us walk through the key considerations so you can make a confident decision.
Consider Your Room Lighting
Lighting is the single biggest factor in choosing a canvas. If your room is completely dark, a matte white canvas with a gain of 1.0 to 1.1 will work beautifully. If your room has windows or ambient light, consider a gray canvas or a high-gain screen. High-gain canvases reflect more light back to the viewer, which helps fight off ambient light. But they also narrow the viewing angle, so you need to sit directly in front of the screen.
Measure Your Throw Distance
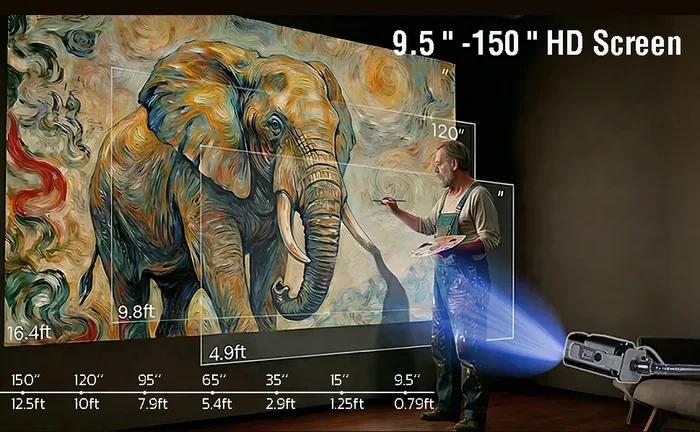
Throw distance is the space between your projector and the screen. It determines how large your image can be. Before buying a canvas, measure the distance from your projector to the wall or screen location. Then check your projector specifications for the recommended throw ratio. This will tell you what screen size you can achieve in your space.
For example, if your projector has a throw ratio of 1.5:1 and you place it 10 feet from the wall, your image will be about 6.7 feet wide. Plan ahead so you do not end up with a screen that is too small or too large for your room.
Think About Aspect Ratio
Aspect ratio refers to the shape of the image. The most common ratios are 16:9 and 16:10. Most modern projectors use a 16:9 ratio, which matches standard HD and 4K content. Make sure your canvas or screen matches the aspect ratio of your projector. If you use a 4:3 canvas with a 16:9 projector, you will get black bars on the sides. This is an easy mistake to avoid, but it can be frustrating when you do not notice in time.
Budget Considerations
Projector canvases come in a wide range of prices. A basic roll-up screen can cost as little as 30 to 50 dollars. A high-end fixed frame canvas can run several hundred dollars or more. You do not need to spend a fortune to get good results. Even a mid-range portable screen will dramatically improve your image compared to a bare wall. Set a budget, compare options, and focus on the features that matter most for your use case.
Common Mistakes People Make With Projector Surfaces
Even with the best projector in the world, a bad surface will ruin the experience. Here are some common mistakes to avoid.
Using a Glossy or Shiny Surface
Never project onto a glossy or shiny surface. Glossy paint, glass, or glossy fabrics create intense hot spots. The center of the image will look blindingly bright while the edges stay dim. Always use matte surfaces for the best results. A matte white surface is the gold standard for projector setups.
Ignoring Wrinkles and Folds
Any wrinkle or fold in your canvas or screen will distort the image. The projector will try to display a flat picture on an uneven surface, and the result is a warped image. If you use a portable screen, make sure the fabric is pulled tight before you start watching. For DIY setups, take the time to iron or smooth out the fabric beforehand.
Choosing the Wrong Size
A screen that is too small or too large for your room will hurt the viewing experience. If the screen is too small, you will feel like you are sitting too close to a TV. If it is too large, the image loses sharpness and brightness. Measure your room, consider your seating distance, and choose a canvas size that fits your space.
Forgetting About Ambient Light
Ambient light is the enemy of projector image quality. Even a great canvas will look washed out if there is too much light in the room. Use curtains or blinds to block window light. Turn off overhead lights when possible. And if you cannot control the lighting, invest in a gray canvas or a high-gain screen designed to fight ambient light.
Expert Tips For Getting The Best Projector Image
Want to squeeze every bit of quality out of your setup? Here are some expert tips that make a real difference.
Calibrate Your Projector Settings
Most projectors come with default settings that are not optimized for every room. Spend a few minutes adjusting the brightness, contrast, and color settings. Many modern projectors also have picture modes for movies, sports, and presentations. Use the right mode for your content, and your image will look much better.
Position Your Projector Correctly
Place your projector at the correct height and distance. The lens should be centered on the screen for the most uniform image. If your projector is mounted too high or too low, the image will be skewed. Use a projector mount or a sturdy tripod to keep everything stable and aligned.
Keep Your Lens Clean
This sounds obvious, but dust on the lens is one of the most common causes of blurry or hazy images. Wipe the lens gently with a microfiber cloth before every use. A clean lens makes a noticeable difference in sharpness and clarity.
Use the Right Cables
The cable connecting your source device to the projector matters more than most people realize. An HDMI cable is the standard for modern projectors. Make sure you are using a high-speed HDMI cable that supports your resolution. A cheap or old cable can limit your picture quality, even if your projector is capable of 4K.
Quick Tips For Your Projector Setup
- Always test your setup before a movie night. Run a test image to check for wrinkles or color issues.
- Use blackout curtains to control ambient light in your viewing room.
- Clean your projector lens regularly for the sharpest image.
- Match your canvas aspect ratio to your projector output.
- Invest in a quality HDMI cable for the best signal transmission.
- If you go the wall route, use matte white paint for the smoothest surface.
- Consider a portable screen if you need flexibility for indoor and outdoor use.
Final Thoughts On Whether You Need A Canvas For Your Projector
So, do you need a canvas for a projector? The answer depends on your situation. If you want the best possible image quality and plan to watch movies or shows regularly, a dedicated canvas or screen is absolutely worth it. It makes a noticeable difference in brightness, color, and sharpness. If you only project occasionally and have a smooth white wall, you can get by without one.
The key is understanding your needs and your environment. A dark room with no ambient light makes a wall much more viable. A bright room almost always benefits from a proper canvas. Think about how often you will use your projector, where you will use it, and what kind of image quality you expect. With that information, the right choice becomes clear.
No matter what you choose, the most important thing is to enjoy the experience. A projector is a wonderful way to bring big-screen entertainment into your home. Whether you use a premium canvas or a simple white wall, the magic of watching a great movie on a big screen never gets old. Pick the surface that fits your budget and your space, set everything up, and enjoy the show.
Frequently Asked Questions
Can I use a projector without any canvas or screen at all?
Yes, you can project onto a bare wall, but the image quality will not be as good as with a proper canvas or screen. A smooth, matte white wall works best if you do not have a dedicated surface. Keep in mind that wall texture and color will affect how your image looks.
What is the best color for a projector canvas or wall?
Matte white is the most versatile and widely recommended color for projector surfaces. It reflects light evenly and delivers accurate colors. Gray canvases work well in rooms with ambient light because they boost contrast. Avoid bright or colored surfaces, as they will distort your projected image.
How does a projector canvas improve image quality compared to a wall?
A projector canvas is designed to reflect light uniformly across the entire surface. This means your image looks brighter, sharper, and more even compared to a wall, which may have texture or imperfections. A canvas also helps with color accuracy and reduces hot spots and uneven brightness.
Is a portable projector screen worth buying?
Yes, portable screens are a great value for most users. They are easy to set up, store, and move around. They work well for both indoor and outdoor use. While they may not match the image quality of a fixed frame canvas, they offer a huge improvement over a bare wall at a reasonable price.
Can I use a bedsheet as a DIY projector screen?
You can, but the results vary depending on the fabric. A white, smooth bedsheet can work in a pinch, but it often creates uneven brightness and hot spots. For better results, buy projector screen fabric designed for this purpose. It reflects light much more evenly than regular bedding.
What size projector screen should I get for my room?
Screen size depends on your throw distance and room size. Measure the distance from your projector to the screen location, then check your projector’s throw ratio. A general rule is to sit about 1.5 to 2 times the screen width away from the projector for the best viewing experience. Choose a size that fits your space without stretching the image too thin.
=== CONCLUSION ===
Choosing the right surface for your projector does not have to be complicated. A canvas for projector setups is a great investment if you watch movies or present regularly. But a well-prepared white wall can also work surprisingly well in the right conditions. The most important factors are surface texture, color, and your room lighting. Take the time to assess your setup, consider your options, and pick the surface that delivers the best image for your needs. With the right projection surface, your projector will deliver an experience that truly feels like a big screen in the comfort of your own home.