Can You Use A Tarp For A Projector Screen For Home
Yes, you can use a tarp for a projector screen at home, and it works surprisingly well for casual movie nights and backyard gatherings. A white tarp or matte white fabric can serve as a DIY projector screen when you need a quick and affordable setup. However, image quality and wrinkle issues can affect your viewing experience, so choosing the right material and setup method matters a lot.
Have you ever wanted to host a backyard movie night but didn’t want to spend a fortune on a projector screen? Maybe you already own a projector and are wondering if you can just hang up a tarp and call it a day. The good news is that using a tarp for a projector screen is a real option that thousands of people have tried successfully.
Whether you are planning a backyard movie night with friends, setting up a temporary screen for a camping trip, or just looking for a cheap way to enjoy movies at home, a tarp can do the job. But there are some important things you need to know before you hang that tarp up and start projecting. Not all tarps are created equal, and the wrong choice can leave you with a blurry, distorted image that kills the fun.
In this guide, we will walk you through everything you need to know about using a tarp as a projection surface. We will cover which tarps work best, how to set one up properly, and what to expect in terms of image quality. By the end, you will know exactly whether a tarp is the right choice for your setup.
Key Takeaways
- A tarp can work as a projector screen: A white or matte white tarp provides a decent projection surface for home and outdoor use.
- Material choice matters: Not all tarps are equal — thicker, lighter-colored tarps deliver better image quality than dark or thin ones.
- Wrinkles are the biggest enemy: A wrinkled tarp creates distortions, so proper stretching and mounting are essential.
- Ambient light affects performance: Tarps work best in low-light environments; bright daylight washes out the projected image.
- DIY tarp screens are budget-friendly: You can set up a tarp screen for under $30, making it ideal for casual movie nights.
- Temporary setups shine: Tarps are perfect for one-time events, camping trips, or backyard gatherings where a permanent screen isn’t needed.
- Consider alternatives for regular use: If you watch movies frequently, a dedicated screen or wall paint may deliver better long-term results.
📑 Table of Contents
- Can You Use A Tarp For A Projector Screen At Home?
- Choosing the Right Tarp for Your Projector Screen
- How to Set Up a Tarp as a Projector Screen
- Pros and Cons of Using a Tarp as a Projector Screen
- Tips for Improving Image Quality on a Tarp Screen
- Common Mistakes to Avoid When Using a Tarp as a Projector Screen
- Alternatives to Using a Tarp as a Projector Screen
- Expert Insights on Tarp Projector Screens
- Final Thoughts on Using a Tarp for a Projector Screen
Can You Use A Tarp For A Projector Screen At Home?
The short answer is yes. A tarp can work as a DIY projector screen in a pinch. Many people use tarps for outdoor movie events, school presentations, and even temporary home theater setups. A white tarp or a matte white fabric tarp reflects light back toward the audience, which is exactly what a projection screen needs to do.
However, a tarp is not a replacement for a purpose-built screen. The image quality you get from a tarp depends heavily on several factors. These include the tarp material, color, size, how tightly you stretch it, and the lighting conditions in your room or outdoor space. Let us break down each of these factors so you can make an informed decision.
Why People Choose Tarps as Projector Screens
There are several reasons why people turn to tarps instead of buying a dedicated screen. First, tarps are incredibly affordable. You can pick up a decent white tarp for under $20 at most hardware stores or online. Second, tarps are widely available. You probably already have one in your garage or shed from a previous camping trip or home project.
Third, tarps are portable and easy to store. You can roll one up, toss it in a closet, and pull it out whenever you need it. This makes tarps ideal for outdoor movie nights, parties, and events where you need a screen that can be set up and taken down quickly. Finally, tarps come in many sizes, so you can find one that fits your space perfectly.
When a Tarp Screen Makes Sense
A tarp works well in situations where you need a quick, temporary solution. If you are hosting a one-time outdoor movie event, a tarp is a great choice. It also works well for casual weekend movie nights in the backyard where perfect image quality is not the top priority. Camping trips and tailgating parties are other great use cases for a tarp screen.
Tarps also make sense if you are testing out projector setups before investing in a permanent screen. You can see how a projector performs in your space without spending a lot of money upfront. This is a smart way to experiment with screen size, throw distance, and placement before committing to a more expensive option.
Choosing the Right Tarp for Your Projector Screen
Not all tarps will give you good results. The type of tarp you choose has a direct impact on your viewing experience. Here is what you need to look for when picking a tarp for your projector screen.
Color Matters
White is the best color for a projector screen, and this applies to tarps as well. A white tarp reflects light evenly, which helps produce a bright and clear image. Avoid colored tarps like green, blue, or dark gray. These colors absorb light and can cause color distortion in your projected image.
Some people wonder about black tarps. While a black tarp might seem like it would create deep blacks in your image, it actually absorbs most of the light. This results in a very dim projection that is hard to see. Stick with white or light gray for the best results.
Material and Thickness
The material of the tarp matters just as much as the color. Look for a tarp made from polyethylene or canvas. These materials have a relatively smooth surface that works well for projection. Avoid tarps with a shiny or glossy finish, as they can create glare and hot spots in the projected image.
Thickness plays a role too. A thicker tarp tends to be more opaque, which means less light passes through it. This is important if you are using the tarp outdoors and light might leak through from behind. A matte white fabric tarp is often the best option because it has a soft, non-reflective surface that scatters light evenly.
Size Considerations
Choose a tarp that is larger than the image you want to project. This gives you room to adjust the throw ratio and position your projector without losing any part of the image. A common mistake is picking a tarp that is too small, which forces you to crop the image or place the projector too close.
For a backyard setup, a tarp that is at least 8 by 10 feet works well for most projectors. If you have a powerful projector with a short throw distance, you might be able to use a smaller tarp. Always measure your space and check your projector’s specifications before buying a tarp.
How to Set Up a Tarp as a Projector Screen
Setting up a tarp as a projector screen is straightforward, but doing it right makes a big difference in image quality. Follow these steps for the best results.
Step 1: Find the Right Location
Choose a flat, open area for your tarp screen. Outdoors, this could be a backyard wall, a fence, or a frame you build yourself. Indoors, a bare wall works well. The key is to find a surface that is as straight and smooth as possible. Avoid areas with lots of ambient light, as this will wash out your projected image.
Step 2: Stretch the Tarp Tight
This is the most important step. A loose tarp creates wrinkles, and wrinkles create distortions in your image. Use bungee cords, clamps, or zip ties to secure the tarp tightly. If you are using a frame, pull the tarp over it and staple or tape it down firmly.
Some people use a wrinkle-free screen approach by stretching the tarp over a PVC pipe frame. This creates a drum-tight surface that produces much better results than just hanging a tarp from a rope. Take your time with this step, because the effort you put in here directly affects your projection quality.
Step 3: Position Your Projector
Place your projector on a stable surface or mount it on a tripod. Adjust the distance until the image fills the tarp properly. Check your projector’s throw ratio to find the sweet spot. Most projectors work best when placed between 5 and 15 feet from the screen, depending on the size of the image you want.
Make sure the projector is level and centered on the tarp. Even a slight angle can cause keystone distortion, which makes the image look skewed. Use the projector’s keystone correction feature if needed, but try to get the angle right physically first for the sharpest image.
Step 4: Adjust Settings and Test
Turn on your projector and display a test image. Look for bright spots, color issues, or areas where the image appears blurry. Adjust the projector settings, brightness, and focus until the image looks sharp and even across the entire tarp surface.
Pros and Cons of Using a Tarp as a Projector Screen
Every screen option has its strengths and weaknesses. Here is a balanced look at what you gain and what you sacrifice when you use a tarp for your projector screen.
The Advantages
- Very affordable: A tarp costs a fraction of what a dedicated projector screen costs.
- Easy to find: Tarps are available at hardware stores, home improvement centers, and online retailers.
- Portable and lightweight: You can roll up a tarp and take it anywhere.
- Multiple sizes available: Tarps come in small, medium, and extra-large sizes.
- Great for temporary use: Perfect for one-time events or occasional movie nights.
- Quick setup: You can have a tarp screen ready in minutes.
The Disadvantages
- Wrinkles and wrinkles cause image distortion: Even a slightly wrinkled tarp can create visible lines and distortions in the projected image.
- Lower image quality compared to dedicated screens: Tarps do not offer the same level of clarity, color accuracy, or brightness as purpose-built screens.
- Sensitive to ambient light: Tarps do not have the light-blocking properties of high-end screens, so they work best in dark environments.
- Durability concerns: Tarps can tear, fade, or degrade over time, especially with outdoor use.
- Not ideal for regular use: If you watch movies frequently, a tarp may not deliver the consistent quality you want.
Tips for Improving Image Quality on a Tarp Screen
If you decide to go with a tarp screen, there are several things you can do to improve your viewing experience. These tips help you get the most out of your DIY setup.
Use a High-Brightness Projector
The brighter your projector, the better your image will look on a tarp. A projector with at least 2,000 lumens is recommended for outdoor use. If you are watching in a dimly lit room, 1,500 lumens may be enough. The extra brightness helps overcome the natural light absorption of the tarp material.
Minimize Ambient Light
Turn off outdoor lights, close curtains, and avoid placing the screen near bright windows. The less ambient light there is, the sharper and more vibrant your projected image will appear. Consider setting up your movie night after sunset for the best results.
Iron or Smooth Out Wrinkles
If your tarp has wrinkles, try ironing them out before setup. A handheld steamer also works well for removing creases. The smoother the surface, the better the image will look. Some people even lay a second layer of white bedsheet over the tarp to create a smoother projection surface.
Add a Border or Frame
Framing your tarp with a wooden or PVC frame helps keep it taut and wrinkle-free. A frame also gives your screen a more finished look and makes it easier to position your projector. You can build a simple frame in under an hour with basic tools and materials.
Test Before the Big Event
Always do a test run before your movie night. Set up the tarp, position the projector, and watch a few minutes of content. Check for any issues with brightness, clarity, or color accuracy. Making adjustments before guests arrive saves you from a frustrating experience later.
Common Mistakes to Avoid When Using a Tarp as a Projector Screen
Even with the best intentions, people make mistakes that hurt their viewing experience. Here are the most common ones to watch out for.
Using the Wrong Tarp Color
This is the number one mistake people make. Using a green, blue, or dark tarp will ruin your image quality. Always choose white or light gray for the best results. The tarp color directly affects the colors and brightness of your projected image.
Skipping the Stretching Step
A loose, sagging tarp looks terrible as a screen. The wrinkles create shadows and distortions that make the movie unwatchable. Take the time to stretch the tarp tight using a frame, bungee cords, or clamps. Your image quality will thank you.
Ignoring the Projector Placement
Placing the projector too close or too far from the tarp can result in a blurry or overly small image. Always check your projector’s throw ratio and adjust the distance accordingly. A projector that is not level will also cause keystone distortion, so use a level or adjust the projector feet.
Forgetting About Wind and Weather
If you are using a tarp outdoors, wind can be a real problem. A loose tarp will flap around and ruin the image. Secure the tarp firmly to a frame or wall, and consider using weights or stakes to keep it stable. Also, avoid setting up during rainy or windy conditions.
Alternatives to Using a Tarp as a Projector Screen
If a tarp does not seem like the right option for your needs, there are several alternatives worth considering. Each has its own advantages depending on your situation and budget.
Painted Wall or Exterior Wall
Many people use a flat, white exterior wall as a natural projection surface. A wall painted with projector screen paint can deliver excellent results. This is a great permanent solution for a backyard or patio setup.
Inflatable Projector Screens
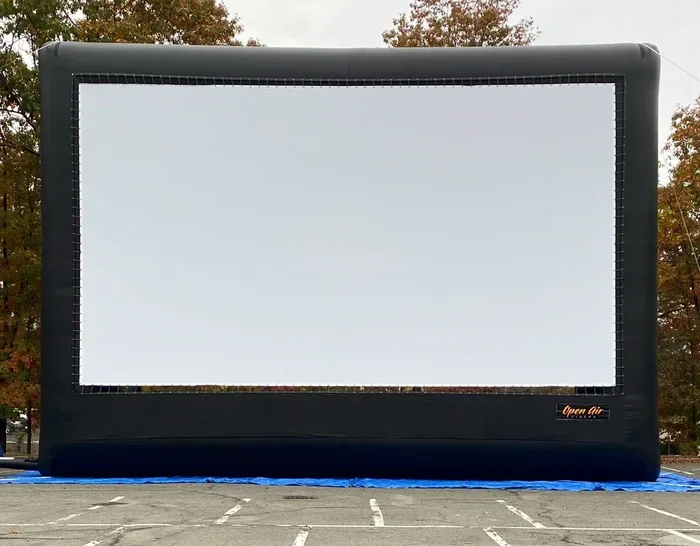
Inflatable screens are popular for outdoor events. They are easy to set up and provide a smooth, wrinkle-free surface. However, they cost more than a tarp and require an electric pump for inflation.
Retractable Projector Screens
A retractable screen is the go-to option for regular home theater use. These screens offer the best image quality and convenience, but they come at a higher price point. If you plan to use your projector frequently, a retractable screen is a worthwhile investment.
White Bed Sheet
A white bed sheet can work in a pinch, similar to a tarp. Sheets tend to be smoother than tarps, which helps reduce wrinkles. However, they are usually smaller and more translucent, so they work best for indoor use in dark rooms.
Expert Insights on Tarp Projector Screens
According to home theater enthusiasts and AV experts, a tarp can deliver surprisingly good results when set up correctly. The key is managing expectations. A tarp will not match the performance of a premium projection screen, but for casual viewing and occasional use, it gets the job done.
Experts recommend using a matte white tarp with a tight weave for the best results. They also suggest avoiding tarps with holes, tears, or patches, as these create visible imperfections in the projected image. If you want to upgrade your setup over time, consider adding a screen gain fabric overlay to boost brightness and improve the overall image.
The consensus among experienced users is that a tarp is an excellent starting point for anyone new to projector setups. It allows you to learn about throw distance, projector placement, and screen size without spending a lot of money. Once you understand what works best in your space, you can decide whether to invest in a more permanent solution.
Final Thoughts on Using a Tarp for a Projector Screen
So, can you use a tarp for a projector screen at home? Absolutely. A white tarp is a practical, affordable, and versatile option for anyone who wants to enjoy movies on a big screen without breaking the bank. Whether you are setting up for a backyard movie night, a camping trip, or a one-time event, a tarp screen can deliver a fun and memorable viewing experience.
The secret to success lies in choosing the right tarp, stretching it tight, minimizing ambient light, and positioning your projector correctly. With these steps in place, you will be surprised by how good the image quality can be. A tarp screen is not about perfection, it is about making the most of what you have and creating memorable moments with family and friends.
If you are on a budget or just looking for a quick and easy solution, a tarp is hard to beat. Give it a try, experiment with your setup, and enjoy the show. You might be shocked at how much fun a simple tarp and projector can bring to your next movie night.
Frequently Asked Questions
Can any tarp be used as a projector screen?
Not every tarp is suitable. You need a white or light-colored tarp with a matte finish for the best results. Dark or shiny tarps will absorb light or create glare, which ruins the projected image. A matte white tarp reflects light properly and gives you a clear picture.
Does a tarp affect projector image quality?
Yes, it can. A wrinkled or thin tarp may cause distortions, color shifts, or reduced brightness. However, if you choose a good quality white tarp and stretch it tightly, the image quality can be surprisingly good for casual viewing and outdoor use.
What size tarp do I need for a projector screen?
The size depends on your projector and the space you have. A tarp that is at least 8 by 10 feet works well for most backyard setups. Make sure the tarp is larger than the image you want to project so you can adjust the projector placement without losing any part of the picture.
Can I use a tarp projector screen indoors?
Yes, you can. An indoor tarp screen works well in dim or dark rooms. The key is to minimize ambient light and stretch the tarp tightly against a flat wall. Indoor use often produces better results because you have more control over lighting conditions.
How do I prevent wrinkles on a tarp projector screen?
The best way is to stretch the tarp tightly over a frame using bungee cords, clamps, or staples. You can also use a steamer or iron to remove creases before setup. Some people layer a white bedsheet over the tarp for an even smoother surface.
Is a tarp screen better than a painted wall?
A painted wall with projector screen paint generally produces better image quality because it creates a smoother and more uniform surface. However, a tarp is more portable and versatile. If you need a temporary or movable screen, a tarp is the better choice.
=== CONCLUSION ===
Using a tarp for a projector screen is a practical and budget-friendly solution that works well for casual movie nights, outdoor events, and temporary setups. With the right white tarp, proper stretching, and smart projector placement, you can enjoy a surprisingly good viewing experience without spending a fortune. The key is to manage your expectations, choose the right materials, and put in a little effort to get the setup right.
Whether you are a camping enthusiast looking for a portable screen or a homeowner hosting a backyard movie party, a tarp projector screen gets the job done. It is simple, affordable, and effective. So grab a white tarp, set up your projector, and get ready for a great movie night under the stars.