Can You Connect A Gamecube To A Modern Tv With Ease
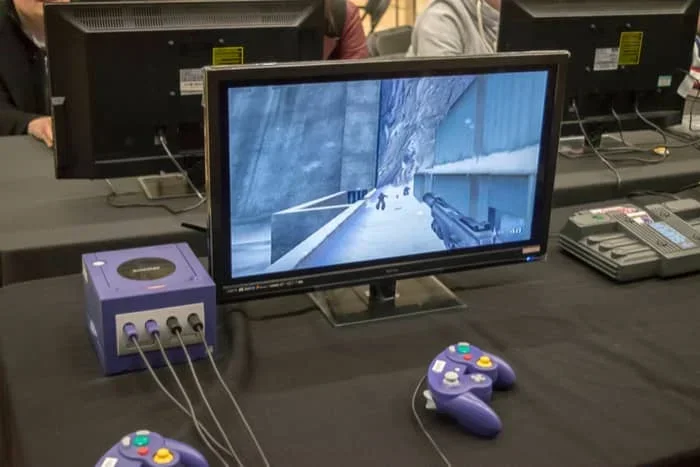
Connecting a GameCube to a modern TV is absolutely possible and easier than most people think. With the right cables, adapters, or upscalers, you can enjoy your favorite retro games on a big flat-screen display without lag or quality loss. Whether you use a composite cable, component cable, or an HDMI converter, this guide walks you through every option step by step. You will learn which setup delivers the best picture quality and how to avoid common mistakes. Get ready to bring your Nintendo GameCube experience into the modern era of gaming.
Key Takeaways
- Multiple Connection Options Exist: You can use composite cables, component cables, VGA adapters, or HDMI converters to link your GameCube to a modern TV.
- Upscalers Improve Picture Quality: Using a dedicated upscaler can remove scan lines and boost your display resolution significantly.
- Component Cables Offer the Best Balance: They provide sharper visuals than composite cables and are widely available and affordable.
- HDMI Adapters Are the Easiest Option: Plug-and-play HDMI converters let you connect your GameCube directly to any modern LCD or LED TV with minimal setup.
- Avoid Common Mistakes: Using the wrong cable type or skipping audio setup can cause frustration and poor performance.
- Retro Gaming Is More Accessible Than Ever: Modern TVs and affordable adapters make it simple to enjoy classic Nintendo games on big screens.
- Audio Output Matters Too: Proper audio setup ensures you get clear sound alongside your improved visuals.
📑 Table of Contents
Why Connect a GameCube to a Modern TV?
The Nintendo GameCube launched in 2001 and remains a beloved console among retro gaming fans. But here is the problem. Most modern TVs do not have the old AV inputs that the GameCube was designed to use. If you have ever tried plugging a GameCube straight into a flat-screen TV, you probably ran into blank screens or terrible picture quality.
The good news is that connecting a GameCube to a modern TV is totally doable. You just need the right cables and a little know-how. Whether you want to replay classic titles like Super Smash Bros. Melee or revisit hidden gems from the GameCube library, getting it to look great on a modern display makes the experience so much better.
Modern TVs use digital signals, while the GameCube outputs an analog signal. This mismatch is the main challenge. But thanks to adapters and upscalers, you can bridge that gap easily. Let us walk through exactly how to do it.
What Makes Modern TVs Different?
Old CRT televisions accepted analog signals natively. They displayed images with a warmth and simplicity that many gamers still love. Modern LCD, LED, and OLED screens work differently. They are built for digital inputs like HDMI. When you feed an analog signal into these screens without proper conversion, the image can look blurry, washed out, or full of flickering artifacts.
This is exactly why connecting a GameCube to a modern TV requires some extra gear. You are not just plugging in a cable and hoping for the best. You need a signal path that converts and optimizes the output for your specific display type.
What You Need: Cables and Adapters for GameCube
Before you start, it helps to understand the different cables and adapters available. Each option has its own strengths and trade-offs. Let us break them down clearly.
Composite AV Cable (The Stock Option)
The composite cable comes bundled with most GameCube consoles. It uses a single yellow RCA plug for video and red and white plugs for audio. This is the easiest and most basic way to connect your console. However, the picture quality is not great on modern TVs. You will notice a lot of blur, color bleeding, and visible scan lines.
If you just want to get the console working quickly, the composite cable does the job. But if you care about picture quality and a cleaner image, you will want to explore better options.
Component Cable (The Sweet Spot)
The GameCube component cable is widely considered the best balance of quality and affordability. It splits the video signal into three separate cables for sharper colors and better detail. You get a noticeably cleaner image compared to composite. Many retro gaming enthusiasts recommend this as the go-to option for most setups.
Component cables are easy to find online and are relatively inexpensive. They work well with most modern TVs that have component inputs. If your TV has component AV inputs, this is the simplest upgrade from the stock cable.
VGA Adapter (For Crisp Display Output)
A VGA adapter converts the GameCube signal to a VGA output. This gives you a very clean, sharp image. VGA cables are common on older computer monitors and some TVs. The image quality is excellent, especially for display resolution and clarity. However, you will need a VGA-compatible display or a VGA-to-HDMI converter to use it with a modern TV.
This option is great if you already have a VGA monitor or are willing to add a small converter box to your gaming setup.
HDMI Converter (The Easiest Modern Solution)
If you want the simplest setup possible, an HDMI converter is your best bet. These small devices take the GameCube signal and convert it directly to HDMI. You plug one end into the console and the other into any modern TV with an HDMI port. No fuss, no complicated wiring.
Many HDMI converters also include upscaling features. This means they can boost the resolution of the GameCube output to match your TV’s native resolution. The result is a much cleaner, more enjoyable image. For most people wanting to connect a GameCube to a modern TV with minimal effort, an HDMI adapter is the way to go.
Step-by-Step Connection Guide
Now that you know your options, let us walk through the actual setup process. Each method has its own steps, so I have broken them down by cable type.
Connecting with a Component Cable
Follow these steps to set up your GameCube with a component cable:
- Locate the component video inputs on the back of your TV. They are usually color-coded green, blue, and red.
- Plug the corresponding component cables into the matching ports on your TV.
- Connect the red and white audio cables to the audio input ports on your TV.
- Plug the other end of the cables into your GameCube AV port.
- Switch your TV input source to the component channel.
- Power on your GameCube and enjoy the improved image.
This setup gives you a much sharper picture than the composite cable. You will notice better color accuracy and fewer visual artifacts. It is a quick win for anyone who wants better quality without spending a lot of money.
Connecting with an HDMI Converter
Here is how to set up an HDMI converter for your GameCube:
- Connect the GameCube’s AV cable to the input port on the HDMI converter box.
- Plug an HDMI cable into the output port of the converter.
- Run the HDMI cable from the converter to any HDMI port on your modern TV.
- Connect the audio cable from the converter to your TV or sound system if needed.
- Switch your TV to the correct HDMI input.
- Power on the GameCube and the converter, then adjust settings as needed.
The HDMI converter handles all the signal conversion for you. Most models also offer a lag-free experience, which is important if you are playing games that require quick reactions. Some converters even let you adjust the display resolution to match your TV’s capabilities.
Quick Tips for Any Setup
- Always use high-quality cables. Cheap cables can introduce signal interference and degrade your image.
- Make sure your TV firmware is up to date. Some modern TVs handle retro signals better after updates.
- Test your setup in a dim room. This helps you spot any visual issues like flickering or color distortion.
- Keep your GameCube well-ventilated. Running it for long sessions can cause overheating if airflow is blocked.
- Label your cables if you have multiple devices connected. It saves a lot of confusion when switching inputs.
Best Upscalers and Converters for GameCube
If you want to take your retro gaming setup to the next level, an upscaler is a worthwhile investment. An upscaler takes the low-resolution output from the GameCube and enhances it to fit your modern TV’s screen. This reduces scan lines and makes the image look much cleaner.
Why Upscaling Matters
The GameCube outputs at a resolution of 480p at best. Modern TVs typically display at 1080p or even 4K. When you stretch a 480p signal to fill a large screen, the image can look pixelated or blurry. An upscaler solves this problem by processing the signal before it reaches your TV.
Good upscalers also handle the analog signal to digital conversion more cleanly than basic adapters. The difference is especially noticeable on larger screens. If you have a 50-inch or bigger TV, an upscaler can make a huge impact on your viewing experience.
Popular Upscaler Options
- RetroTINK 2X: A portable upscaler that works with composite and component signals. It is affordable and easy to use.
- RetroTINK 4X: Offers higher-quality scaling and supports more input types. Great for serious retro enthusiasts.
- Line Doublers: Simple devices that double the scan lines for a cleaner look. They are compact and plug directly into your setup.
- HDMI Upscaler Converters: All-in-one devices that convert and upscale simultaneously. These are the most convenient option for most users.
When choosing an upscaler, consider your budget and your TV setup. If you just want a quick improvement, a basic HDMI converter works well. If you are a dedicated retro console collector, investing in a dedicated upscaler will give you the best results.
Tips for the Best Picture Quality
Getting a great image on a modern TV from a GameCube takes a little tweaking. Here are some practical tips to help you get the most out of your setup.
Adjust Your TV’s Picture Settings
Modern TVs often have picture settings optimized for high-definition content. These settings do not always work well with retro consoles. Try these adjustments:
- Turn off any motion smoothing or interpolation features. These can introduce lag and make the image look unnatural.
- Set the sharpness to a moderate level. Too much sharpness can make retro graphics look harsh.
- Reduce the brightness slightly if the image looks washed out.
- Switch your TV to a game mode if available. This reduces input lag and improves response time.
These small changes can dramatically improve how your GameCube games look on a modern screen. Many people do not realize how much their TV settings affect the output from older consoles.
Get the Right Cables and Keep Them Short
Long cables can weaken your signal and introduce visual noise. Keep your AV cable runs as short as possible. If you need to run cables across a room, use high-quality shielded cables to minimize interference.
Gold-plated connectors are a nice bonus. They resist corrosion and maintain a solid connection over time. But even standard RCA cables work fine for most setups. The key is to avoid cheap, unshielded cables that pick up interference from other electronics in your home.
Consider Your Room Lighting
Retro games were originally designed for CRT screens in dimly lit rooms. Modern TVs are much brighter. Playing in a very bright room can make the GameCube image look flat and less vibrant. Try dimming your room lights slightly when you play. You might be surprised at how much better the image looks.
Common Problems and How to Fix Them
Even with the right setup, you might run into some issues when you connect a GameCube to a modern TV. Here are the most common problems and how to solve them.
No Picture or Black Screen
If your screen is black, check the cable connections first. Loose cables are the most common cause. Make sure the yellow video plug and the red and white audio plugs are firmly seated in the correct ports. Also verify that your TV is set to the right input source.
If you are using an HDMI converter, make sure it is powered on. Some converters need their own power supply to work correctly. Try a different HDMI cable or port on your TV if the issue persists.
Flickering or Unstable Image
Flickering usually means a poor connection or an incompatible cable type. If you are using a composite cable, try switching to a component cable. Component cables handle modern TV signals much better.
Also check if your TV has any special processing features turned on. Features like motion smoothing or noise reduction can interfere with retro console signals and cause flickering.
Poor Audio Quality
If your sound is crackly or quiet, check the audio cable connections. Make sure the red and white audio plugs are in the correct inputs. If you are using an HDMI converter, check whether the converter passes audio through the HDMI cable or requires a separate audio connection.
Some upscalers and converters handle audio better than others. If audio quality is important to you, look for a converter that supports stereo audio pass-through without compression.
Input Lag During Gameplay
Input lag can make games feel unresponsive. This is especially noticeable in fast-paced titles. To reduce lag, enable game mode on your TV and turn off any post-processing features. If you are using an HDMI converter, check the product specs for lag measurements and choose a lag-free model.
Building the Ultimate GameCube Modern TV Setup
If you are serious about retro gaming on a modern display, building a proper setup makes all the difference. Here is a quick checklist for the ideal GameCube-to-TV experience.
- A GameCube console in good working condition
- A quality component cable or HDMI converter
- An upscaler if you want the best possible image
- A modern TV with component inputs or HDMI ports
- Short, high-quality shielded cables
- A clean, well-ventilated space for your console
With this setup, you can enjoy your favorite GameCube games with crisp visuals, clear audio, and minimal lag. It does not have to be expensive either. A component cable and a basic HDMI converter can transform your experience for under $50.
The beauty of retro console gaming today is that you do not need a CRT television anymore. Modern technology has made it possible to enjoy classic games on big, beautiful flat-screen displays. Whether you are a seasoned collector or just getting started with retro gaming, connecting your GameCube to a modern TV is a rewarding project.
Conclusion
Connecting a GameCube to a modern TV is simpler than most people assume. You have multiple paths to choose from, whether you prefer a component cable, a VGA adapter, or an HDMI converter. Each option has its own advantages, and the best choice depends on your TV, your budget, and how much you care about image quality.
The key is to match your cables and adapters to your specific setup. A little effort goes a long way in transforming your retro gaming experience. You will be amazed at how good classic GameCube games can look on a modern display when you set things up correctly.
Start with the basics, experiment with your settings, and upgrade your gear as needed. The world of retro gaming is more accessible than ever, and your GameCube deserves to be seen and heard in the best possible way. Grab your controller, fire up your console, and enjoy the classics on your big screen today.
Frequently Asked Questions
Can I connect a GameCube directly to any modern TV?
Not directly without some additional hardware. Modern TVs use HDMI inputs, while the GameCube outputs analog signals through composite or component cables. You will need an adapter or converter to bridge this gap and get a workable image on your screen.
What is the best cable for connecting a GameCube to a modern TV?
The GameCube component cable is widely regarded as the best balance of quality and ease of use. It provides a much sharper image than the stock composite cable. If you want the simplest setup, an HDMI converter with a composite or component input is an excellent alternative.
Will I experience input lag when playing GameCube on a modern TV?
Input lag depends on your TV and the adapter you use. Most modern TVs have a game mode that significantly reduces lag. Using a lag-free HDMI converter or a component cable connection also helps minimize any delay during gameplay.
Do I need an upscaler to play GameCube on a modern TV?
An upscaler is not strictly necessary, but it greatly improves picture quality. The GameCube outputs at 480p, and upscaling it to fit a 1080p or 4K screen reduces pixelation and scan lines. If you care about visual clarity, an upscaler is a worthwhile addition to your setup.
Can I get audio through HDMI when connecting a GameCube?
Yes, many HDMI converters pass both video and audio through the single HDMI cable. However, some converters may require separate audio connections. Check the specifications of your specific converter to confirm how audio is handled in your setup.
Is retro gaming on a modern TV worth the effort?
Absolutely. Modern TVs offer larger screens, better brightness, and sharper displays that enhance the retro gaming experience. With the right cables and adapters, your GameCube games can look and sound better than they ever did on a CRT television. The effort is minimal compared to the payoff.
=== END OF ARTICLE ===