Can I Use Short Throw Projector On Wall for Big Screen
Yes, you can absolutely use a short throw projector on a wall to create a big screen experience. A short throw projector sits close to the wall and still projects a massive image, making it perfect for small rooms. You just need the right wall color and a bit of setup to get the best visual clarity. This guide will show you exactly how to set up your short throw projector on a wall for a big screen without any hassle. Let us dive into the simple steps and expert tips to make your movie nights amazing.
Key Takeaways
- Wall Suitability: A smooth, light-colored wall works best for a sharp and clear image.
- Short Throw Advantage: You can sit close and still enjoy a big screen without casting shadows.
- Image Quality Matters: Wall texture and ambient light affect your overall viewing experience.
- Easy Setup: Mounting a short throw projector on the wall saves valuable floor space.
- Keystone Correction: Use this feature to fix any distorted edges on the wall projection.
- Cost Effective: A plain wall can replace an expensive projection screen for casual viewing.
📑 Table of Contents
- Can I Use a Short Throw Projector on a Wall for a Big Screen?
- Understanding Your Short Throw Projector
- Preparing Your Wall for the Best Image
- Setting Up Your Short Throw Projector
- Beating Ambient Light for a Clear Picture
- Pros and Cons of Projecting on a Wall
- Expert Tips for the Best Big Screen Experience
- Conclusion
Can I Use a Short Throw Projector on a Wall for a Big Screen?
Yes, you can. A short throw projector is a fantastic tool for making your movies and games feel huge. You do not need a fancy screen to get a big picture. In fact, a clean wall works great. The short throw projector sits very close to the wall. This means you can place it on a small table or mount it on the wall itself. You get a massive image without sitting in a dark cave. It is a great way to build a home theater in any room.
Many people ask if a wall is good enough. The simple answer is yes. But there are a few things you must check first. The color of your wall matters a lot. A plain white wall reflects light well. This helps your short throw projector shine bright. You also need a smooth surface. Bumpy walls make the image look fuzzy. Let us look at how to make this work perfectly for you.
Understanding Your Short Throw Projector
What Is a Short Throw Projector?
A short throw projector sits very close to the screen. It can throw a big image from just a few feet away. This is different from a standard projector. A standard projector needs a long distance to make a big picture. With a short throw projector, you avoid the shadow problem. You do not have to walk in front of the light beam. This makes it perfect for small rooms and tight spaces.
How Does Throw Ratio Work?
The throw ratio tells you how far the projector needs to sit. It is the distance divided by the screen width. For a short throw projector, this number is low. Usually, it is between 0.4 and 1.0. A lower number means a bigger picture from a closer spot. Before you buy, check the throw ratio. This helps you pick the right spot on your wall. You want the short throw projector to be close enough to fill the wall. A proper throw ratio ensures your big screen looks amazing.
Why Choose a Short Throw Over a Standard One?
There are many reasons to pick a short throw projector. First, it saves space. You do not need a long hallway to use it. Second, it reduces shadows. People can walk in front of the projector without blocking the picture. Third, it keeps the lamp life longer. The projector does not have to work as hard. You also get less eye strain. The image quality remains sharp even when you sit close. This makes immersive viewing so much better.
Preparing Your Wall for the Best Image
Choosing the Right Wall Color
The color of your wall changes everything. You want a wall that reflects light well. White is the best choice. It bounces the short throw projector light evenly. Bright white gives you the most vivid colors. Some people paint their wall with a special projector paint. This paint boosts the image quality. It makes the colors pop and the text sharp. If you cannot paint, a plain white wall is still great. Avoid dark walls. They absorb the light and make the picture dull.
Wall Texture and Smoothness
You must avoid bumpy or textured walls. A rough wall scatters the light. This makes your big screen look blurry. The image loses its sharpness. You want a flat, smooth surface. If your wall has texture, it can ruin the picture. You can use a projector screen panel on the wall. This gives you a smooth white area. It is much better than a rough brick or stucco wall. Smooth walls give you the best visual clarity. Your short throw projector will thank you for it.
Cleaning Your Wall Before Setup
Dust can hurt your projection. The wall must be clean before you start. Use a damp cloth to wipe the wall. Remove all the dust and dirt. Check for any stains or marks. A dirty wall shows up on the big screen. It distracts from the image quality. A clean wall makes the colors look brighter. It is a simple step that makes a big difference. Your wall projection will look much sharper.
Setting Up Your Short Throw Projector
Mounting Options for Your Projector
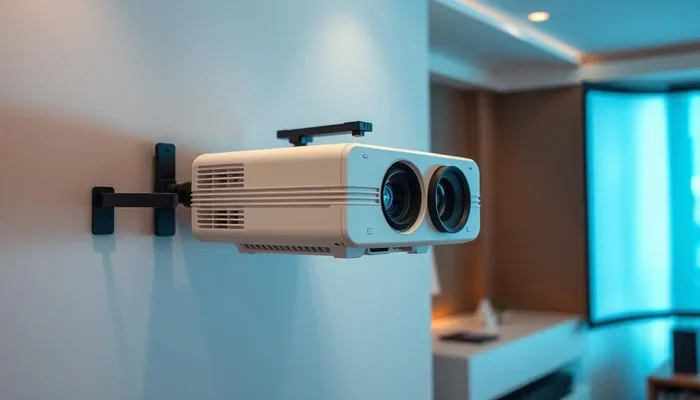
You have two main ways to set up a short throw projector. You can put it on a table. Or you can mount it on the wall. Wall mounting saves floor space. It also keeps the projector out of the way. You need a sturdy projector mount. Make sure the mount can handle the weight. You also need to aim it perfectly at the wall. A slight tilt can make the image look like a trapezoid. Take your time to adjust the projector mount. A good setup makes all the difference.
Using Keystone Correction
Sometimes the image is not perfectly square. This happens when the projector is tilted. You can fix this with keystone correction. Most short throw projectors have this feature built in. It adjusts the picture shape for you. You can use digital keystone or optical keystone. Optical keystone is better. It does not lower the image quality. Digital keystone can make the picture a bit fuzzy. Use keystone correction to keep your image sharp. It fixes the keystone effect quickly. You get a perfect big screen in seconds.
Adjusting the Throw Distance
Measuring the throw distance is very important. You need the projector to be the right distance from the wall. Too close and the image is small. Too far and it spills off the wall. Use a tape measure to find the sweet spot. Check your projector manual for the exact throw distance. This helps you get the right image size. You want a big screen that fills your vision. A short throw projector makes this easy. Just move it closer or further until it looks perfect.
Beating Ambient Light for a Clear Picture
The Challenge of Room Lighting
A big problem with wall projections is ambient light. Sunlight or lamps can wash out the image. The colors look faded. The picture loses its contrast. This is true for any projector. But a short throw projector can struggle more if the room is bright. You need to control the light in your room. Close the curtains during the day. Turn off the bright lights at night. This makes your wall act like a cinema screen. A darker room always gives you better image quality.
Boosting Brightness and Contrast
You can also boost your projector settings. Turn up the brightness mode. Use the dynamic or bright mode if your projector has one. This fights the ambient light. You can also add a light background to the wall. A matte white finish works best. It reflects more light back to your eyes. The goal is to make the image look crisp. High contrast makes the dark scenes look deep and real. Your short throw projector will produce a stunning big screen. You will love the visual clarity.
When to Use a Screen Instead
Sometimes a wall just is not enough. If your room has too much ambient light, a screen helps. A proper screen has a special coating. This coating helps with ambient light rejection. It sends light straight back to you. A plain wall scatters light everywhere. This makes the image dimmer when viewed from the side. If you want the best image sharpness, consider a screen. But for casual watching, a wall is perfect. You can always upgrade later if needed.
Pros and Cons of Projecting on a Wall
Why a Wall Works Great
There are many good reasons to use a wall. First, it saves a lot of money. You do not need to buy a pull-down screen. Second, it is super easy to set up. Just point the short throw projector at the wall. Third, it gives you a huge screen size. You can go from eighty inches to one hundred twenty inches easily. A wall is always there, ready to use. It is a simple and effective solution. Your home theater can be ready in minutes.
When a Wall Might Not Be Enough
But there are downsides too. A wall does not have a gain. A proper screen has a special coating. This coating sends light straight back to you. A plain wall scatters light everywhere. This makes the image dimmer when viewed from the side. Also, if the wall is not perfectly clean, you will see the dots and dents. For the best image quality, a screen is still king. But for casual watching, a wall is perfect. You can always add a screen later.
Expert Tips for the Best Big Screen Experience
Keep the Projector Clean
Dust can hurt your short throw projector. The lens gets dirty fast when it sits close to the wall. Use a soft cloth to clean the lens often. A dirty lens makes the image look hazy. It can also shorten the lamp life. Keep the projector in a cool, dry place. Good airflow around the projector prevents it from overheating. Clean air means a longer lifespan. You will enjoy your big screen for years.
Test Your Setup Before Movie Night
Do not wait until your friends arrive to test it. Set up the short throw projector a day early. Watch a test video with lots of colors. Check the corners of the image. Is the picture sharp all over? Does the keystone look good? Fix any problems early. This ensures your big screen experience is flawless when it counts. A little prep goes a long way. You will be glad you checked everything first.
Adjusting Picture Settings for Walls
Every wall is different. You must tweak the picture settings. Start with the brightness and contrast. Turn the brightness up if the wall is white. Adjust the color settings for the best look. Some projectors have a specific wall color setting. Use that feature if you have it. This helps the short throw projector adapt. You get the best image quality possible. Take a few minutes to fine tune the settings. Your eyes will notice the difference.
Conclusion
Using a short throw projector on a wall for a big screen is a great idea. You get a huge picture without spending a fortune on a screen. Just make sure your wall is smooth and white. Control the light in the room for the best results. Set up your projector carefully and use keystone correction if needed. Your short throw projector can turn any blank wall into a cinema. Enjoy your big screen and make every movie night a hit.
Frequently Asked Questions
Can I use any short throw projector on any wall?
Most short throw projectors work on any wall, but the results vary. You need a smooth, white wall for the best image quality. Textured or dark walls will make the picture look dull and blurry.
Do I need a special screen if I am using a wall?
No, you do not need a special screen. A plain white wall works just fine for a short throw projector. However, a projector screen can boost brightness and contrast if you want a premium look.
How close does a short throw projector need to be to the wall?
The distance depends on the throw ratio of your projector. Usually, a short throw projector sits about three to five feet from the wall. Check your projector manual for the exact throw distance to get the right image size.
Will ambient light ruin my wall projection?
Ambient light can wash out your picture, but you can fix this. Close the curtains and turn off bright lights to create a darker room. This makes your short throw projector wall image look much sharper and more colorful.
Is a short throw projector better than a standard one for wall use?
Yes, a short throw projector is much better for wall use in small spaces. It sits close to the wall and avoids casting shadows on the screen. This makes it perfect for a cozy and immersive big screen setup.
How do I make my wall projection look sharper?
You can make the image sharper by using keystone correction. Also, ensure your wall is perfectly smooth and clean. Adjusting the focus ring on the projector also helps you get a crisp and clear big screen image.