Can I Connect a SATA Hard Drive to My Laptop Through USB
Yes, you can connect a SATA hard drive to your laptop through USB using a simple adapter or enclosure. This method lets you turn any internal drive into portable storage in minutes. You do not need advanced technical skills or expensive tools. Whether you want to recover old files, back up data, or expand storage, this guide covers everything. Read on to learn the best methods, tools, and tips for a smooth connection.
Key Takeaways
- Two Easy Methods: You can use a SATA to USB adapter or a hard drive enclosure to connect your drive.
- No Technical Expertise Needed: The process is plug-and-play and works with most laptops.
- USB 3.0 or Higher Is Best: It offers faster data transfer speeds for large files.
- Power Matters: 3.5-inch drives may need an external power source.
- Safety First: Always eject the drive properly to avoid data loss.
- Works with HDDs and SSDs: Both types of SATA drives connect the same way.
📑 Table of Contents
- What Is a SATA Hard Drive?
- Why Connect a SATA Hard Drive to Your Laptop Through USB?
- Tools and Equipment You Will Need
- Method 1: Using a SATA to USB Adapter
- Method 2: Using a Hard Drive Enclosure
- How to Set Up and Use Your Connected Drive
- Troubleshooting Common Connection Issues
- Expert Tips for Getting the Best Performance
- Can I Connect a SATA Hard Drive to My Laptop Through USB: Final Thoughts
What Is a SATA Hard Drive?
A SATA hard drive is a common type of internal storage device. SATA stands for Serial Advanced Technology Attachment. It is the standard interface used in most desktop and laptop computers. These drives come in two sizes. The 2.5-inch drive fits laptops. The 3.5-inch drive is common in desktops. Both types store your files, photos, and operating system.
There are two main kinds of SATA drives. Hard disk drives (HDDs) use spinning disks. They are affordable and offer large storage. Solid-state drives (SSDs) use flash memory. They are faster but cost more. You can connect either type to your laptop through USB. The method is simple and does not require opening your laptop.
Many people have old SATA drives sitting in a drawer. These drives still hold valuable data. Instead of throwing them away, you can reuse them. Connecting a SATA hard drive to laptop through USB gives old drives new life. It is one of the easiest and most affordable storage upgrades you can make.
Why Connect a SATA Hard Drive to Your Laptop Through USB?
There are many reasons to connect an internal drive externally. Let us explore the most common ones. Each reason shows how useful this simple setup can be.
Data Recovery. If your laptop’s internal drive fails, you can remove a working drive and connect it via USB. This lets you access your files without booting your laptop. It is a lifesaver when your computer will not start.
Backup and Storage. You can use an old drive as a backup device. Simply connect it, copy your important files, and disconnect it. This keeps your data safe from crashes or accidents.
File Transfer Between Computers. Need to move large files from one computer to another? A connected SATA drive works like a portable hard drive. You can carry it anywhere and plug it into any USB port.
Laptop Storage Upgrade. Some laptops have limited storage space. Instead of replacing the internal drive, you can use an external SATA drive for extra room. This is especially helpful for storing media files and games.
Cloning and Imaging. Advanced users can clone a drive using a USB connection. This creates an exact copy of your drive. It is useful for migrating to a new drive or creating a recovery image.
Tools and Equipment You Will Need
Before you start, gather the right tools. Having everything ready makes the process smooth and fast. Here is what you need to connect a SATA drive to your laptop through USB.
SATA to USB Adapter
A SATA to USB adapter is the most affordable option. It is a small cable that connects directly to the SATA drive on one end and to a USB port on the other. These adapters cost between 10 and 25 dollars. They are compact and easy to carry. Most adapters support USB 3.0 for fast speeds.
Hard Drive Enclosure
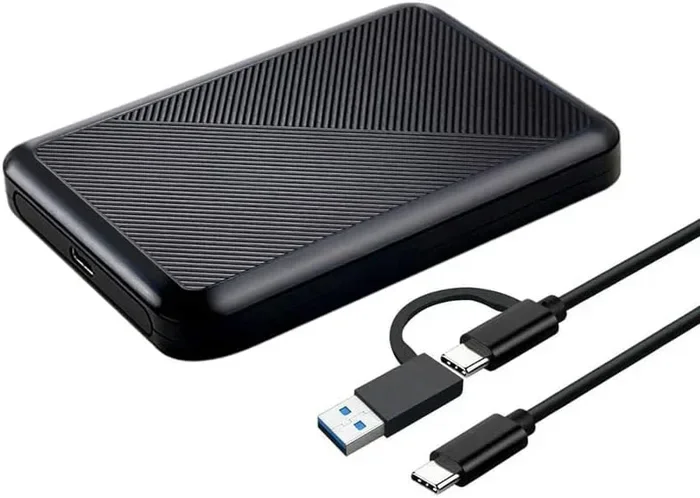
A hard drive enclosure is a protective case that houses your drive. You place the SATA drive inside and close it. The enclosure connects to your laptop through USB. Enclosures cost between 15 and 50 dollars. They offer better protection than bare adapters. They also look more professional and portable.
USB Cable
Make sure you have a reliable USB cable. Most modern adapters and enclosures include one. If you need a replacement, look for a USB 3.0 or USB-C cable. USB 3.0 offers speeds up to 5 Gbps. USB 3.1 and USB 3.2 are even faster. USB-C is the newest standard and works with many modern laptops.
Power Supply (For 3.5-inch Drives)
2.5-inch drives get power through the USB connection. However, 3.5-inch drives need more power. You will need a separate power adapter for larger drives. Many SATA to USB kits include a power brick. Check the product specs before you buy.
Screwdriver
You may need a small Phillips screwdriver to remove the drive from a desktop computer. Some laptops have easy-access panels that do not need tools. Keep a screwdriver handy just in case.
Method 1: Using a SATA to USB Adapter
A SATA to USB adapter is the simplest way to connect your drive. It requires no assembly or extra parts beyond the adapter itself. Here is how to do it step by step.
Step 1: Plug the SATA end into your drive. Connect the L-shaped SATA data connector to the drive. Make sure it clicks into place. Then connect the SATA power connector if your drive needs it.
Step 2: Plug the USB end into your laptop. Use a USB 3.0 port for the best speed. If your laptop only has USB-C, use a USB-C to USB-A adapter.
Step 3: Wait for your laptop to recognize the drive. Most operating systems detect the drive within seconds. You may see a notification sound or a pop-up message.
Step 4: Open File Explorer or Finder. Your drive should appear as a new removable disk. You can now browse its contents and transfer files.
This method works great for quick tasks. It is ideal when you need to grab a few files fast. The adapter is small enough to keep in your bag. Many users keep one in their desk drawer for emergencies.
Quick Tips for Using an Adapter
- Always use a USB 3.0 port for faster speeds.
- Avoid cheap adapters that may cause connection drops.
- Handle the drive gently while it is connected.
- Eject the drive properly before unplugging it.
Method 2: Using a Hard Drive Enclosure
A hard drive enclosure is a more permanent solution. It wraps your SATA drive in a protective shell. This method is great if you plan to use the drive often.
Step 1: Choose the right enclosure. Make sure the enclosure fits your drive size. 2.5-inch enclosures work for laptop drives. 3.5-inch enclosures are for desktop drives. Buy an enclosure that supports USB 3.0 or higher.
Step 2: Open the enclosure. Most enclosures slide open or have screws. Place your SATA drive inside carefully.
Step 3: Connect the internal cables. Attach the SATA data and power cables to the drive. The enclosure should come with these cables included.
Step 4: Close the enclosure and plug it in. Connect the USB cable from the enclosure to your laptop. Wait for the system to recognize the drive.
Enclosures offer better protection than bare adapters. They prevent dust damage and accidental drops. They also look sleeker and more professional. If you plan to carry your drive around often, an enclosure is the better choice.
Adapter vs. Enclosure: Which Is Better?
| Feature | SATA to USB Adapter | Hard Drive Enclosure |
|---|---|---|
| Price | 10 to 25 dollars | 15 to 50 dollars |
| Setup Time | Under 1 minute | 3 to 5 minutes |
| Portability | Very portable | Moderately portable |
| Protection | Low | High |
| Best For | Quick one-time tasks | Frequent or regular use |
| Drive Safety | Drive is exposed | Drive is fully enclosed |
Both methods work well for connecting a SATA hard drive to laptop through USB. Your choice depends on how often you will use the drive and how much protection you want.
How to Set Up and Use Your Connected Drive
Once your SATA drive is connected, you need to set it up properly. This ensures safe and efficient use. Follow these steps for the best experience.
Initialize the Drive (If Needed)
Windows may prompt you to initialize a new drive. Open Disk Management by right-clicking the Start button. Select the drive and choose your partition style. GPT is recommended for modern systems. MBR works with older computers. Mac users do not need to initialize. The drive should appear in Finder automatically.
Format the Drive
If the drive is empty or you want to erase it, you can format it. Right-click the drive in File Explorer and select Format. Choose NTFS for Windows-only use. Choose exFAT if you need to use the drive on both Windows and Mac. Formatting erases all data on the drive. Make sure you have backups before formatting.
Transfer Files
Now you can copy files to and from the drive. Drag and drop works just like with a USB flash drive. For large files, expect transfer speeds of 100 to 200 MB per second on USB 3.0. USB 3.1 and USB-C can be even faster. Keep an eye on the transfer progress bar. Do not disconnect the drive while files are copying.
Eject the Drive Safely
Always eject the drive before unplugging it. On Windows, click the safe remove icon in the taskbar. On Mac, drag the drive icon to the trash or right-click and select Eject. This prevents data corruption. It is a simple habit that saves you from headaches.
Common Mistakes to Avoid
- Forgetting to eject safely. This can corrupt files on the drive.
- Using a USB 2.0 port. It will be much slower than USB 3.0.
- Ignoring the power needs of 3.5-inch drives. Without proper power, the drive will not work.
- Forcing the SATA connector. If it does not fit, check the alignment and try again.
- Using a damaged cable. A faulty cable can cause connection issues and data loss.
Troubleshooting Common Connection Issues
Sometimes things do not go as planned. Your laptop may not recognize the connected drive. Do not worry. Most issues have simple fixes. Here are the most common problems and how to solve them.
The Drive Is Not Recognized
This is the most common issue. Try these solutions. First, unplug the drive and plug it into a different USB port. A USB 3.0 port on the back of your laptop often works better than a front port. Second, try a different USB cable. Third, restart your laptop and try again. If none of these work, test the drive on another computer. This helps you determine if the problem is with the drive or the laptop.
Slow Transfer Speeds
Slow speeds are frustrating. Check that you are using a USB 3.0 or higher port. USB 2.0 ports limit speeds to about 30 MB per second. Also, make sure your adapter or enclosure supports fast speeds. Cheap adapters may cap the transfer rate. Another cause is a nearly full drive. Drives slow down when they reach 90 percent capacity.
Drive Makes Clicking or Grinding Noises
Unusual sounds are a warning sign. Stop using the drive immediately. Clicking noises often mean the drive is failing. Connect the drive to another computer and try to recover your data right away. Use file recovery software if needed. Do not ignore strange sounds. They usually mean the drive has physical damage.
Drive Works on One Laptop but Not Another
This can happen due to driver issues. Update your USB drivers on the problem laptop. On Windows, go to Device Manager and look for USB controllers. Right-click and select Update Driver. Also check that the drive is not disabled in Disk Management. Sometimes a drive needs to be assigned a drive letter manually.
Expert Tips for Getting the Best Performance
Want to get the most out of your connected SATA drive? Follow these expert recommendations. They will help you maximize speed, reliability, and lifespan.
Always use USB 3.0 or higher. USB 2.0 is too slow for modern storage needs. If your laptop has USB-C, even better. USB-C supports the fastest transfer speeds available.
Keep your drive cool. Hard drives generate heat during use. Do not place them on soft surfaces like pillows or blankets. Use a hard drive dock with a built-in fan for extended use. Overheating is one of the leading causes of drive failure.
Use the drive regularly. Drives that sit unused for months can develop issues. Plug them in occasionally to keep the components active. This is especially important for mechanical HDDs.
Back up your data. Even connected drives can fail. Use the drive as a secondary backup, not your only copy. Follow the 3-2-1 backup rule. Keep three copies of your data on two different types of media with one stored offsite.
Scan for errors regularly. Windows has a built-in tool called Check Disk. Run it on your connected drive every few months. On Mac, use First Aid in Disk Utility. These tools find and fix minor issues before they become serious problems.
Handle the drive with care. SATA drives contain sensitive moving parts (in the case of HDDs). Avoid dropping or bumping them while they are running. If you need to move the drive, disconnect it first.
Can I Connect a SATA Hard Drive to My Laptop Through USB: Final Thoughts
Connecting a SATA hard drive to laptop through USB is one of the simplest and most useful tech skills you can learn. It costs almost nothing and takes just a few minutes. Whether you use a SATA to USB adapter or a hard drive enclosure, the process is straightforward. You can recover lost files, back up important data, or add extra storage to your laptop. Both methods work with HDDs and SSDs alike.
Start with a quality adapter or enclosure from a reputable brand. Look for USB 3.0 support for the best speeds. Follow the setup steps carefully and always eject the drive safely. Avoid the common mistakes we covered, and your connected drive will serve you well for years. Give it a try today and breathe new life into that old drive sitting in your drawer.
With the right tools and a little patience, you will have your external storage up and running in no time. The process is simple enough for beginners and fast enough for experienced users. Do not let old drives collect dust. Put them to work and enjoy the extra storage and peace of mind they provide.
Frequently Asked Questions
Can I connect any SATA hard drive to my laptop through USB?
Yes, you can connect both 2.5-inch and 3.5-inch SATA drives to your laptop through USB. You will need a SATA to USB adapter or a hard drive enclosure. For 3.5-inch drives, make sure you have a power supply. Most adapters and enclosures work with both HDDs and SSDs without any extra setup.
Do I need any special software to use a SATA drive connected via USB?
No, you do not need special software in most cases. Modern operating systems like Windows and macOS recognize SATA drives automatically. They show up as removable drives in File Explorer or Finder. You only need third-party software if you want to clone the drive or recover lost data from a damaged drive.
Will connecting a SATA drive through USB slow down my laptop?
No, connecting a SATA drive through USB will not slow down your laptop. The USB port provides a separate connection that does not affect your laptop’s internal performance. In fact, using an external drive can free up space on your internal drive, which may actually improve your laptop’s speed.
What is the difference between USB 2.0 and USB 3.0 for external SATA drives?
USB 3.0 is significantly faster than USB 2.0. USB 2.0 maxes out at about 30 MB per second. USB 3.0 can reach speeds of 5 Gbps or more. For large file transfers, USB 3.0 makes a huge difference. Always check that your adapter or enclosure supports USB 3.0 before buying.
Can I use a SATA hard drive connected via USB as a boot drive?
In most cases, you cannot boot your laptop from a USB-connected SATA drive. Some advanced setups allow it, but it is not reliable for everyday use. A USB-connected drive works best for storing and transferring files. If you want a boot drive, install the SATA drive internally instead.
How do I know if my SATA drive is still working after connecting it via USB?
Your laptop should detect the drive within seconds of connecting it. If the drive appears in File Explorer or Finder and you can browse its contents, it is working. Listen for unusual sounds like clicking or grinding, which indicate a failing drive. You can also use disk checking tools to verify the drive’s health and look for bad sectors.
=== CONCLUSION ===
Connecting a SATA hard drive to your laptop through USB is easy, affordable, and incredibly useful. You now know the two main methods: using a SATA to USB adapter or a hard drive enclosure. You understand what tools you need and how to set everything up. You also know how to troubleshoot common issues and get the best performance from your connected drive.
Take action today. Dig out that old SATA drive from your storage box. Pick up an adapter or enclosure for under 30 dollars. Follow the steps in this guide, and you will have extra storage in minutes. Whether you need to recover files, back up data, or expand your laptop storage, this skill will serve you well. Do not let unused drives go to waste. Start connecting and enjoy the convenience of portable SATA storage.