Should You Plug Your Eero Into the Modem or a Switch
Should you plug your Eero into the modem or a switch? This is one of the most common questions people ask when setting up their mesh Wi-Fi system. The answer is simple: plug your Eero directly into the modem for the best performance. A switch can be helpful if you have many wired devices, but it adds complexity. This guide covers everything you need to know about Eero setup, modem vs. switch connections, and how to avoid common mistakes.
Key Takeaways
- Plug Eero into the modem first: This gives your mesh system the best performance and simplest setup.
- Use a switch when needed: A network switch helps if you have many wired devices or need Ethernet backhaul.
- Direct modem connection is fastest: Fewer devices in the chain means better speed and fewer points of failure.
- Placement matters: Keep your main Eero unit in a central, open location for the best Wi-Fi coverage.
- Avoid common setup mistakes: Don’t plug into the wrong port, skip firmware updates, or hide your Eero behind furniture.
- Use the Eero app for management: It makes setup, monitoring, and troubleshooting easy for everyone.
- Ethernet backhaul boosts performance: Wired connections between Eero units provide the fastest and most reliable mesh experience.
📑 Table of Contents
- Should You Plug Your Eero Into the Modem or a Switch?
- Should You Plug Your Eero Into the Modem or a Switch?
- How to Connect Eero to Your Modem (Step by Step)
- When to Use a Switch with Your Eero Setup
- Common Mistakes People Make When Setting Up Eero
- Expert Tips for Getting the Most Out of Your Eero Network
- Conclusion
Should You Plug Your Eero Into the Modem or a Switch?
Setting up your Eero mesh Wi-Fi system can feel confusing, especially when you are not sure where to plug it in. The question of whether to connect your Eero to the modem or a network switch is one of the most common ones people ask. The answer depends on your home setup, the number of devices you use, and the type of internet plan you have. In this guide, we will walk you through everything you need to know to make the right choice.
A wrong connection can lead to slow speeds, dead zones, or even a complete network failure. That is why it is so important to get this step right from the start. Whether you are setting up an Eero Pro or a basic Eero unit, the placement and connection matter a lot. Let us break it down in simple terms so you can get your home network setup running smoothly.
What Does Your Eero Connect To?
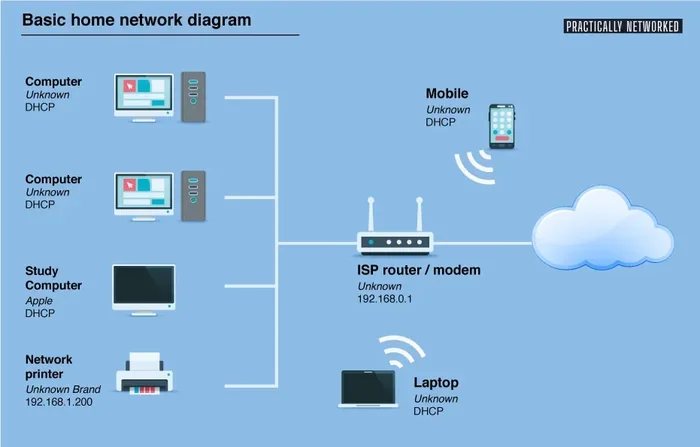
Your Eero unit needs to connect to a source of internet. That source is usually your modem. The modem receives the signal from your internet service provider and turns it into a signal your devices can use. In most cases, you plug the Eero directly into the modem using an Ethernet cable.
But what if you already have a router? Or what if you need more ports? That is where a switch comes in. A network switch lets you connect multiple devices at once. Some people plug their Eero into a switch that is already connected to the modem. Both setups can work, but they serve different needs.
How Does an Eero Mesh System Work?
An Eero mesh Wi-Fi system uses multiple units to spread Wi-Fi coverage across your home. One unit connects directly to the modem. This is called the main unit or gateway. The other units, sometimes called Eero beacons, talk to the main unit to extend your Wi-Fi coverage throughout the house.
The units communicate with each other using a dedicated wireless backhaul or a wired Ethernet backhaul. This means your devices get a strong, steady signal no matter where they are. The Eero app makes it easy to set up and manage the whole system from your phone.
Should You Plug Your Eero Into the Modem or a Switch?
The short answer is: plug your Eero into the modem first. This gives your mesh system direct access to the internet. From there, the Eero can distribute the connection to all your devices through Wi-Fi or Ethernet.
However, there are times when plugging into a switch makes sense. If you have a lot of wired devices, a switch can help you manage everything. Let us look at both options in detail.
Option 1: Plugging Eero Directly Into the Modem
This is the simplest and most common way to set up an Eero system. You take an Ethernet cable, plug one end into the modem, and the other end into the Eero main unit. That is it.
When you plug Eero directly into the modem, you get the best possible performance. The Eero has a clear path to the internet without any extra devices slowing things down. This setup works great for most homes.
- Simple setup: Just plug and go.
- Best speeds: No extra hardware to slow things down.
- Fewer points of failure: Fewer devices mean fewer things that can go wrong.
- Easy troubleshooting: When something goes wrong, you know exactly where the problem is.
This is the recommended setup for most people. If you are not sure what to do, start here.
Option 2: Plugging Eero Into a Switch
A network switch is a box that gives you more Ethernet ports. You might need one if you have a lot of wired devices like desktop computers, smart TVs, game consoles, or security cameras.
In this setup, the modem connects to the switch first. Then the Eero connects to the switch. This lets you run both wired and wireless devices from one connection point.
But there is a catch. Adding a switch can sometimes cause a slight drop in speed. This is usually very small and not noticeable for most users. However, if you are chasing every bit of speed, the direct modem connection is better.
| Feature | Modem Direct | Switch Setup |
|---|---|---|
| Setup Complexity | Very simple | Slightly more complex |
| Speed Performance | Best possible | Slight reduction possible |
| Number of Wired Ports | One (on Eero) | Multiple (depends on switch) |
| Best For | Most homes | Homes with many wired devices |
| Troubleshooting | Easy | A bit more involved |
| Cost | No extra cost | Requires buying a switch |
As you can see, both options have their place. The right choice depends on what your home needs.
How to Connect Eero to Your Modem (Step by Step)
Setting up your Eero with a modem is straightforward. Follow these steps and you will be online in no time.
Step 1: Unbox and Power On Your Eero
Take your Eero unit out of the box. Plug the power adapter into the Eero and into a wall outlet. Wait for the light on the Eero to turn solid white. This means it is ready to be set up.
Step 2: Connect the Ethernet Cable
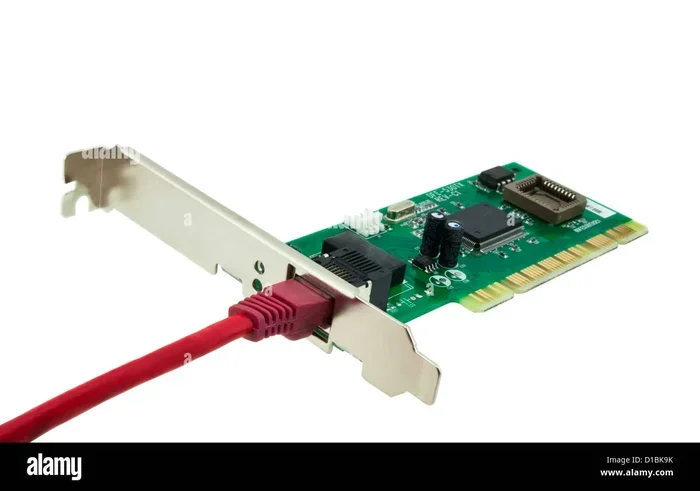
Take an Ethernet cable and plug one end into the modem. Plug the other end into the back of the Eero main unit. Make sure the connection is snug and secure. Use a high-quality cable for the best results.
Step 3: Download the Eero App
On your phone, download the Eero app from the App Store or Google Play. Open the app and follow the on-screen instructions. The app will guide you through the setup process step by step. It is very intuitive and takes only a few minutes.
Step 4: Add Your Eero Units
If you have additional Eero units, the app will prompt you to add them. Place the Eero beacons in rooms where you need better Wi-Fi coverage. The app will help you find the best spots based on signal strength.
Step 5: Test Your Connection
Once everything is set up, run a speed test. Open a browser and go to a speed test site. Check if your internet speed matches what you pay for. If it does, you are all set. If not, try moving the main Eero unit to a more central location.
Quick Tip: Place your main Eero unit in a central location in your home. Avoid hiding it in a closet or behind furniture. Good placement helps your mesh system perform at its best and reduces Wi-Fi dead zones.
When to Use a Switch with Your Eero Setup
Not everyone needs a switch. But for some setups, it is a real game changer. Let us look at when a switch makes sense for your Eero system.
You Have Many Wired Devices
If you have a home office with multiple desktops, a gaming setup with consoles, or a smart home with security cameras, a switch is very useful. Instead of plugging each device directly into the modem, you connect them all to the switch. Then the Eero connects to the switch.
This gives you a clean, organized setup. All your devices share one internet connection, and your Eero handles the Wi-Fi side. You get the best of both worlds: wired reliability and wireless convenience.
You Want Ethernet Backhaul
Ethernet backhaul is when you connect your Eero units to each other using cables instead of Wi-Fi. This gives you the fastest possible speeds between units. It is especially useful for larger homes where wireless signals can weaken.
To set up Ethernet backhaul, you need a switch. Connect the modem to the switch. Then connect each Eero unit to the switch using Ethernet cables. This setup is ideal for larger homes where wireless backhaul might not be strong enough. The Eero Pro model supports multi-gig Ethernet, making wired backhaul even more powerful.
Your ISP Provides a Gateway Device
Some ISPs give you a gateway device that combines a modem and a router into one box. In this case, you might need to put the gateway in bridge mode before connecting your Eero. When the gateway is in bridge mode, it stops doing the routing. The Eero takes over as the main router. This gives you the full benefits of the Eero mesh system and better network topology control.
A switch can help you manage all your wired devices while the Eero handles the Wi-Fi. This is a clean and efficient setup for homes that already have ISP-provided gateway equipment.
Common Mistakes People Make When Setting Up Eero
Setting up a mesh Wi-Fi system is not hard, but there are some mistakes that trip people up. Here are the most common ones and how to avoid them.
Plugging Eero Into the Wrong Port
Some people plug the Ethernet cable into the wrong port on the modem or switch. Always use the LAN port on the modem or the port labeled “Internet” on the switch. Plugging into the wrong port can cause your Eero to not connect to the internet at all. If you are unsure, check the labels on your modem or contact your ISP for guidance.
Placing the Main Eero Too Far From the Modem
Keep your main Eero unit close to the modem, especially during setup. Once everything is working, you can move it to a better location. But during the initial setup, a short cable run is best. This ensures a strong initial connection and makes troubleshooting easier if something goes wrong.
Ignoring Firmware Updates
The Eero app will notify you when updates are available. Always install them. Firmware updates fix bugs, improve security, and can even boost your internet speed. Ignoring updates is one of the easiest mistakes to avoid. Set a reminder to check for updates once a month.
Overlooking Placement of Eero Beacons
Where you place your Eero beacons matters a lot. Do not stick them in corners or behind thick walls. Place them in open areas, about halfway between the main unit and the area with weak signal. This helps eliminate Wi-Fi dead zones in your home and ensures consistent Wi-Fi coverage everywhere.
Using a Low-Quality Ethernet Cable
A cheap or damaged Ethernet cable can limit your speeds. Use a Cat5e or Cat6 cable for the best performance. If you are setting up Ethernet backhaul between Eero units, a high-quality cable makes a noticeable difference in your broadband connection quality.
Expert Tips for Getting the Most Out of Your Eero Network
Once your Eero is set up and running, there are a few things you can do to get even better performance. These tips come from networking best practices and real-world experience.
Use the Eero App to Run Speed Tests
The Eero app has a built-in speed test feature. Run it regularly to check your internet speed. If you notice a drop, it might be a sign that something needs attention. The app also shows you which devices are using the most bandwidth. This helps you identify heavy users and adjust your network topology accordingly.
Enable QoS Settings
Quality of Service (QoS) lets you prioritize certain devices or activities. For example, you can give your work laptop higher priority over a smart speaker. This ensures your most important devices always get the bandwidth they need. QoS is especially helpful in households where multiple people stream, game, or work from home at the same time.
Keep Your Eero Units Updated
Regular updates keep your Eero mesh system running smoothly. The Eero app makes this easy. When an update is available, you will see a notification. Tap it and let the system do its thing. The process usually takes just a few minutes. Keeping your Eero units updated also ensures you get the latest security patches.
Consider a Wired Backhaul for Large Homes
If your home is larger than 2,000 square feet, consider using Ethernet cables to connect your Eero units. This is called wired backhaul, and it provides the fastest and most reliable connection between units. It is especially helpful for Eero Pro units that support multi-gig speeds. Wired backhaul removes the variability of wireless signals and gives you consistent performance in every room.
Restart Your Eero Units Periodically
Just like any other tech device, your Eero units can benefit from a fresh restart. Unplug them, wait 30 seconds, and plug them back in. This clears out any temporary glitches and keeps your home network setup running at its best. Many people find that a monthly restart keeps everything running smoothly.
Name Your Eero Network Something Recognizable
When setting up your Eero network, give it a clear and recognizable name. This helps you and your family members easily identify the correct network. Avoid generic names that might be confused with neighbor networks. A clear network name also makes troubleshooting faster when you or someone else needs to connect a new device.
Conclusion
The answer to whether you should plug your Eero into the modem or a switch comes down to your specific needs. For most people, plugging the Eero directly into the modem is the best choice. It is simple, fast, and reliable.
If you have many wired devices or need Ethernet backhaul, a switch can be a great addition. Just make sure you set it up correctly to avoid any speed or connection issues. A network switch gives you flexibility, but it adds a small layer of complexity.
Take the time to set up your Eero system the right way, and you will enjoy fast, reliable Wi-Fi coverage throughout your home. Use the Eero app to manage your network, keep your units updated, and place your beacons strategically. With the right setup, your mesh Wi-Fi system will serve you well for years to come.
Now that you know the answer, go ahead and set up your Eero with confidence. Your home network will thank you for it.
Frequently Asked Questions
Can I plug my Eero into a router instead of a modem?
You can plug your Eero into a router, but it is not the ideal setup. The router should be connected to the modem first, and then the Eero connects to the router. However, this creates an extra hop that can slightly reduce your speeds. For the best performance, plug the Eero directly into the modem whenever possible.
Do I need a switch if I only have a few wired devices?
No, you do not need a switch if you have only a few wired devices. Most Eero units come with at least one Ethernet port. If you only have one or two wired devices, plugging them directly into the modem or using the port on the Eero itself is perfectly fine. A switch becomes useful when you have three or more wired devices that need a connection.
What is Ethernet backhaul and why does it matter?
Ethernet backhaul is when you connect your Eero units to each other using physical Ethernet cables instead of relying on wireless signals. This matters because wired connections are faster, more stable, and less prone to interference than wireless ones. If you have a larger home or need the best possible performance, Ethernet backhaul through a network switch is the way to go.
Can I use any Ethernet cable with my Eero?
You can use most Ethernet cables with your Eero, but Cat5e or Cat6 cables are recommended for the best performance. These cables support gigabit speeds and are widely available and affordable. Avoid using very old or damaged cables, as they can limit your broadband connection speeds and cause frustrating slowdowns.
How many Eero units do I need for my home?
The number of Eero units you need depends on the size of your home. For apartments or small homes under 1,000 square feet, one Eero unit is usually enough. For homes between 1,000 and 2,000 square feet, two units work well. Larger homes over 2,000 square feet may need three or more units. The Eero app helps you figure out the right number and placement for your space.
What should I do if my Eero is not connecting to the internet?
If your Eero is not connecting, start by checking the Ethernet cable connections. Make sure the cable is firmly plugged into both the modem and the Eero unit. Try restarting both the modem and the Eero by unplugging them for 30 seconds. If that does not work, check the Eero app for any error messages or alerts. You can also try resetting the Eero to factory settings through the app as a last resort.