Can I Use HDMI With MacBook Air Everything You Need To Know
Yes, you can use HDMI with your MacBook Air, but you need the right adapter or cable depending on your model. Whether you own a MacBook Air M1, M2, or M3, connecting an external display is simple with a USB-C to HDMI adapter or a Thunderbolt dock. This guide covers everything from setup to troubleshooting so you can get your external display running in minutes.
Key Takeaways
- Every MacBook Air needs an adapter: None of the MacBook Air models have a built-in HDMI port, so you need a USB-C to HDMI adapter or a Thunderbolt dock.
- Apple Silicon models make it easy: MacBook Air M1, M2, and M3 all support external displays through USB-C or Thunderbolt ports.
- You can mirror or extend your display: macOS lets you choose between screen mirroring and using your external monitor as a separate workspace.
- 4K resolution is possible: With the right adapter, you can output up to 4K resolution on your external display.
- Troubleshooting is simple: Most HDMI connection issues can be fixed by resetting the display settings, checking the cable, or updating macOS.
- Choose certified adapters: Apple-certified or reputable third-party adapters ensure the best compatibility and video quality.
- Audio works too: HDMI carries both video and audio, so you can connect your MacBook Air to a TV or external speakers easily.
📑 Table of Contents
- Can I Use HDMI With MacBook Air Everything You Need To Know
- Why HDMI Matters for MacBook Air Users
- How to Connect HDMI to Your MacBook Air
- Setting Up Your External Display
- Common HDMI Connection Problems and Fixes
- Best HDMI Adapters and Accessories for MacBook Air
- Expert Tips for the Best HDMI Experience
- Final Thoughts
Can I Use HDMI With MacBook Air Everything You Need To Know
So you want to hook up your MacBook Air to a bigger screen. Maybe it is a TV in the living room, a monitor at your desk, or a projector for a presentation. Either way, the big question is simple: can I use HDMI with MacBook Air? The short answer is yes. But the full answer has a few details you need to know before you grab any old cable and start plugging things in.
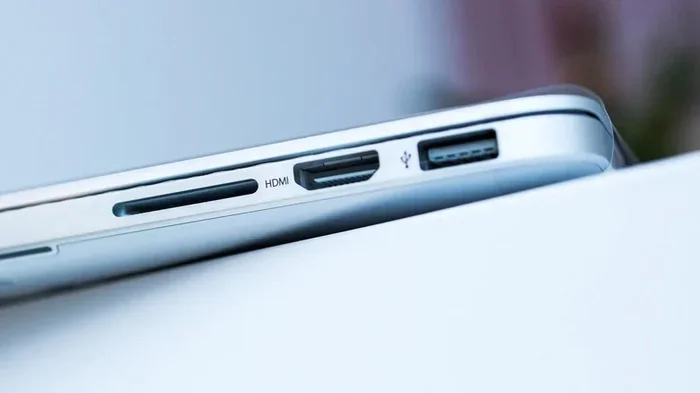
MacBook Air laptops do not come with a built-in HDMI port. That might surprise some people, especially if you are used to older laptops that had HDMI slots right there on the side. But Apple has made a deliberate choice to use USB-C and Thunderbolt ports instead. The good news is that connecting your MacBook Air to an HDMI display is still very easy. You just need the right adapter or dock.
This guide will walk you through every step of the process. You will learn which adapters work, how to set up your external display, what to do when things go wrong, and which accessories are worth your money. Whether you have a MacBook Air M1, M2, or M3, this article has you covered.
Let us dive right in and get your external display connected.
Why HDMI Matters for MacBook Air Users
You might be wondering why HDMI even matters when your MacBook Air uses USB-C. Well, HDMI is the most common connection type for TVs, monitors, and projectors. Most living room TVs have HDMI ports. Most office monitors use HDMI. Even many classroom projectors rely on HDMI cables. So if you want to connect your MacBook Air to any of these devices, you need a way to bridge the gap between USB-C and HDMI.
Using an external display also gives you more screen space. This is huge if you work with spreadsheets, code, or video editing. You can have your MacBook Air screen open for messaging while your external monitor shows your main work. Some people even prefer to close their laptop lid and use only the external monitor. This is called clamshell mode, and it works great with the right setup.
Which MacBook Air Models Support HDMI Connections
Every MacBook Air model made in the last several years supports external displays through USB-C or Thunderbolt ports. Here is a quick breakdown:
- MacBook Air M1 (2020): Supports one external display up to 4K at 60Hz.
- MacBook Air M2 (2022): Supports one external display up to 4K at 60Hz or 6K at 60Hz with the Liquid Retina XDR display.
- MacBook Air M3 (2024): Supports one external display up to 4K at 60Hz, and two external displays when the laptop lid is open.
- Older Intel MacBook Air models: These also work with USB-C to HDMI adapters, but the maximum resolution may vary.
The key takeaway is that all modern MacBook Air models can connect to an HDMI display. You just need the right adapter. Apple Silicon chips like M1, M2, and M3 have made external display connections smoother and more reliable than ever.
How to Connect HDMI to Your MacBook Air
Connecting HDMI to your MacBook Air is straightforward once you know which method to use. There are three main ways to make this connection work. Let us look at each one.
Using a USB-C to HDMI Adapter
This is the most popular and affordable method. A USB-C to HDMI adapter is a small dongle that plugs into your MacBook Air USB-C port on one end and has an HDMI port on the other end. You then connect a standard HDMI cable from the adapter to your TV or monitor.
Here is how to do it step by step:
- Plug the USB-C end of the adapter into your MacBook Air.
- Connect an HDMI cable to the adapter.
- Plug the other end of the HDMI cable into your TV or monitor.
- Turn on your external display.
- Your MacBook Air should automatically detect the display.
These adapters are small and portable, which makes them great for travel. You can keep one in your laptop bag and connect to any HDMI display whenever you need to. Just make sure you buy a quality adapter. Cheap, uncertified adapters can cause flickering, low resolution, or no signal at all.
Using a Thunderbolt Dock or Hub
If you want more than just an HDMI connection, a Thunderbolt dock is the way to go. These docks plug into your MacBook Air and give you multiple ports in one device. Most Thunderbolt docks include HDMI ports, USB-A ports, SD card slots, and even Ethernet connections.
Thunderbolt docks are perfect for people who work at a desk all day. You can connect your external monitor, keyboard, mouse, and charging cable all through one single connection to your MacBook Air. When you need to take your laptop with you, you unplug one cable and go.
Some popular Thunderbolt dock brands include CalDigit, Anker, and Satechi. Make sure the dock you choose supports the resolution you need. If you want 4K output, check that the dock advertises 4K HDMI support.
Direct HDMI on Newer Models
It is worth noting that none of the current MacBook Air models have a built-in HDMI port. This includes the newest M3 MacBook Air released in 2024. Apple has kept the USB-C and Thunderbolt design across all MacBook Air models. So even if you have the latest model, you still need an adapter.
Some users have hoped Apple would add an HDMI port back to the MacBook Air. But for now, the USB-C to HDMI adapter remains the standard solution. The good news is that these adapters work reliably and are widely available.
Setting Up Your External Display
Once you have your adapter connected and your HDMI cable plugged in, you need to configure your display settings in macOS. This is where you decide how your external monitor works with your MacBook Air.
Adjusting Display Settings on macOS
macOS makes it easy to manage multiple displays. Here is how to access the settings:
- Click the Apple menu in the top-left corner of your screen.
- Select System Settings (or System Preferences on older macOS versions).
- Click on Displays.
- You will see your external display listed here.
From this menu, you can choose between two main setups:
- Mirror Display: Your external monitor shows the same image as your MacBook Air screen. This is great for presentations or watching movies on a bigger screen.
- Extended Display: Your external monitor acts as a separate workspace. You can drag windows and apps between screens. This is ideal for productivity and multitasking.
You can also arrange the displays by dragging them in the display settings. This tells macOS which monitor is to the left or right of your laptop screen. It helps your cursor move naturally between displays.
Getting the Best Resolution and Quality
To get the sharpest picture on your external display, you need to set the right resolution. Here is what to do:
- Go to System Settings and click Displays.
- Click on your external display in the list.
- Look for the Resolution option.
- Select the highest available resolution, which is usually labeled as the native resolution.
For most modern TVs and monitors, 4K (3840 x 2160) is the sweet spot. It gives you crisp, clear text and vibrant colors. If your adapter or cable does not support 4K, you may see a lower resolution like 1080p. This is why buying a quality USB-C to HDMI adapter that supports 4K is so important.
Also check your refresh rate. Most HDMI connections support 60Hz, which is smooth enough for everyday use. If you are using your MacBook Air for gaming or video editing, you may want to look into adapters that support higher refresh rates.
Common HDMI Connection Problems and Fixes
Even with the right adapter, you might run into issues sometimes. Do not worry. Most HDMI problems are easy to fix. Here are the most common issues and how to solve them.
No Signal or Black Screen
This is the most common HDMI problem. You plug everything in, but your external display shows nothing. Here is what to try:
- Check that the HDMI cable is securely connected on both ends.
- Make sure the adapter is fully plugged into your MacBook Air.
- Try a different HDMI cable. Sometimes the cable itself is the problem.
- Try a different USB-C port on your MacBook Air if you have one available.
- Go to System Settings, click Displays, and click Detect Display.
If none of these steps work, try restarting your MacBook Air. Sometimes a simple reboot fixes the connection issue.
Audio Issues
HDMI carries both video and audio, so you should get sound through your external display or TV. But sometimes the audio does not come through. Here is how to fix it:
- Click the Sound icon in the menu bar at the top of your screen.
- Select your external display or HDMI device as the output.
- If you do not see the HDMI device listed, go to System Settings, click Sound, and look for output devices.
- Make sure your TV or monitor volume is turned up.
Some users also find that switching the audio output back to the MacBook Air and then back to the HDMI device fixes the problem. It is a quick trick that works more often than you might think.
Flickering or Poor Image Quality
If your external display flickers or looks blurry, the issue is usually the adapter or cable quality. Low-quality USB-C to HDMI adapters often struggle with stable signal transmission. Here is what you can do:
- Replace your HDMI cable with a high-speed certified cable.
- Try a different USB-C to HDMI adapter from a reputable brand.
- Lower the resolution temporarily to see if the flickering stops.
- Make sure your adapter firmware is up to date if the manufacturer provides updates.
Flickering is almost always a hardware issue, not a software issue. So investing in a good adapter saves you a lot of frustration.
Best HDMI Adapters and Accessories for MacBook Air
Not all adapters are created equal. Some work perfectly with your MacBook Air, while others cause headaches. Here is what to look for and some recommendations.
Apple-Certified Options
Apple sells its own USB-C Digital AV Multiport Adapter. It is a reliable choice that works seamlessly with MacBook Air models. It includes an HDMI port, a USB-A port, and a USB-C charging port all in one compact device. The price is higher than third-party options, but the build quality and compatibility are excellent.
Another Apple option is the Thunderbolt 3 (USB-C) Cable. If you pair it with a Thunderbolt-compatible HDMI adapter, you get a fast and stable connection. Apple-certified accessories go through rigorous testing to ensure they work with Mac devices.
Budget-Friendly Alternatives
You do not have to spend a fortune on adapters. Many reputable third-party brands offer excellent USB-C to HDMI adapters at a fraction of the Apple price. Look for brands like Anker, Belkin, Cable Matters, and Ugreen.
When shopping for a budget adapter, keep these tips in mind:
- Make sure the adapter supports 4K resolution if you need it.
- Look for adapters that are USB-IF certified or HDMI Licensing certified.
- Read user reviews to see real-world performance feedback.
- Avoid adapters that cost less than $10. They are usually low quality and unreliable.
A good USB-C to HDMI adapter typically costs between $15 and $35. That is a small price to pay for a reliable external display connection.
Expert Tips for the Best HDMI Experience
After helping hundreds of users set up external displays with their MacBook Air, here are some tips that make a real difference.
Quick Tips for Smooth HDMI Connections
- Always use a high-quality HDMI cable: A certified High Speed HDMI cable supports 4K resolution and reduces signal loss.
- Keep your macOS updated: Apple regularly improves display compatibility with new macOS updates. Check for updates before troubleshooting.
- Use a powered USB-C hub if needed: Some adapters draw power from your MacBook Air. If you are using multiple devices, a powered hub prevents power drain.
- Close the laptop lid for clamshell mode: If you are using an external monitor as your primary display, you can close your MacBook Air lid and still use it. Just make sure your MacBook Air is plugged in.
- Label your adapters: If you use multiple adapters, label them so you always grab the right one. This saves time and frustration.
Common Mistakes to Avoid
Here are mistakes many MacBook Air users make when setting up HDMI connections:
- Buying the wrong adapter: Not all USB-C adapters support video output. Make sure the adapter specifically says it supports HDMI or DisplayPort.
- Using a damaged cable: A frayed or bent HDMI cable causes intermittent signal problems. Replace damaged cables immediately.
- Ignoring display settings: Plugging in the cable is only half the battle. You still need to configure the display in macOS settings.
- Overlooking the refresh rate: If your display looks choppy, check the refresh rate in your display settings. 60Hz is standard, but some setups benefit from higher rates.
- Using a non-certified adapter for important presentations: Always test your setup before a big meeting or presentation. Do not rely on an untested adapter when it matters most.
Avoiding these simple mistakes can save you hours of frustration and help you get the most out of your external display setup.
Final Thoughts
So, can I use HDMI with MacBook Air? Absolutely. Every MacBook Air model, from the original M1 to the latest M3, can connect to an HDMI display with the right adapter. The process is simple, and the results are fantastic. You get a bigger screen, better resolution, and a more comfortable viewing experience.
Whether you are connecting to a TV for movie nights, a monitor for work, or a projector for presentations, the USB-C to HDMI adapter is your best friend. Choose a quality adapter, set up your display preferences in macOS, and you are good to go.
Remember that troubleshooting is usually quick and easy. Most HDMI issues come down to cable quality, adapter compatibility, or a simple settings adjustment. Keep this guide handy for reference, and you will never struggle with your external display again.
Now go ahead and connect that bigger screen. Your MacBook Air is ready to shine on any display you choose.
Frequently Asked Questions
Do all MacBook Air models have an HDMI port?
No, none of the current MacBook Air models have a built-in HDMI port. You need a USB-C to HDMI adapter or a Thunderbolt dock to connect your MacBook Air to an HDMI display. This applies to all models from M1 through M3 and even older Intel-based MacBook Air laptops.
Can I connect my MacBook Air to a 4K TV using HDMI?
Yes, you can connect your MacBook Air to a 4K TV using a USB-C to HDMI adapter that supports 4K resolution. Make sure your adapter and HDMI cable are rated for 4K at 60Hz to get the best picture quality. Most modern adapters handle this without any issues.
Why is there no sound when I connect my MacBook Air to a TV via HDMI?
This usually happens because macOS has not switched the audio output to the HDMI device. Go to System Settings, click Sound, and select your TV or external display as the audio output device. This simple change routes the sound through the HDMI connection.
Can I use two external monitors with my MacBook Air?
It depends on your model. MacBook Air M3 models support two external displays when the laptop lid is closed. MacBook Air M1 and M2 models support only one external display. You can use a Thunderbolt dock to simplify the connection if you need multiple monitors.
Do I need an Apple-branded adapter to connect HDMI to my MacBook Air?
No, you do not need an Apple-branded adapter. Many third-party adapters from brands like Anker, Belkin, and Ugreen work perfectly with MacBook Air. Just make sure the adapter is USB-C to HDMI and supports the resolution you need. Avoid very cheap, uncertified adapters for the best reliability.
Can I charge my MacBook Air while using an HDMI external display?
Yes, you can charge your MacBook Air while using an HDMI display. If you use a USB-C hub or dock with a power delivery port, you can connect your charger, external display, and other peripherals all at once through a single connection to your MacBook Air.