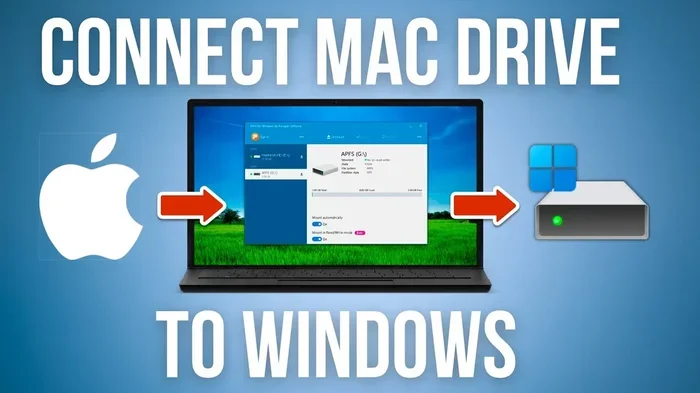
Can I Download Macos On USB Via Windows Operating System
Yes, you can download macOS on a USB drive using a Windows PC. This process lets you create a bootable macOS installer on a USB flash drive without needing a Mac. You will need a USB drive of at least 16 GB, a third-party tool like TransMac or BalenaEtcher, and a macOS disk image file. Our guide walks you through every step clearly and simply. Whether you are building a Hackintosh, testing Apple software, or just curious, this guide has you covered.
Have you ever wondered if you can download macOS on a USB drive using a Windows PC? The short answer is yes. You absolutely can. Many people want to run Apple’s operating system without owning a Mac. Maybe you are a developer testing software. Maybe you are a student curious about the Apple ecosystem. Or perhaps you want to build a Hackintosh setup. Whatever your reason, creating a bootable macOS USB on Windows is totally doable.
This guide will walk you through the entire process. We will cover everything from what you need to get started, to the step-by-step instructions, to troubleshooting common problems. By the end, you will feel confident enough to do it yourself. Let us dive right in.
Key Takeaways
- It is possible: You can create a bootable macOS USB drive using a Windows computer with the right tools.
- You need specific software: Tools like TransMac or BalenaEtcher are essential for writing macOS images on Windows.
- Hardware matters: A USB flash drive of at least 16 GB and a reliable internet connection are must-haves.
- Legal considerations exist: Apple’s terms of service restrict macOS installation to Apple-branded hardware.
- Common issues are fixable: Most problems like USB not showing up or corrupt files have straightforward solutions.
- Backup your data: Always back up your Windows system before starting the process.
- Patience is key: The process takes time, especially the download and write phases.
📑 Table of Contents
- What Does It Mean to Download macOS on USB via Windows?
- What You Need Before You Start
- Step-by-Step Guide to Download macOS on USB via Windows
- Alternative Method: Using BalenaEtcher
- Comparison: TransMac vs. BalenaEtcher for macOS USB Creation
- Common Problems and How to Fix Them
- Is It Legal and Safe to Download macOS on USB via Windows?
- Expert Tips for a Smooth macOS USB Creation Experience
- Frequently Asked Questions
- Conclusion
What Does It Mean to Download macOS on USB via Windows?
When we talk about downloading macOS on USB via Windows, we mean creating a bootable USB installer. This is a USB flash drive that contains the full macOS operating system. You can plug it into any compatible computer and start the installation process. The USB drive essentially acts as a replacement for a Mac’s recovery partition.
Normally, you would download macOS from the App Store on a Mac. But Windows PCs do not have that option. So we need workarounds. These workarounds involve downloading the macOS disk image file manually and then writing it to a USB drive using special software. The result is the same. You get a bootable USB that can install macOS on supported hardware.
Why Would Someone Want to Do This?
There are several reasons people want to create a macOS USB installer on Windows:
- Hackintosh building: Running macOS on non-Apple hardware is a popular hobby. A bootable USB is essential for this.
- Software development: Developers need to test apps on macOS but may not own a Mac.
- Learning and experimentation: Students and tech enthusiasts want to explore Apple’s operating system.
- Data recovery: Sometimes a bootable macOS USB helps recover data from a crashed Mac.
- Cross-platform flexibility: Having macOS on USB lets you boot into different operating systems easily.
What You Need Before You Start
Before you begin the download and creation process, make sure you have everything ready. Skipping this step can cause frustration later. Here is your checklist.
Hardware Requirements
- USB flash drive: You need at least 16 GB. A 32 GB drive is even better. Make sure it is fast and reliable.
- A Windows PC: Any modern Windows 10 or Windows 11 computer will work.
- A stable internet connection: macOS installer files are large. You need a reliable download speed.
- A compatible target computer: The computer you plan to install macOS on must support the version you are using.
Software You Will Need
- TransMac: This is one of the most popular tools for writing macOS images on Windows. It has a free trial version.
- BalenaEtcher: A free, open-source tool that works well for flashing disk images to USB drives.
- macOS disk image file: You need the .dmg or .iso file for the macOS version you want to install.
- Rufus (optional): Another tool that can help format and write USB drives in certain scenarios.
Important Preparations
Here are a few things to do before you start:
- Back up your Windows system. Creating a bootable USB involves formatting your drive. You do not want to lose important files.
- Disable antivirus temporarily. Some security software may interfere with the writing process.
- Check your USB drive health. Use a tool like CrystalDiskInfo to make sure your USB is not failing.
- Know your target macOS version. Different versions have different requirements and file sizes.
Step-by-Step Guide to Download macOS on USB via Windows
Now for the main event. Follow these steps carefully and you will have a working macOS bootable USB in no time.
Step 1: Download the macOS Installer File
Since you are on Windows, you cannot use the Mac App Store directly. You need to find the macOS disk image file from a reliable source. Here is how to approach this:
- Search for the specific macOS version you want. For example, macOS Ventura, macOS Sonoma, or macOS Big Sur.
- Look for the official Apple download links or trusted mirrors.
- The file will typically be in .dmg format. Some sources provide .iso files instead.
- Make sure the file is complete and not corrupted. Check the file size against what Apple lists.
Quick Tip: Always verify the download using a checksum if the source provides one. This ensures your file is authentic and untouched.
Step 2: Download and Install TransMac
TransMac is the most widely recommended tool for this process on Windows. Here is what to do:
- Go to the TransMac website and download the installer.
- Run the setup file and follow the installation prompts.
- TransMac offers a 15-day free trial. That is usually enough to complete the USB creation process.
- Once installed, open TransMac as an administrator. Right-click the app and select “Run as Administrator.”
Expert Insight: Running TransMac with administrator privileges is critical. Without it, the software cannot properly access and format your USB drive.
Step 3: Format Your USB Drive
This step erases everything on your USB drive. Make sure you have backed up any important files.
- Plug your USB flash drive into your Windows PC.
- Open TransMac and look for your USB drive in the left sidebar.
- Right-click on the USB drive and select “Format Disk for Mac.”
- Choose the GUID partition map option.
- Wait for the formatting to complete. This usually takes a minute or two.
Common Mistake: Do not select the wrong drive. Formatting the wrong USB or partition can result in permanent data loss on your Windows system drive.
Step 4: Write the macOS Image to the USB Drive
This is the most important step. Here is exactly what to do:
- In TransMac, right-click on the formatted USB drive again.
- Select “Restore with Disk Image.”
- Browse to the macOS .dmg file you downloaded earlier.
- Click “OK” or “Restore” to start the writing process.
- Wait for the process to complete. This can take anywhere from 15 minutes to over an hour depending on file size and USB speed.
Quick Tip: Do not remove the USB drive during the writing process. Interrupting it can corrupt the installer and ruin the USB drive.
Step 5: Eject and Test the USB Drive
Once the writing process finishes, safely eject the USB drive from Windows. Then plug it into the target computer. Restart the computer and enter the boot menu (usually by pressing F12, F2, or Esc during startup). Select the USB drive as the boot device. You should see the macOS installer launch.
Alternative Method: Using BalenaEtcher
Not everyone wants to use TransMac. BalenaEtcher is a great free alternative. It is open-source and works on Windows, Mac, and Linux. Here is a quick overview of the process:
- Download and install BalenaEtcher from the official website.
- Insert your USB drive into your Windows PC.
- Open BalenaEtcher and click “Flash from file.”
- Select your macOS disk image file.
- Select your USB drive as the target.
- Click “Flash” and wait for the process to finish.
Note: BalenaEtcher may not work with all macOS versions. It works best with newer .iso conversions. If you encounter issues, TransMac is the more reliable option for macOS USB creation on Windows.
Comparison: TransMac vs. BalenaEtcher for macOS USB Creation
| Feature | TransMac | BalenaEtcher |
|---|---|---|
| Price | Free trial (15 days) | Completely free |
| Ease of Use | Very straightforward | Extremely simple interface |
| macOS Support | Full support | Limited on some versions |
| Speed | Fast and reliable | Fast with good performance |
| Cross-Platform | Windows only | Windows, Mac, Linux |
| Reliability | Industry standard | Great for general use |
Both tools get the job done. If you need a quick, free solution, try BalenaEtcher first. If you want the most reliable option for macOS specifically, go with TransMac.
Common Problems and How to Fix Them
Even when you follow every step carefully, things can go wrong. Here are the most common issues and their solutions.
USB Drive Not Showing Up in TransMac
This usually happens because of a driver issue or the USB port itself. Try these fixes:
- Switch to a different USB port. Avoid USB hubs and use a port directly on your motherboard.
- Try a different USB flash drive. Some drives are not compatible with macOS formatting.
- Update your USB drivers through Windows Device Manager.
- Restart TransMac as an administrator.
macOS Installer Won Boot from USB
If your target computer does not boot from the USB, check these things:
- Make sure Secure Boot is disabled in your BIOS/UEFI settings.
- Check that your BIOS is set to allow booting from external devices.
- Verify that your USB drive was formatted correctly with GUID partition map.
- Try a different USB port on the target computer.
Corrupted or Incomplete Download
A corrupted macOS image file will cause problems during the write process. To avoid this:
- Always download from trusted sources.
- Verify file checksums when available.
- Re-download the file if the download was interrupted.
- Check the file size matches the expected size for that macOS version.
Windows Recognizes USB but Cannot Format It
This is a common issue with macOS-formatted drives. Try using Windows Disk Management to clean the drive first. Or use the command line with diskpart to fully erase the USB before starting the process again.
Is It Legal and Safe to Download macOS on USB via Windows?
This is a question many people ask, and it deserves a clear answer. Apple’s End User License Agreement states that macOS should only be installed on Apple-branded hardware. This means creating a bootable macOS USB on Windows for use on a non-Apple computer technically violates Apple’s terms of service.
However, the process itself is not illegal in most countries. Creating a bootable USB for personal use on Apple hardware is perfectly fine. The legal gray area comes when you install macOS on non-Apple hardware, which is what Hackintosh setups involve.
From a safety standpoint, the process is safe as long as you download files from official or trusted sources. Avoid sketchy websites that promise free macOS downloads. These often contain malware or corrupted files. Always use verified Apple download links or reputable mirrors.
Expert Tips for a Smooth macOS USB Creation Experience
Here are some insider tips that can save you time and headaches:
- Use a USB 3.0 or higher drive. USB 2.0 drives are painfully slow when writing large disk images. A USB 3.0 drive cuts the write time significantly.
- Close all unnecessary programs. Free up system resources on your Windows PC during the writing process for the best performance.
- Label your USB drive. After formatting it for Mac, give it a clear name so you do not confuse it with other drives later.
- Keep your Windows system updated. A stable Windows environment ensures fewer hiccups during the USB creation process.
- Have a backup plan. Keep a second USB drive handy in case the first one fails during the process.
- Research your target macOS version. Newer versions like macOS Ventura or macOS Sonoma have different hardware requirements than older ones like macOS Catalina or Big Sur.
Quick Tip: If you plan to use the USB drive on multiple computers, label it clearly as a macOS installer. This prevents accidental formatting or data loss by someone who does not know what is on the drive.
Frequently Asked Questions
Can I use any USB flash drive to download macOS on Windows?
Not just any USB drive will work. You need a drive with at least 16 GB of storage. USB 3.0 or higher is strongly recommended because the write process is much faster. Avoid very cheap or low-quality USB drives, as they may fail during the writing process or cause installation errors later.
Do I need a Mac to download macOS for the USB?
No, you do not need a Mac. You can download the macOS disk image file on a Windows PC from Apple’s support website or trusted sources. The only Mac-specific requirement is the App Store download, which you can bypass by obtaining the .dmg file directly.
Is it safe to run macOS from a USB on a Windows PC?
Yes, it is generally safe. Running macOS from a USB drive does not affect your Windows installation. However, always download the macOS image from trusted sources to avoid malware. Also, make sure your target computer’s hardware is compatible with macOS before attempting installation.
Can I use Boot Camp to install macOS on a Windows PC?
No, Boot Camp is an Apple tool that only works on Mac computers. It allows you to run Windows on a Mac, not the other way around. To install macOS on a non-Apple PC from Windows, you need to use tools like TransMac or BalenaEtcher to create a bootable USB.
What macOS versions work best with this method?
Recent versions like macOS Ventura, macOS Sonoma, and macOS Big Sur work well with the TransMac method. Older versions like macOS Catalina and Mojave also work but may have fewer online resources for troubleshooting. Always check compatibility with your target hardware before choosing a version.
How long does it take to create a bootable macOS USB on Windows?
The time varies depending on several factors. Downloading the macOS image can take 20 minutes to over an hour depending on your internet speed. The actual write process to the USB drive typically takes 15 to 45 minutes. USB 3.0 drives are significantly faster than USB 2.0 drives for this task.
Conclusion
Downloading macOS on a USB drive via Windows is a straightforward process once you know the steps. You need the right tools, a compatible USB drive, and a reliable macOS disk image file. TransMac remains the go-to tool for most users, while BalenaEtcher offers a solid free alternative. Whether you are building a Hackintosh, testing software, or simply exploring the Apple ecosystem, this skill is incredibly valuable.
Remember to back up your data, follow each step carefully, and be patient during the process. Common problems like USB recognition issues or boot failures are usually easy to fix with the troubleshooting tips we covered. The key is to take your time and not rush through any step.
Now that you know how to download macOS on USB via Windows, you are ready to get started. Grab your USB drive, download the macOS installer, and create your bootable USB today. The world of macOS is just a USB plug away.