Can You Connect Airpods To Macbook And How To Do It
Yes, you can connect AirPods to a Macbook with ease. The process is simple, fast, and works across all Macbook models. Whether you own AirPods Pro, AirPods Max, or standard AirPods, your Macbook recognizes them instantly. This guide walks you through every step, from pairing to troubleshooting. You will also learn expert tips to improve your wireless audio experience.
So you just got a pair of AirPods and want to use them with your Macbook? Great news. You absolutely can. The whole process is quick, straightforward, and works with virtually every Macbook model on the market. Whether you are using a Macbook Air or a powerful Macbook Pro, your Apple devices are designed to work together like magic.
Wireless headphones have become a daily essential for millions of people. They make listening to music, taking calls, and watching videos so much more convenient. AirPods stand out because they integrate deeply into the Apple ecosystem. This means they pair, reconnect, and switch between devices almost effortlessly. In this article, we will walk you through everything you need to know about connecting AirPods to your Macbook. From the first-time setup to fixing common problems, we have you covered.
By the time you finish reading, you will know exactly how to pair your AirPods, troubleshoot any issues, and get the best audio quality. Let us dive right in.
Key Takeaways
- Easy Pairing: Connecting AirPods to a Macbook takes just a few seconds using Bluetooth settings.
- Broad Compatibility: All AirPods models, including AirPods Pro and AirPods Max, work seamlessly with Macbook devices.
- Troubleshooting Available: Common connection issues have simple fixes you can try at home.
- Multi-Device Switching: AirPods can switch between your Macbook and iPhone with iCloud sync.
- Audio Quality Matters: You can adjust Mac audio settings to get the best sound from your AirPods.
- Battery Awareness: Keeping your AirPods charged ensures a smooth and uninterrupted listening experience.
📑 Table of Contents
How to Connect AirPods to Macbook
The process of pairing AirPods with a Macbook is incredibly simple. Apple designed it this way on purpose. You do not need any cables, software downloads, or complicated steps. Just a few clicks and your AirPods are ready to go. Let us walk through it step by step.
Step 1: Put Your AirPods in Pairing Mode
First, make sure your AirPods are charged. Open the lid of your AirPods charging case. If you have AirPods Pro or AirPods Max, the process is slightly different. For AirPods Pro, simply open the case near your Macbook. For AirPods Max, press and hold the noise control button on the top right ear cup. You will see a white light flash on the case. This flashing light means your AirPods are ready to be discovered.
Step 2: Open Bluetooth Settings on Your Macbook
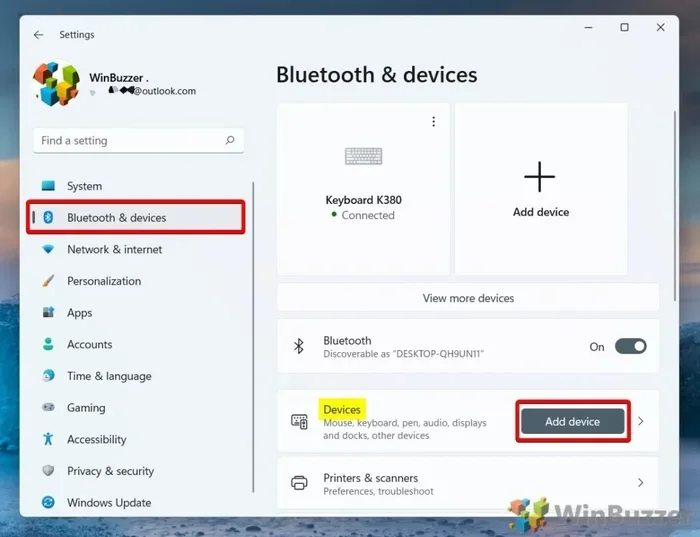
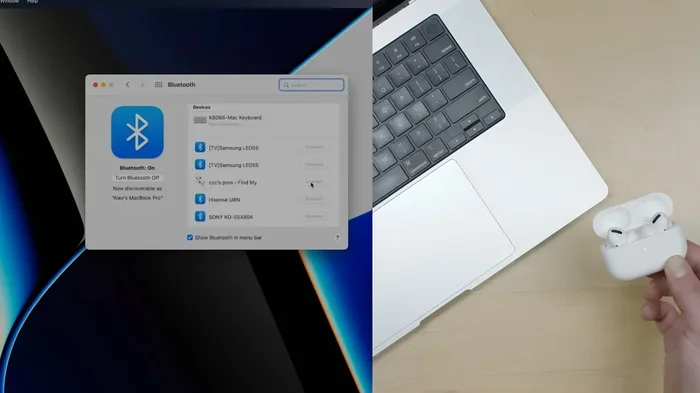
Now go to your Macbook. Click the Bluetooth icon in the menu bar at the top right of your screen. If you do not see it, go to System Settings, then click on Bluetooth. Make sure Bluetooth is turned on. Your Macbook will start scanning for nearby devices automatically.
Step 3: Select Your AirPods
Your AirPods should appear in the list of available devices. Click on them to connect. That is it. Within seconds, your wireless headphones will be paired to your Macbook. You will hear a confirmation sound, and the audio will automatically route to your AirPods.
Step 4: Confirm the Connection
To make sure everything is working, play a song or a video. The sound should come through your AirPods clearly. You can also check the Bluetooth settings panel to confirm your AirPods show a status of “Connected.” If they do, you are all set.
Quick Tip: If you use your AirPods with your iPhone too, the pairing happens automatically when you open the case near your Macbook. Apple calls this seamless pairing, and it is one of the biggest perks of the Apple ecosystem.
Which AirPods Models Work with Macbook
Not all Bluetooth headphones are created equal, but AirPods are designed specifically for Apple devices. The good news is that nearly every AirPods model works with a Macbook. Let us break down the compatibility so you know exactly what to expect.
AirPods (1st, 2nd, 3rd, and 4th Generation)
The standard AirPods from each generation connect to a Macbook without any issues. You get full access to audio playback, microphone input, and automatic ear detection. The 3rd and 4th generation models also support spatial audio, which adds a richer, more immersive sound experience when watching movies or listening to music on your Macbook.
AirPods Pro and AirPods Pro 2
AirPods Pro models offer active noise cancellation and transparency mode. Both features work perfectly when connected to a Macbook. The fit is also more secure, which is great if you move around while working. The 2nd generation AirPods Pro adds an even better microphone system and adaptive audio, making calls and meetings on your Macbook crystal clear.
AirPods Max
The AirPods Max are Apple’s premium over-ear wireless headphones. They connect to Macbook just like any other AirPods model. The sound quality is outstanding, and the build quality is top-notch. If you want the best audio experience on your Macbook Pro or Macbook Air, the AirPods Max are hard to beat.
AirPods with USB-C
Apple recently released AirPods with USB-C charging. These work with Macbook models that have USB-C or Thunderbolt ports. The pairing process is the same as other AirPods models. You just place them near your Macbook, and the connection happens automatically.
Troubleshooting Common Connection Issues
Even though Apple makes this process easy, sometimes things do not go as planned. Your AirPods connection might fail, drop out, or not show up in the Bluetooth list. This section covers the most common problems and how to fix them quickly.
AirPods Not Showing Up in Bluetooth List
This is the most common issue people face. If your AirPods do not appear, try these fixes. First, make sure your AirPods are in pairing mode. The white flashing light is your indicator. Second, restart your Macbook Bluetooth. Turn it off, wait ten seconds, and turn it back on. Third, restart your Macbook entirely. A fresh reboot clears up most temporary glitches.
You can also try resetting your AirPods. Place them in the case, close the lid, wait thirty seconds, then open the lid and press and hold the setup button on the back of the case for fifteen seconds. The light will flash amber, then white. Now try pairing again.
Audio Cutting Out or Lagging
If your audio keeps cutting out or sounds delayed, the issue is likely Bluetooth range or interference. Stay within thirty feet of your Macbook. Walls, microwaves, and other wireless devices can cause interference. Also, make sure your Macbook software is up to date. Apple regularly releases updates that improve Bluetooth connectivity and fix bugs.
Only One AirPod Connects
Sometimes only one AirPod connects to the Macbook. This usually happens when the other AirPod needs cleaning. Wipe the metal contacts on both AirPods and inside the charging case with a dry microfiber cloth. Also, check the battery level of both AirPods. If one is dead, it will not connect.
Sound Quality Is Poor
If the audio sounds muffled or low quality, check your Macbook audio settings. Go to System Settings, then Sound, and make sure your AirPods are selected as the output device. Also, check that the volume is not set too low. If you are using AirPods Pro, make sure the ear tips fit snugly. Poor fit can dramatically reduce sound quality.
Tips for Better AirPods Performance on Macbook
Once your AirPods are connected, you can take a few extra steps to get the best experience. These small adjustments make a big difference in daily use.
Adjust Audio Settings for Optimal Sound
Go to System Settings and click Sound. Under the Output tab, select your AirPods. You can also adjust the balance slider if one side sounds louder than the other. For AirPods Pro and AirPods Max, you can enable spatial audio for a more immersive experience. This is especially great for watching movies or streaming content on your Macbook.
Manage Multiple Devices with iCloud
If you use AirPods with both your iPhone and Macbook, iCloud sync makes switching effortless. Just make sure both devices are signed into the same Apple ID. When you play audio on your Macbook, then pick up your iPhone, your AirPods will automatically switch to the iPhone. This multipoint connection feature works behind the scenes without you doing anything.
Keep Your AirPods Charged
Nothing kills a good listening session faster than dead AirPods. Get into the habit of placing them back in the charging case when you are not using them. The case holds multiple charges, giving you over 24 hours of total listening time with the case. Keep an eye on the battery indicator on your Macbook screen when your AirPods are connected.
Update Your Software Regularly
Apple releases macOS updates frequently. These updates often include improvements for Bluetooth audio, bug fixes, and new features for AirPods. Keeping your Macbook updated ensures the best compatibility and performance. You can check for updates by going to System Settings, then General, then Software Update.
Use the Macbook Microphone for Calls
When you take a call on your Macbook while wearing AirPods, the microphone on your AirPods picks up your voice. This works great for Zoom calls, FaceTime, and regular phone calls. If the other person has trouble hearing you, try adjusting the microphone position. The boom mic on AirPods Pro sits close to your mouth, which helps with clarity.
Benefits of Using AirPods with Macbook
Using AirPods with your Macbook offers several advantages that go beyond just wireless convenience. Here are some of the best benefits you get.
- Seamless Apple Integration: AirPods and Macbook are designed to work together. The pairing process is fast, and reconnection is automatic every time you open the case.
- High-Quality Audio: AirPods deliver clear, balanced sound. Whether you are listening to music, podcasts, or watching videos, the audio quality is excellent.
- Hands-Free Calling: You can take calls directly through your AirPods without touching your Macbook. The built-in microphone ensures your voice comes through clearly.
- Noise Cancellation: AirPods Pro and AirPods Max offer active noise cancellation. This helps you focus in noisy environments like coffee shops or open offices.
- Automatic Switching: If you own multiple Apple devices, your AirPods switch between them automatically. This saves you from manually reconnecting every time.
- Long Battery Life: AirPods provide several hours of listening on a single charge. Combined with the charging case, you get all-day battery life.
- Compact and Portable: AirPods are lightweight and easy to carry. They fit in your pocket or bag without adding bulk.
All of these benefits make AirPods one of the best wireless headphones for Macbook users. The combination of convenience, quality, and Apple ecosystem integration is hard to match.
Comparison: AirPods Models for Macbook Use
Not sure which AirPods model is right for your Macbook? Here is a quick comparison to help you decide.
| Feature | AirPods (4th Gen) | AirPods Pro 2 | AirPods Max |
|---|---|---|---|
| Form Factor | In-Ear | In-Ear with Tips | Over-Ear |
| Noise Cancellation | No | Yes | Yes |
| Spatial Audio | Yes | Yes | Yes |
| Battery Life (Headphones) | 6 Hours | 6 Hours | 20 Hours |
| Price Range | Mid | High | Premium |
| Best For | Everyday Use | Calls and Commuting | Audiophiles and Long Sessions |
No matter which model you choose, all AirPods connect to a Macbook using the same simple Bluetooth process. Pick the one that fits your budget and needs best.
Frequently Asked Questions
Can I connect AirPods to a Macbook without Bluetooth?
No, Bluetooth is required to connect AirPods to a Macbook. All AirPods models use Bluetooth technology for wireless communication. There is no wired connection option for AirPods with a Macbook. Make sure Bluetooth is enabled on both devices before attempting to pair them.
Why do my AirPods keep disconnecting from my Macbook?
Disconnections usually happen due to Bluetooth interference or low battery. Move closer to your Macbook and reduce the number of wireless devices nearby. Also, make sure both your AirPods and Macbook are running the latest software. Restarting both devices often resolves the issue quickly.
Can I use AirPods as a microphone on my Macbook?
Yes, absolutely. When your AirPods are connected to your Macbook, they double as a microphone. This works for FaceTime, Zoom calls, and any app that uses audio input. The microphone quality is good, especially on AirPods Pro models with their built-in boom mic.
How do I know if my AirPods are connected to my Macbook?
You can check by looking at the Bluetooth icon in your menu bar. Your AirPods will show a status of “Connected.” You can also go to System Settings, click on Bluetooth, and see your AirPods listed with a connected status. If audio plays through your AirPods, they are connected.
Can I connect AirPods to multiple Macbooks at the same time?
AirPods can only be actively connected to one device at a time. However, they remember previously paired devices and switch between them easily. If you want to use your AirPods with a different Macbook, simply disconnect them from the current one and connect to the new one through Bluetooth settings.
Do AirPods work with older Macbook models?
Yes, AirPods work with older Macbook models that support Bluetooth. Most Macbooks from 2012 onward have Bluetooth capability. If your older Macbook has Bluetooth 4.0 or higher, it will pair with AirPods without any problems. Check your Macbook specifications to confirm Bluetooth support.
Final Thoughts
Connecting AirPods to a Macbook is one of the easiest and most rewarding things you can do with your Apple devices. The process takes less than a minute, and once paired, your AirPods reconnect automatically every time. Whether you are working from home, studying, or just relaxing, wireless audio on your Macbook makes everything more enjoyable.
We covered the full pairing process, compatibility across all AirPods models, troubleshooting tips, and ways to improve your experience. The key is to keep your devices updated, maintain good Bluetooth hygiene, and take advantage of the Apple ecosystem features that make everything seamless.
Now that you know exactly how to connect and manage your AirPods with your Macbook, go ahead and give it a try. Put on your favorite playlist, start a video call, or dive into a movie. The wireless freedom that AirPods bring to your Macbook is truly worth it. Enjoy the experience, and happy listening.