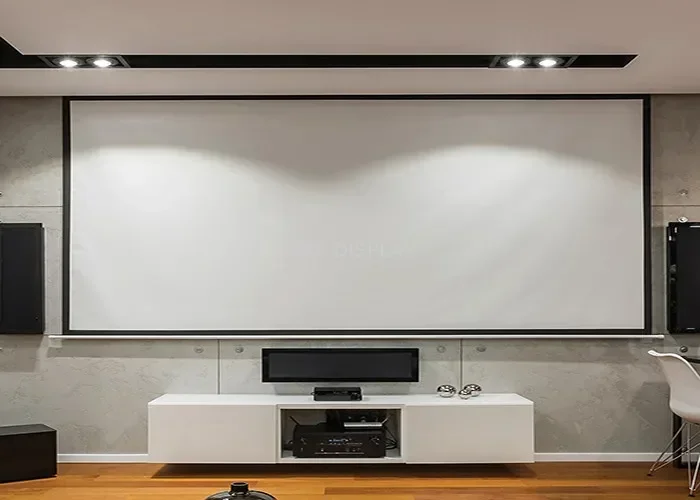
Can You Paint A Wall White For A Projector Screen At Home
Yes, you can paint a wall white for a projector screen at home, but choosing the right paint and preparing the wall properly makes all the difference. A white painted wall projector setup is an affordable alternative to buying a dedicated screen. This guide covers the best paints, wall prep steps, and expert tips to boost your home theater image quality and get a bright, clear picture every time.
You have a projector. You have a blank white wall. You want to watch movies, play games, or present slides. The question is simple: can you paint a wall white for a projector screen? The short answer is yes. But the real answer has a few important details you need to know.
Turning a regular wall into a projector screen at home is one of the easiest and cheapest upgrades you can make. Whether you are building a backyard movie night setup or a full home theater, a painted wall can work surprisingly well. But not all white paint is the same. Not all walls are ready. And not all projectors perform the same way on a painted surface.
This guide walks you through everything. You will learn which paints work best, how to prep your wall, what to watch out for, and how to get the sharpest picture possible. By the end, you will know exactly whether a white wall for projector use makes sense for your space.
Key Takeaways
- White walls work for projectors: A clean, flat white wall can serve as a decent projector screen with the right preparation.
- Paint choice matters a lot: Specialized projector screen paint gives better results than standard wall paint.
- Wall prep is essential: Filling cracks, sanding, and priming ensure a smooth, even surface for sharp images.
- Ambient light affects quality: A white wall works best in dim rooms; bright rooms need special screen paint.
- DIY saves money: Painting a wall is far cheaper than buying a commercial projector screen.
- Sheen level impacts brightness: Flat or matte finishes reduce glare and give a more natural look.
- Test before committing: Always do a small test patch to check how the wall looks with your specific projector.
📑 Table of Contents
- Why People Choose to Paint a Wall White for a Projector
- Can Any White Wall Work as a Projector Screen?
- Best Paints for a Projector Wall
- How to Prepare Your Wall for a Projector Screen
- Quick Tips for the Best Projector Wall Paint Job
- Common Mistakes to Avoid When Painting a Wall for a Projector
- White Wall vs. Dedicated Projector Screen
- Expert Insights on Using a White Wall for Projection
- How Projector Settings Affect a White Wall Setup
- When a White Wall Projector Setup Is Not the Right Choice
- Conclusion
Why People Choose to Paint a Wall White for a Projector
A lot of people skip buying a dedicated screen. They look at their empty wall and think, “Why not just use that?” It is a fair thought. Let us look at why this idea is so popular.
Cost Savings
A good projector screen costs money. Even a basic pull-down screen can run you fifty to two hundred dollars. A high-end screen can cost much more. Paint, on the other hand, is cheap. A gallon of quality projector screen paint runs between thirty and eighty dollars. You can cover a large wall for less than the price of one screen.
Simplicity
There is no frame to build. No stand to wobble. No wall mount to drill into. You just paint the wall and you are done. It is one of the simplest DIY projector screen ideas out there. Anyone with a roller, a brush, and a weekend can pull it off.
Large Screen Size
Want a one hundred-inch image? Go ahead. A painted wall gives you unlimited size options. You are only limited by the size of your wall. No screen material comes in custom sizes that large without a huge price tag.
Clean, Invisible Setup
When the projector is off, a white wall looks like a normal wall. There is no visible screen frame or bezel. Your room stays clean and uncluttered. This is a big win for people who want their home theater setup to look elegant when not in use.
Can Any White Wall Work as a Projector Screen?
Here is where things get interesting. Yes, a white wall can work. But “white” is not a one-size-fits-all answer. The shade, the texture, and the finish of your wall all matter a lot.
The Color Matters
Not all whites are the same. Pure white gives the brightest image. But some whites lean slightly blue or yellow. These tints can shift your picture colors. You want a wall that is as neutral as possible. Look for paint labeled “pure white” or “bright white.” Avoid creamy or off-white shades. They will dull your image over time.
The Texture Matters
A smooth wall gives a sharper picture than a rough one. If your wall has heavy texture from popcorn ceilings or knockdown drywall, the image will look blurry or uneven. Wall preparation for projector use should include sanding down any bumps or ridges. You want the flattest surface you can get.
The Finish Matters
This is a big one. Glossy or semi-gloss paint reflects light in a harsh way. It creates hot spots and glare on your image. Flat or matte paint scatters light evenly. This gives you a softer, more uniform picture. Always choose flat matte paint for a projector wall. It is the best finish for image quality.
Best Paints for a Projector Wall
Not every paint is created equal when it comes to projecting images. Some paints are designed specifically for this purpose. Others work fine in a pinch. Let us break down your options.
Projector Screen Paint
This is the top-tier choice. Brands like Screen Goo and Sherwin-Williams ProProjector make paint formulated for projection. These paints have special reflective properties. They boost brightness and color accuracy. They also reduce hot spots. If you want the best possible image, this is the way to go.
Standard Matte White Paint
A basic matte white paint from any brand works in a pinch. Look for one with high opacity and a true white pigment. Brands like Benjamin Moore, Behr, and Sherwin-Williams all have good options. Just make sure it is labeled “matte” or “flat.” Avoid eggshell or satin finishes.
DIY Paint Mixes
Some hobbyists mix their own projector screen paint. A common recipe combines flat white latex paint with a small amount of glossy white paint. This creates a semi-gloss surface that reflects more light. However, this method is hit or miss. It requires careful testing. For most people, buying a dedicated screen paint is the safer bet.
Comparison Table: Paint Options for Projector Walls
| Paint Type | Image Quality | Cost | Ease of Use | Best For |
|---|---|---|---|---|
| Projector Screen Paint | Excellent | $$$ | Easy | Dedicated home theater |
| Standard Matte White | Good | $ | Very Easy | Casual viewing, dim rooms |
| DIY Mix | Fair to Good | $ | Moderate | Budget experiments |
| Semi-Gloss White | Poor to Fair | $ | Easy | Not recommended |
How to Prepare Your Wall for a Projector Screen
Skipping wall prep is the number one mistake people make. A poorly prepared wall gives you a blurry, uneven image no matter how good your projector is. Take the time to do this right.
Step One: Clean the Wall
Wipe down the entire wall with a damp cloth. Remove dust, dirt, and cobwebs. Any debris on the wall will show up as spots or texture in your projected image. Let the wall dry completely before moving on.
Step Two: Fill and Repair
Look for cracks, holes, dents, or uneven patches. Use a lightweight spackling compound to fill any imperfections. Let it dry, then sand it smooth with fine-grit sandpaper (220 grit works well). Wipe away the dust with a tack cloth.
Step Three: Prime the Wall
Priming is not optional if your wall is currently a dark color or has a bold pattern. Use a high-quality primer that blocks stains and ensures even coverage. A good primer helps the white paint go on smoothly and look true to color. It also reduces the number of coats you need.
Step Four: Apply the Paint
Use a high-quality roller for smooth, even coverage. Start with a thin first coat and let it dry completely. Apply a second coat for full opacity. Most white paints need two to three coats for a rich, uniform white. Avoid brushing too hard, as this can create visible roller marks. These marks will show up on your projected image.
Step Five: Let It Cure
Do not project onto the wall right away. Let the paint cure for at least 48 to 72 hours. Fresh paint can off-gas slightly, which may affect clarity. Once it is fully cured, you are ready to test your setup.
Quick Tips for the Best Projector Wall Paint Job
- Use a paint extender: This reduces roller marks and gives you a smoother finish.
- Paint in even, overlapping strokes: Avoid going over the same spot twice, which creates thickness variations.
- Check with your projector first: Do a test run with a blank white image before you commit to the final coat.
- Consider a slight warm tint: Some people add a tiny bit of warm white to combat the cool blue cast from certain projectors.
- Paint the ceiling too: If light spill hits the ceiling, a white ceiling can help bounce light back for a brighter image.
Common Mistakes to Avoid When Painting a Wall for a Projector
Even with the best intentions, it is easy to mess up a projector wall. Here are the mistakes most people make and how to avoid them.
Using the Wrong Paint Sheen
This is the biggest error. Satin, eggshell, or semi-gloss paints create a shiny surface that reflects light unevenly. You get bright spots and dark areas in the same image. Always stick with flat or matte finish. It scatters light evenly and gives you the most balanced picture.
Skipping the Primer
If your wall is a dark color underneath, the white paint may not fully cover it in two coats. The dark color can bleed through and tint your image. Primer blocks this completely and ensures your white looks true.
Ignoring Room Lighting
A white wall works best in a dim or dark room. If you project in a bright room with lots of windows, the image will look washed out. Consider blackout curtains or shades if your room gets a lot of natural light. This is especially important for ambient light rejection and overall picture clarity.
Not Testing the Wall First
Do not paint the entire wall and then hope for the best. Paint a small test patch, about two feet by two feet. Project an image onto it and check the quality. Look for color accuracy, brightness, and evenness. If it looks good, paint the rest. If not, adjust your approach before committing.
Forgetting About Wall Color Consistency
If you paint only part of the wall or touch up a small area later, the new paint may not match perfectly. Even slight shade differences can show up on a projected image. Plan to paint the entire wall in one go for the best results.
White Wall vs. Dedicated Projector Screen
A painted wall is not the only option. Let us compare it side by side with a traditional projector screen so you can make an informed choice.
Image Quality
A dedicated screen usually wins here. Screens are engineered to reflect light in a specific way. They have a screen gain rating that boosts brightness and directs light toward the viewer. A white wall scatters light more broadly. The image is good, but it may not be as bright or as sharp as a purpose-built screen.
Cost
A painted wall wins easily. Paint costs a fraction of what a quality screen costs. You can get a large, custom-sized projection surface for the price of a single gallon of paint.
Flexibility
A painted wall is permanent. You cannot roll it up or move it. A screen gives you flexibility. You can put it away when you are not using it. If you share the room for other purposes, a screen might be the better choice.
Aesthetics
A white wall looks clean and invisible when the projector is off. A screen has a visible frame and surface texture. For some people, the invisible wall is a huge plus. For others, the sleek look of a dedicated screen is more appealing.
Maintenance
A painted wall is easy to maintain. You can touch up chips or scuffs with a small amount of paint. A screen requires careful cleaning. You cannot wipe a screen as aggressively as a wall without damaging the surface.
Expert Insights on Using a White Wall for Projection
We spoke with a few home theater enthusiasts and AV pros about their experiences with painting a wall white for projector use. Here is what they had to say.
Mark T., a home theater hobbyist from Austin, Texas, says: “I painted my basement wall with Sherwin-Williams ProProjector paint. The difference compared to my old sheet wall was night and day. Colors are richer and the image is way more even. I saved over three hundred dollars.”
Sarah L., an AV consultant, advises: “The biggest thing people underestimate is wall texture. Even small bumps throw off the image. Spend the extra time sanding and priming. It is the difference between a decent picture and a great one.”
David R., a tech reviewer, adds: “If you are in a bright room, a plain white wall will struggle. You need either a dark accent wall behind the screen or a specialized screen paint that handles ambient light better.”
These insights reinforce one key idea: preparation and paint choice make or break a white wall projector setup.
How Projector Settings Affect a White Wall Setup
Your wall is only half the equation. Your projector settings play a huge role in how the final image looks on a white surface.
Start with your projector brightness settings. If your projector has a brightness or lumens adjustment, boost it slightly when using a wall instead of a screen. A dedicated screen reflects light more efficiently. A wall absorbs a bit more. A small brightness bump can compensate for this.
Next, check your color settings. Most projectors have a “warm” or “cool” color temperature option. Test both on your white wall. Some walls have a slight blue or yellow tint that interacts with the projector color profile. Adjust until the white areas on screen look truly neutral.
Also consider your projector throw ratio. This determines how far the projector needs to be from the wall to produce a given image size. Measure your room and check your projector manual. A too-close or too-far placement will distort the image regardless of how perfect your wall looks.
When a White Wall Projector Setup Is Not the Right Choice
A painted white wall is not perfect for every situation. Let us be honest about when it falls short.
If your room gets a lot of direct sunlight, a white wall will struggle. The ambient light washes out the projected image. You will see a faded, low-contrast picture. In this case, consider a gray projector wall or a screen with ambient light rejection technology. These surfaces handle bright rooms much better.
If you need a portable setup, a painted wall does not work. You cannot move a painted wall. If you set up your projector in different rooms or outdoors, a portable screen is the better investment.
Finally, if you are a hardcore home theater enthusiast who demands the absolute best image quality, a dedicated screen is still the way to go. A white wall is a great budget-friendly option, but it has limits. Know what you are getting into before you commit.
Conclusion
Can you paint a wall white for a projector screen at home? Absolutely. It is one of the most affordable and effective ways to create a large projection surface. A well-prepped white wall with the right paint can deliver a surprisingly great picture for movies, gaming, and presentations.
The key is in the details. Choose the right paint. Prep the wall properly. Test before you commit. And adjust your projector settings to match the surface. Do these things, and you will enjoy a sharp, bright image that rivals many commercial screens.
Whether you are a college student on a budget, a family looking for a fun movie night setup, or a DIY enthusiast building a home theater, a painted wall is a smart choice. It is simple, it is cheap, and it works. Give it a try and see the difference for yourself.
Frequently Asked Questions
Can I use regular white wall paint for a projector?
Yes, you can use regular matte white wall paint, but dedicated projector screen paint will give you better brightness and color accuracy. Standard matte paint works fine in dim rooms for casual viewing.
What color paint is best for a projector wall?
Pure matte white is the best choice for most setups. It reflects light evenly and gives a natural, balanced image. Avoid glossy or satin finishes, as they create glare and hot spots.
Do I need to prime the wall before painting it white for a projector?
Yes, priming is highly recommended, especially if the wall is a dark color or has stains. A good primer ensures the white paint goes on evenly and blocks any underlying color from affecting the projected image.
Will a white wall work in a bright room with a projector?
A plain white wall will struggle in bright rooms. Ambient light washes out the image and reduces contrast. For bright rooms, consider using a specialized screen paint or a gray accent wall behind the projection area.
How many coats of white paint should I apply for a projector wall?
Two to three coats are usually needed for full, even coverage. Always let each coat dry completely before applying the next. More coats mean a richer, more opaque white surface for better image quality.
Can I paint a pattern or design on the wall behind the projected image?
No, avoid any patterns, textures, or designs on the wall behind the projection area. They will show through the projected image and distract from the picture. Keep the projection wall completely smooth and solid white.