How Do I Align A Table Horizontally In Microsoft Word
How Do I Align A Table Horizontally In Microsoft Word is a common question for users struggling with document formatting. You can easily center, left-align, or right-align your data using simple built-in tools. This guide provides quick, step-by-step methods to perfectly position any table on your page.
Have you ever stared at a Word document and wondered why your data looks so off-center? You typed everything perfectly, but the table alignment just feels wrong. Maybe your numbers are crammed to the left side, or your chart looks lost in the middle of the page. It happens to the best of us during document editing. The good news is that fixing this is super easy. You do not need to be a tech expert to make it look right. Let us walk through exactly how to fix it. Today, we will answer the question: How Do I Align A Table Horizontally In Microsoft Word. By the end, you will know all the simple steps to make your tables look perfect. You will learn how to center a table, move it left, or push it right with just a few clicks. This guide is full of practical tips that work every time.
Many people struggle with Microsoft Office formatting. They spend hours trying to drag and drop things manually. But Word has built-in tools that do the hard work for you. Horizontal centering is one of the most useful features you will ever use. It keeps your table formatting clean and professional. Whether you are making a school report or a business plan, proper alignment makes a huge difference. It helps your readers focus on the data, not the messy layout. So, let us dive into the methods you can use right now. We will keep things simple and easy to follow.
Key Takeaways
- Quick Alignment: Use the Table Tools layout tab to center or align your table instantly.
- Multiple Methods: You can align tables using the paragraph group, table properties, or margin settings.
- Left and Right Options: Centering is not the only choice; you can easily left-align or right-align your table too.
- Text vs. Table: Aligning the table itself is different from aligning text inside the table cells.
- Page Layout Matters: Your document margins and page setup affect how your table sits on the page.
📑 Table of Contents
- How Do I Align A Table Horizontally In Microsoft Word?
- Understanding Table Alignment Basics
- Step-by-Step Guide to Aligning Your Table
- Comparing the Three Alignment Methods
- Aligning Text Inside Your Table Cells
- Quick Tips for Aligning Tables in Word
- How to Fix a Misaligned Table
- Expert Tips for Perfect Document Formatting
- Conclusion
How Do I Align A Table Horizontally In Microsoft Word?
Aligning a table horizontally means moving it left or right on the page. You can center it, left-align it, or right-align it. This is different from aligning the text inside the cells. We are talking about the whole box moving across the page. Table positioning is all about where that box sits between your margins. When you align table horizontally Word, you change the overall placement. This makes your page layout look balanced and organized. There are three main ways to do this. Each method works great for different situations. Let us look at them one by one so you can pick the best one for your needs.
The Visual Impact of Good Formatting
First, let us talk about why this matters. A poorly placed table can ruin an otherwise great document formatting job. Imagine reading a report where the table hangs off the edge of the page. Or picture a table stuck far to the left, leaving a huge gap on the right. It looks messy and unprofessional. Proper table alignment fixes this instantly. It creates a clean flow for your eyes. Readers can easily scan the data without getting distracted by empty space. Good formatting shows attention to detail. It makes your work look polished and credible. In any kind of document editing, the small details matter most. Think about a resume. A centered table looks neat and tidy. But a left-aligned table might look better if you have a side column of text. The goal is always to make reading easy.
Understanding Table Alignment Basics
Before you start clicking around, it helps to understand the basics. Word treats your table as a single object. Just like a picture or a text block, it has its own alignment settings. You can change these settings without touching the data inside the table. This is great news if you want to keep your cell alignment intact. The key is finding the right menu. Once you know where to look, aligning tables takes just seconds. You will use the Table Tools section on the ribbon. This changes depending on where you click. Let us break down the exact steps you need to follow. We will keep it simple and straightforward.
Think of your table like a picture frame. The frame is the table. The picture inside is your data. You can move the frame left or right without changing the picture at all. This is exactly how table alignment works in Microsoft Word. The data stays the same. Only the position of the box changes. This separation is very helpful. It means you can format your data perfectly first. Then, you can worry about where the table sits on the page. You do not have to do both at the same time. This makes the whole process much less stressful.
Centering a Table on the Page
Centering is the most popular choice for horizontal centering. It places your table right in the middle of the page. This works well for most reports and letters. To do this, first click anywhere inside your table. You will see a small cross icon appear at the top left corner. Click on that icon to select the whole table. Now, look at the top of your screen. You should see the Table Tools tab. Click on the Layout tab under it. On the left side, you will find the Alignment group. Click the Center button. Your table will jump right to the middle of the page. This is the easiest way to achieve perfect table alignment in seconds. If your table does not move, make sure you clicked the cross icon first. This selects the entire table object, not just the text inside it.
Left Aligning and Right Aligning a Table
Sometimes centering is not what you need. You might want your table to sit flush with the left margin. Or maybe you want it on the right side of the page. Left aligning a table is just as easy as centering it. Select your table using the cross icon. Go to the Table Tools Layout tab. Click the Left Align button in the Alignment group. Your table will move to the left edge. To push it to the right, simply click the Right Align button. This is perfect for document formatting when you have text on one side and a table on the other. It gives your page a nice, structured look. For example, if you are writing a newsletter, a left-aligned table can sit nicely beside a paragraph of text. It keeps the design balanced and easy to read.
Step-by-Step Guide to Aligning Your Table
Now that you know the basics, let us get into the step-by-step details. We will cover three different methods. Each one has its own benefits. You can choose the one that feels easiest for you. All of these methods will help you align a table horizontally Word without any hassle. I will walk you through each click so you do not get lost.
Method 1: Using the Table Tools Layout Tab
This is the fastest way to center or align your table. First, click inside your table. You will notice a small box with a cross appear at the top left corner. Click that box. This selects the entire table. Now, look up at the ribbon menu at the top of Microsoft Word. You will see the Table Tools section appear. Click on the Layout tab. Look for the Alignment group on the left side of the ribbon. You will see icons for Left, Center, and Right alignment. Click the one you want. Your table will move instantly. This method is great for quick adjustments during document editing. You do not need to open any extra windows. Everything happens right on the ribbon. It is the go-to method for most people. I use this method every single day. It saves so much time. Once you get used to it, you will never go back to the slow methods.
Method 2: Adjusting Table Properties
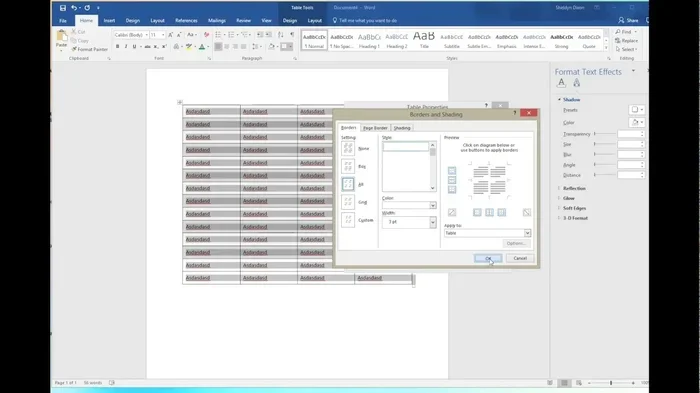
If you want more control, the Table Properties dialog box is your best friend. Right-click anywhere inside your table. A menu will pop up. Look for the Table Properties option and click it. A new window will open. Go to the Alignment tab at the top. You will see options for Left, Center, and Right. Pick the one you want. You can also choose how the table relates to the margins. Click OK to apply the changes. This method is very precise. It is perfect for table positioning when you need exact placement. Many people use this for formal reports and print layout documents. It gives you a clear preview of where your table will sit before you commit to the change. You can also set the table to align with the left margin or the right margin. This is useful if your document has specific paragraph settings that you need to follow.
Method 3: Changing Margins and Indentation
Another way to move your table is by adjusting the margins. This method works well if your table is wide. First, select your table by clicking the cross icon. Right-click and choose Table Properties again. This time, click on the Row tab. Check the box that says Specify height if you want. Then, look at the Alignment options. You can also go to the Indentation section. You can set a specific measurement for how far the table sits from the left edge. Type in a number, or use the up and down arrows. This gives you custom table formatting that fits your exact needs. It is a great trick for table spacing in complex page layout designs. You can nudge the table left or right by a few millimeters. This tiny adjustment can make a big difference in how your Word document looks. Sometimes, a table just needs a little push to the right to look balanced next to a heading.
Comparing the Three Alignment Methods
Choosing the right method depends on your specific needs. Some methods are faster, while others give you more control. Here is a quick comparison to help you decide.
| Method | Best For | Speed | Control Level |
|---|---|---|---|
| Table Tools Layout Tab | Quick centering and side alignment | Very Fast | Basic |
| Table Properties Dialog | Precise positioning and margin settings | Medium | High |
| Margin and Indentation Adjustments | Fine-tuning table placement | Slow | Very High |
As you can see, each method has its place. Use the Layout tab for everyday tasks. Use Table Properties when you need exact numbers. Use margin adjustments for those tricky edge cases. Knowing all three makes you a table formatting pro.
Aligning Text Inside Your Table Cells
Sometimes, the problem is not the table itself. It is the text inside the cells. You might have centered the table, but the words inside are still stuck to the left. This can look very confusing. Fixing the text alignment inside the cells is just as important as moving the table. You want your numbers and words to look neat and tidy. Let us look at how to fix the alignment inside your cells. This step is crucial for data tables that need to look professional.
Imagine you have a price list. The item names are on the left. The prices are on the right. If the text inside the cells is not aligned properly, the prices will not line up. This makes the list hard to read. You can fix this by changing the cell alignment settings. Just highlight the cells with the prices. Go to the Layout tab. Click the Right Align button in the Alignment group. Now your prices will line up perfectly. This small change makes a huge difference. It shows that you care about the details of your document formatting.
Centering Text Vertically and Horizontally
To center text inside a cell, first highlight the text you want to change. You can also click inside the cell to select it all. Now, go to the Layout tab under Table Tools. Look for the Alignment group again. You will see a grid of nine little boxes. These represent different alignment options. The top center box centers text horizontally. The middle center box centers text both horizontally and vertically. Click the one you need. This is a quick way to make your cell data look balanced. Proper cell alignment makes your table much easier to read. Try it out on a few cells and see how much cleaner it looks.
Changing Default Cell Alignment
If you want all your cells to align a certain way, you can change the defaults. Select the entire table by clicking the cross icon. Right-click and choose Table Properties. Go to the Table tab. At the bottom, you will see a button labeled Options. Click it. Check the box for Default cell alignment. You can set it to Left, Center, or Right. This saves you a lot of time. You will not have to adjust every single cell manually. This is a smart trick for large data tables in any Word document. It ensures consistency across your entire report.
Quick Tips for Aligning Tables in Word
Here are some quick tips to make your life even easier. These small hacks will speed up your workflow and improve your table formatting.
- Use keyboard shortcuts: Select your table and press Alt+J, then C to center it. This works in newer versions of Microsoft Word.
- Use the ruler: You can drag your table using the ruler at the top of the page. This gives you a visual guide for table spacing.
- Turn on formatting marks: Click the paragraph button on the Home tab. This shows you hidden marks and helps you see exactly where your table sits.
- Use the Table Grid: If you have a complex table, use the grid to help you align things. The grid snaps your cells to a neat structure.
- Check your paragraph settings: Sometimes the paragraph settings before or after the table affect how it looks. Adjust the spacing before and after the table for better table positioning.
How to Fix a Misaligned Table
Sometimes your table gets messed up. Maybe you accidentally dragged it, or it jumped to the wrong place. Do not panic. Fixing a misaligned table is very simple. First, click the cross icon to select the whole table. Then, go back to the Table Tools Layout tab. Click the Center button. Your table will snap back to the middle. If it is still not right, check your margins. Sometimes the page layout settings change without you noticing. You can go to the Layout tab on the ribbon and check your margins. If the margins are too narrow, your table might look off-center even when it is perfectly aligned. Resetting your margins to Normal can fix this instantly. You can also check your justify text settings. If your text is justified, it might push the table around. Switching to left-aligned text can stabilize your layout.
Expert Tips for Perfect Document Formatting
Want to make your Word document look truly professional? Here are some expert tips. These small changes can make a big difference in your table formatting. These insights come from years of document editing best practices. Professional writers and designers use these tricks every day.
- Use consistent spacing: Make sure your table spacing matches the rest of your document. Consistent table spacing creates a unified look. You can adjust spacing in the Table Properties window. Go to the Table tab and click Options. Set the default cell spacing there.
- Preview in Print Layout: Always check how your table looks in Print Layout view. What you see on screen is what you will get on paper. This view helps you catch alignment issues early. It is the best way to be sure your table alignment is perfect.
- Use gridlines wisely: Turn on gridlines if you need to see the table borders. But remember to turn them off before you print if you do not want them on the page. Gridlines are helpful for editing but messy for final drafts. You can toggle gridlines by going to the Table Design tab.
- Save as a template: If you make a perfect table, save it as a template. You can reuse it for future document editing projects. This saves you time and keeps your branding consistent. Look for the Save As option and choose Word Template.
- Check your page layout settings: Sometimes the problem is not the table itself, but the overall page setup. Make sure your page orientation and size are correct before you start aligning. A landscape page might need a different alignment than a portrait page.
Conclusion
Formatting your Word document does not have to be hard. You now know exactly How Do I Align A Table Horizontally In Microsoft Word. Whether you want to center a table, push it left, or align it right, the steps are simple. You can use the Table Tools Layout tab for quick fixes. Or you can dive into Table Properties for more control. Remember to separate table alignment from cell alignment. Avoid the common mistakes we talked about. With these tips, your document formatting will look clean and professional every single time.
Take your time and practice these steps. The more you work with tables in Word, the easier it becomes. Soon, you will align tables without even thinking about it. Your reports, resumes, and letters will look amazing. Good luck with your table formatting projects. You have got this!
Frequently Asked Questions
Can I align a table horizontally and vertically at the same time?
Yes, you can. Horizontal alignment moves the table left, right, or center on the page. Vertical alignment moves the table up or down. You can set both using the Table Properties dialog box. Just go to the Table tab and look for the alignment options there.
Why is my table not centering even when I click the center button?
This usually happens if you did not select the whole table. Make sure you click the cross icon at the top left corner of the table. If you only click inside a cell, Word will align the text inside that cell, not the table itself.
How do I stop my table from moving around when I edit text?
To lock your table in place, right-click the table and choose Table Properties. Go to the Table tab and check the box for Move with text. This keeps your table alignment stable even when you add or delete paragraphs above it.
Can I align a table to the left margin while text wraps around it?
Yes, you can. When you left-align the table, you can set text wrapping to tight or square. This allows your text to flow around the table. It is a great way to create a newsletter-style layout in your Word document.
Is there a difference between centering a table and justifying text?
Yes, there is a big difference. Justifying text spreads the words across the line evenly. Centering a table places the entire table box in the middle of the page. The data inside the cells does not change just because you center the table.
Does aligning a table horizontally affect the printout?
Absolutely. What you see on the screen in Print Layout view is exactly what you will get on paper. If your table is left-aligned on screen, it will be left-aligned when you print. Always check your print layout before you send a document to the printer.