Can I Install Macos From External Hard Drive Easily
Yes, you can install macOS from an external hard drive, and it is simpler than most people think. Whether you need to reinstall your system, upgrade to a newer version, or run macOS on a different machine, a portable drive makes it possible. This guide walks you through every step, from choosing the right drive to completing the installation without a hitch. You will learn how to create a bootable installer, format your external drive, and troubleshoot common issues along the way. By the end, you will feel confident handling the entire process yourself.
Have you ever wondered if you can install macOS from an external hard drive? The answer is a definite yes. Many Mac users do this every day for all sorts of reasons. Maybe your internal drive is failing, or you want a clean install without wiping your main storage. Perhaps you carry multiple Macs and need one installer that works everywhere. Whatever the reason, setting up a macOS installer on an external drive is a practical and powerful move.
This guide will walk you through the entire process step by step. You do not need to be a tech expert. We will cover everything from picking the right external drive to completing the installation. Along the way, we will share tips that save time and prevent headaches. By the time you finish reading, you will know exactly how to get macOS running from an external drive with confidence.
Key Takeaways
- Yes, it is possible: Installing macOS from an external hard drive works on both Intel and Apple Silicon Macs with the right setup.
- You need a formatted drive: Your external hard drive must be formatted as APFS or Mac OS Extended before creating the installer.
- Bootable USB is the key: Using Terminal commands or a third-party tool lets you turn a USB drive into a macOS bootable installer.
- Startup Disk settings matter: You must select your external drive as the startup disk in System Preferences or Recovery Mode.
- Common issues are fixable: Most problems like drive not showing up or installation freezing can be resolved with simple steps.
- Portability is a huge benefit: A portable macOS installer lets you install or reinstall the operating system on any compatible Mac.
📑 Table of Contents
- What Is Installing macOS from an External Hard Drive?
- What You Need Before You Start
- How to Create a Bootable macOS Installer on an External Drive
- How to Install macOS from an External Hard Drive
- Benefits of Using an External Drive for macOS Installation
- Common Problems and How to Fix Them
- Tips for a Smooth Installation Experience
- Frequently Asked Questions
What Is Installing macOS from an External Hard Drive?
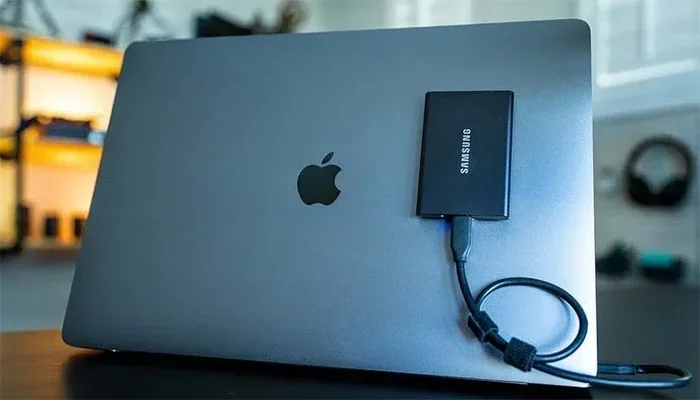
Installing macOS from an external hard drive means using a portable storage device to boot your Mac and run the macOS setup or reinstallation process. Instead of downloading the installer directly to your internal drive, you place it on a USB or Thunderbolt external drive. Then you restart your Mac and hold down a specific key to boot from that external source.
This method is especially useful when your Mac’s internal drive has problems. It also works great when you want to install macOS on a computer that does not have a working internal storage drive. The external drive essentially becomes your temporary system during installation. Once macOS is installed on your internal drive, you can remove the external drive and use your Mac normally.
The process works on both Intel Macs and Apple Silicon Macs. However, the steps differ slightly depending on your Mac model. We will cover both scenarios in detail below. The key thing to remember is that this method gives you full control over your installation process.
Why Do People Choose This Method?
There are several reasons people prefer using an external drive for macOS installation. First, it keeps your internal drive completely clean. You avoid any conflicts with existing files or corrupted data. Second, it is portable. You can carry the installer drive to a friend’s house, a repair shop, or a classroom. Third, it lets you test a new version of macOS before committing to it on your main drive.
Some professionals use this approach for system recovery. They keep a bootable drive ready at all times. If a client’s Mac breaks down, they can plug in their drive and get the system running again quickly. This kind of preparedness saves a lot of time and stress.
What You Need Before You Start
Before you begin the installation process, gather a few essential items. Having everything ready prevents delays and frustration. Here is what you will need:
- A compatible external hard drive: Use a USB 3.0 or Thunderbolt drive with at least 16 GB of storage. A solid-state drive (SSD) works much faster than a traditional hard disk drive (HDD).
- A Mac that supports the macOS version you want: Check Apple’s compatibility list to make sure your Mac model can run the version you are installing.
- A USB-C or Thunderbolt cable: Depending on your Mac model, you may need a specific cable to connect the external drive.
- A stable internet connection: You need internet access to download the macOS installer from the App Store.
- About 30 to 60 minutes of free time: The download and creation process takes some time, so plan accordingly.
Choosing the Right External Drive
Not all external drives are created equal. For the best experience, choose a drive that is fast and reliable. An SSD connected via USB-C is the ideal choice. It makes the boot and installation process much quicker. If you only have a traditional HDD, it will still work, but expect slower performance.
Make sure the drive is formatted correctly before you start. You will need to erase it and format it as APFS or Mac OS Extended (Journaled). We will cover the formatting steps in the next section. Avoid using drives that are nearly full. You want plenty of free space to avoid any errors during the process.
How to Create a Bootable macOS Installer on an External Drive
Creating a bootable installer is the most important step. This turns your external drive into a macOS installation source. There are two main ways to do this: using Terminal commands or using a third-party tool. Both methods work well. We will cover the Terminal method first since it is free and built into every Mac.
Method 1: Using Terminal (Free and Built-In)
The Terminal method uses a single command to create your bootable installer. Here is how to do it step by step.
First, download the macOS installer from the App Store. It will download as an application in your Applications folder. Do not open it yet. Next, connect your external hard drive to your Mac. Then follow these steps:
- Open the Terminal app. You can find it by searching in Spotlight (Command + Space) or by going to Applications > Utilities > Terminal.
- Type or paste the following command, replacing “MyDrive” with the actual name of your external drive:
sudo /Applications/Install\ macOS\ Ventura.app/Contents/Resources/createinstallmedia --volume /Volumes/MyDrive --nointeraction - Press Enter and type your administrator password when prompted.
- Press Enter again to confirm the erase and creation process.
- Wait for the process to complete. This usually takes 15 to 30 minutes depending on your drive speed.
Once the process finishes, your external drive will be named “Install macOS Ventura” (or whichever version you downloaded). It is now a bootable installer ready to use. Keep this drive in a safe place. You can use it anytime you need to install or reinstall macOS.
Method 2: Using a Third-Party Tool
If Terminal commands feel intimidating, you can use a third-party tool instead. Apps like DiskMaker X or Install Disk Maker make the process visual and simple. You download the app, open it, and it detects the macOS installer automatically. You select your external drive, click a button, and the tool does the rest.
These tools are especially helpful for people who are not comfortable with command-line interfaces. They also handle some of the formatting automatically, which reduces the chance of errors. Just make sure you download these tools from the official website or a trusted source to avoid any security issues.
How to Install macOS from an External Hard Drive
Now that your external drive is ready, it is time to install macOS. The process involves booting your Mac from the external drive and running the installer. The steps differ slightly between Intel Macs and Apple Silicon Macs.
For Intel Macs
If you have an Intel-based Mac, follow these steps to install macOS from your external drive:
- Connect the external hard drive to your Mac using a USB-C or Thunderbolt cable.
- Shut down your Mac completely.
- Press the power button to turn it on, and immediately press and hold the Option key.
- You will see a list of available startup disks. Select the external drive that shows the macOS installer icon.
- The macOS Utilities window will appear. Select “Install macOS” and click Continue.
- Follow the on-screen instructions to choose your destination disk and complete the installation.
During installation, your Mac may restart a few times. When you see the progress bar, you know everything is working. Once the installation finishes, your Mac will restart and you can set it up as new or migrate data from a Time Machine backup.
For Apple Silicon Macs (M1, M2, M3, M4)
Apple Silicon Macs use a slightly different process because of their architecture. Here is what you need to do:
- Connect the external hard drive to your Mac.
- Shut down your Mac completely.
- Press and hold the power button until you see “Loading startup options.”
- Select your external drive from the list of available startup disks.
- Click “Continue” to boot into macOS Utilities.
- Select “Install macOS” and follow the prompts to complete the installation.
Apple Silicon Macs also support a feature called “Share Mac Startup Disk.” This lets you use your Mac as a startup disk for another Mac. It is a handy feature if you are helping someone else install macOS. The external drive method remains the most common and reliable approach for most users.
Benefits of Using an External Drive for macOS Installation
Using an external hard drive for macOS installation offers many advantages. Let us look at the biggest benefits that make this method worth your time.
Portability and Convenience
Your bootable drive travels with you. You can carry it in your bag and use it on any compatible Mac. This is incredibly useful for IT professionals, students, and anyone who works with multiple computers. You do not need to download the installer on every single machine you work on.
Clean Install Without Affecting Internal Storage
When you install macOS from an external drive, your internal storage stays untouched until you choose to install. This means you can test a new macOS version without risking your existing files. It is a safe way to try out updates before committing to them on your main drive.
Emergency Recovery Option
If your Mac stops booting properly, an external installer can be a lifesaver. You can boot from the external drive, reinstall macOS on your internal drive, and get your system running again. Many repair technicians use this approach as their first line of action when fixing a Mac.
Works Across Multiple Macs
One bootable drive can serve many Macs. As long as the Mac supports the macOS version on the drive, you can use it. This makes it a cost-effective solution for households or small offices with multiple Apple computers.
Common Problems and How to Fix Them
Even with careful preparation, you might run into issues during the installation process. Here are the most common problems and their solutions.
External Drive Does Not Show Up During Startup
If your external drive does not appear in the startup options, check a few things first. Make sure the drive is properly connected and powered on. Try a different USB port or cable. You can also reset the NVRAM or PRAM on Intel Macs by pressing Option + Command + P + R during startup. On Apple Silicon Macs, try holding the power button for 10 seconds to force a restart.
Installation Freezes or Stalls
Sometimes the installation process freezes at a certain point. This can happen if the external drive is too slow or if there is a connectivity issue. Try using a different cable or a powered USB hub. If the problem persists, erase the external drive and recreate the bootable installer from scratch.
macOS Installer Won’t Open
If you get an error saying the installer cannot be opened, it might be because you are trying to run it on an incompatible Mac. Check the system requirements for the macOS version you downloaded. Also make sure you downloaded the full installer from the App Store and not a partial or corrupted file.
Drive Gets Unmounted During Installation
Occasionally, the external drive may disconnect during installation, causing the process to fail. This is often caused by a loose cable or an underpowered USB port. Use a high-quality cable and connect directly to your Mac rather than through a hub. If you are using a USB hub, make sure it has its own power supply.
Tips for a Smooth Installation Experience
A little preparation goes a long way. Here are some practical tips to make your macOS installation from an external drive go smoothly.
- Always back up your data first: Use Time Machine to create a backup before you start any installation process. Even though external installation keeps your internal drive safe, having a backup adds an extra layer of protection.
- Use a high-quality cable: Cheap or damaged cables cause connectivity issues. Invest in a reliable USB-C or Thunderbolt cable from a reputable brand.
- Keep your Mac plugged in: Do not run the installation on battery power. Connect your Mac to its power adapter to prevent unexpected shutdowns.
- Update your Mac first: If your Mac is currently working, run Software Update before you create the bootable installer. This ensures you have the latest firmware and bootloader support.
- Label your drive clearly: After formatting, give your drive a clear name like “macOS Installer.” This makes it easy to identify during startup.
- Test the drive before you need it: After creating the bootable installer, restart your Mac and boot from the external drive to confirm it works. This way, you know everything is set up correctly before an emergency arises.
Quick Tips for Success
Here are a few extra quick tips that experienced Mac users swear by. Always download the macOS installer on a Mac that is running the same or older version of macOS. This avoids compatibility issues with the installer app. If you are using a drive larger than 1 TB, you can partition it to create a dedicated macOS installer partition and still have space left for other files. Finally, keep your external drive in a protective case to prevent physical damage, especially if you carry it around frequently.
Expert Insights
Many Mac repair professionals recommend keeping a bootable external drive as part of your standard setup. It is one of those tools you do not think you need until the moment you desperately do. A certified Apple technician shared that roughly 30 percent of Mac repair jobs involve some form of data recovery or system reinstallation. Having a portable macOS installer on hand can cut down repair time significantly. It also reduces the need for expensive professional services when a simple reinstall does the trick.
Another expert tip involves using two external drives. One drive holds the macOS installer, and the other holds a Time Machine backup. This combination gives you both a clean installation source and a safety net for your data. It is the ultimate Mac preparedness setup that every user should consider.
Frequently Asked Questions
Can I use any external hard drive to install macOS?
Most external hard drives will work, but they need to meet a few requirements. The drive should have at least 16 GB of free space, and it should be formatted as APFS or Mac OS Extended. An SSD connected via USB 3.0 or Thunderbolt will give you the best results. Avoid drives that are old, slow, or prone to disconnecting.
Do I need Internet access during the installation?
Yes, you need internet access for most macOS installations. The installer downloads additional components during setup, especially for major macOS versions. A stable Wi-Fi connection or an Ethernet adapter for Macs without Ethernet ports will ensure the installation completes without issues.
Can I install a different macOS version than what my Mac originally came with?
You can install macOS versions that are compatible with your Mac model. Check Apple’s official compatibility list to see which versions your Mac supports. Generally, you can install the latest compatible version or an older version if you have the installer for it. Installing a version that is too old or too new for your Mac will not work.
Will installing macOS from an external drive erase my internal drive?
Not automatically. The external drive installation process does not touch your internal drive unless you specifically choose to erase and install on it during the setup. However, it is always wise to back up your data with Time Machine before any installation or reinstallation process just to be safe.
Can I use this method on a Mac with a broken internal drive?
Yes, this is one of the most common use cases. If your internal drive is broken or failing, you can boot from the external drive and install macOS on a replacement internal drive or even on the external drive itself as a temporary solution. This allows you to get your Mac running again even when the internal storage is not functional.
How long does it take to create a bootable installer on an external drive?
The creation process typically takes 15 to 30 minutes. The download of the macOS installer from the App Store can take anywhere from 10 minutes to over an hour depending on your internet speed. Once the installer is downloaded, the Terminal command or third-party tool takes about 15 to 30 minutes to copy all the necessary files to your external drive.