Can I Use A Regular Projector For Art On The Walls
Yes, you can absolutely use a regular projector for art on your walls. A standard home projector can transform any blank wall into a stunning gallery display or a powerful tool for tracing and creating art. You do not need expensive specialized equipment to project images, paint murals, or build a digital art wall at home. This guide covers everything you need to know about using a regular projector for art, from setup and brightness tips to common mistakes and expert recommendations.
Have you ever looked at a blank wall and thought it would look amazing with a giant piece of art on it? Maybe you want to display your favorite painting, create a mural, or just set up a cool digital gallery in your living room. The good news is that you can use a regular projector for art on the walls, and it is easier than you might think.
A standard home projector is a surprisingly powerful tool for art. Whether you want to display finished artwork, trace designs, or build an immersive wall installation, a regular projector can do the job. You do not need to spend hundreds of dollars on a specialty art projector. A standard model you already own, or one you pick up for a reasonable price, can open up a whole new world of creative possibilities.
In this guide, we will walk through everything you need to know. We will cover how to set up your projector for wall art, what specs to look for, common mistakes to avoid, and pro tips that make a real difference. By the end, you will feel confident turning any wall into your personal art canvas.
Key Takeaways
- Regular projectors work great for art: You do not need a fancy art-specific projector to display or create wall art.
- Brightness and resolution matter most: Choose a projector with at least 2,000 lumens and 1080p resolution for clear wall images.
- Setup and positioning are key: Distance, angle, and wall color all affect how your projected art looks.
- You can use projectors for tracing: Artists have used projection methods for centuries to scale and transfer images.
- Ambient light can be a challenge: Darker rooms give you the best results when projecting art on walls.
- Keystone correction helps with alignment: Use this feature to fix distorted images and get a clean projection.
- It is affordable and fun: A regular projector lets you create a home gallery without expensive custom framing or prints.
📑 Table of Contents
- What Does It Mean to Use a Regular Projector for Art?
- Why Use a Regular Projector Instead of a Specialized Art Projector?
- How to Set Up a Regular Projector for Art on Your Walls
- What Specs Should You Look for in a Regular Projector for Art?
- Creative Ways to Use a Regular Projector for Art
- Common Mistakes to Avoid When Projecting Art on Walls
- Quick Tips for the Best Art Projection Results
- Expert Insights on Using Regular Projectors for Art
- Key Takeaways
- Conclusion
What Does It Mean to Use a Regular Projector for Art?
Using a regular projector for art simply means taking a standard home or office projector and using it to display images on a wall or surface for artistic purposes. This can mean many different things depending on what you want to achieve.
Some people use a projector to display printed art or digital paintings as a temporary wall gallery. Others use it as a tracing tool to transfer images onto canvas or drywall. And some creators use projection mapping techniques to turn entire rooms into immersive art experiences. All of these are valid uses of a regular projector.
How Does a Projector Display Art on Walls?
A projector takes a digital image from a source like a laptop, phone, or media player and shines it through a lens onto a wall. The lens focuses the light to create a large, visible image. The bigger the wall and the closer the projector, the larger the image can be. This basic principle works the same whether you are showing a movie or displaying a piece of art.
The quality of the image projection depends on several factors. These include the projector’s brightness, resolution, and lens quality. Your wall color and the lighting in the room also play a big role. We will dig into all of these details below.
Why Use a Regular Projector Instead of a Specialized Art Projector?
You might be wondering why bother with a regular projector at all. Why not just buy an art projector? The truth is that a standard projector can do almost everything a dedicated art projector does, often at a lower cost. Here is why a regular projector for art makes a lot of sense.
Cost Savings
Specialized art projectors can cost anywhere from $200 to over $1,000. A good regular home projector with solid image quality can be found for $150 to $400. You get bright images, sharp details, and flexible sizing without paying a premium for a niche product.
Versatility
A regular projector does not just project art. You can watch movies, play games, give presentations, and display art all with the same device. This makes it a much better value if you only need art projection occasionally.
No Learning Curve
Most people already know how to use a standard projector. You plug it in, connect your device, and press play. There is no special software or technique required to get started with wall projection for art.
How to Set Up a Regular Projector for Art on Your Walls
Setting up a projector for art is straightforward, but a few small details make a huge difference in the final result. Here is a step-by-step guide to getting it right.
Step 1: Choose the Right Wall
The wall you project onto matters more than you might think. Ideally, you want a flat, smooth surface with a light or neutral color. White walls work best because they reflect light evenly and keep colors accurate. Dark or textured walls can absorb light and make your image look dull or uneven.
If your wall is dark, consider painting a section with matte white paint temporarily. This simple trick can dramatically improve your digital art display quality. A flat or matte finish is always better than a glossy one, which can cause glare and hot spots.
Step 2: Position the Projector Correctly
Place your projector on a stable surface or mount it on a ceiling or wall bracket. The distance between the projector and the wall determines the image size. Check your projector’s throw ratio to find the right distance for your desired image size.
Keep the projector level and centered with the wall. If the image looks skewed or trapezoidal, use the keystone correction feature to fix it. Some projectors also offer lens shift, which adjusts the image without reducing quality.
Step 3: Connect Your Image Source
You can connect a laptop, tablet, or phone to your projector using HDMI, USB, or wireless casting. For the best image clarity, use an HDMI connection whenever possible. Make sure the source image is high resolution so it does not look pixelated when stretched to a large size on the wall.
Step 4: Adjust Brightness and Focus
Turn off or dim the lights in the room for the best results. Ambient light is the enemy of a clear projected image. Close curtains, turn off overhead lights, and try to create a dim environment. Then adjust the projector’s focus ring until the image is sharp and crisp.
Increase the brightness if the image looks washed out. Most projectors let you adjust brightness, contrast, and color settings manually. Spend a few minutes tweaking these until the colors look true and vibrant.
What Specs Should You Look for in a Regular Projector for Art?
Not all projectors are created equal. If you are shopping for a new one or want to know if your current projector is good enough for art, here are the key specs to consider.
Brightness (Lumens)
Brightness is measured in lumens. For projecting art on walls, you want at least 2,000 lumens. If your room gets a lot of natural light, aim for 3,000 lumens or more. A brighter projector gives you a clearer, more vivid image projection even in less-than-ideal lighting conditions.
Resolution
Resolution determines how sharp and detailed the image looks. For art, 1080p (Full HD) is the sweet spot. It gives you crisp details without being overly expensive. If you want ultra-sharp results, look for 4K projectors, but keep in mind they cost more.
Contrast Ratio
The contrast ratio affects how deep the blacks are and how vibrant the colors appear. A higher contrast ratio means better color accuracy and more detail in dark areas of your projected art. Look for a contrast ratio of at least 2,000:1 for good results.
Throw Distance
The throw ratio tells you how far the projector needs to be from the wall to create a specific image size. Short-throw projectors can create large images from a close distance, which is great for smaller rooms. Standard-throw projectors work well in larger spaces.
Creative Ways to Use a Regular Projector for Art
Once you have your projector set up, the fun really begins. There are many creative ways to use a regular projector for art in your home or studio.
Displaying Digital Art as a Wall Gallery
One of the simplest uses is turning your wall into a digital gallery. Load up a collection of your favorite paintings, photographs, or digital designs and cycle through them. You can change the art anytime, which means your wall never gets boring. This works especially well in living rooms, bedrooms, and hallways.
Tracing and Transferring Art
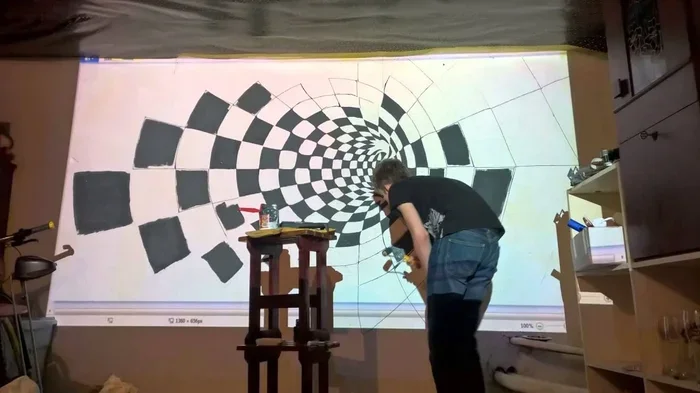
Artists have used projection to trace images for centuries, and modern projectors make this easier than ever. Simply project an image onto your canvas or wall and trace the outlines with pencil, charcoal, or paint. This technique is perfect for scaling up small drawings into large murals or transferring complex designs onto surfaces.
Art tracing with a projector saves enormous amounts of time compared to freehand drawing or grid methods. It also allows for precise scaling and positioning that would be very difficult to achieve by hand.
Creating Mural Art and Wall Paintings
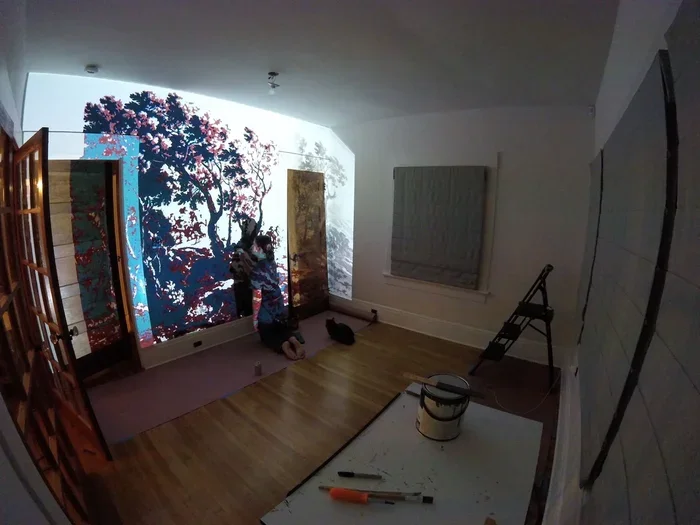
If you want to paint a mural but are not sure how to scale your design, a projector solves that problem instantly. Project your design onto the wall and paint over it. This technique is used by professional muralists and hobbyists alike. You can trace sections at a time, adjust the image as you go, and build a beautiful large-scale painting.
Building an Immersive Room Installation
For the adventurous creator, you can use multiple projectors to cover all four walls of a room. This creates an immersive environment that feels like stepping inside a painting or photograph. While this requires more equipment, the basic principle is the same as using a single projector for art.
Common Mistakes to Avoid When Projecting Art on Walls
Even with a great projector, a few common mistakes can ruin your results. Here is what to watch out for.
Ignoring Ambient Light
Projecting art in a bright room is one of the biggest mistakes people make. Sunlight and overhead lighting wash out the image and reduce image quality dramatically. Always try to project in a dim or dark environment for the best results.
Using a Low-Resolution Source Image
Your projected image is only as good as the source file. If you try to project a small, low-resolution image, it will look blurry and pixelated on a large wall. Always use high-resolution images, ideally at least 1920×1080 pixels for a 1080p projector.
Forgetting About Wall Texture
Textured or uneven walls create a rough surface that distorts the projected image. Smooth walls give you the cleanest results. If you have a textured wall, consider projecting onto a smooth white sheet or portable screen instead.
Not Adjusting Keystone Correction
If the projector is not perfectly aligned with the wall, the image will look skewed. Always use keystone correction to straighten the image. Some projectors also offer digital correction settings that help fine-tune the shape and edges of the projected rectangle.
Skipping Regular Maintenance
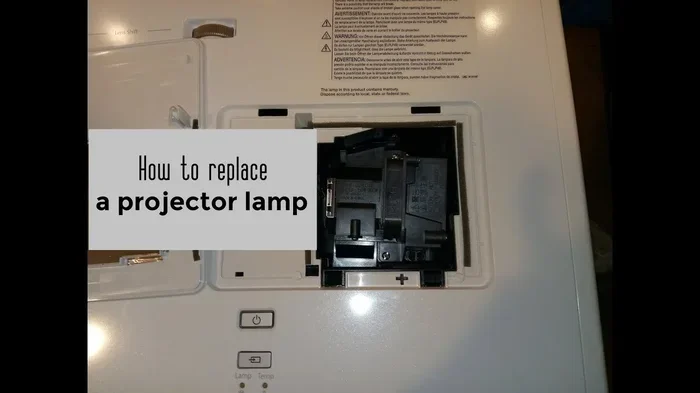
Dust on the projector lens can blur your image and reduce brightness. Clean your lens regularly with a soft microfiber cloth. Also check that your projector’s filter is clean and that ventilation vents are not blocked. A well-maintained projector gives you better image projection and lasts longer.
Quick Tips for the Best Art Projection Results
- Use a matte white wall for the truest colors and clearest image.
- Turn off all lights in the room before projecting art.
- Use high-resolution images to avoid pixelation on large walls.
- Clean your projector lens regularly for sharp output.
- Adjust color settings to match the original artwork as closely as possible.
- Use a projector remote or app so you can control the display from across the room.
- Experiment with distance to find the perfect image size for your wall space.
Expert Insights on Using Regular Projectors for Art
Many professional artists and designers use regular projectors as a core part of their creative workflow. According to muralist and digital artist Elena Torres, “A standard home projector is one of the most underrated tools in an artist’s toolkit. It lets you scale ideas quickly and see your work on the wall before you ever pick up a brush.”
Interior designers also use projectors frequently to visualize how artwork and color schemes will look in a space before committing to permanent changes. This makes a regular projector for art not just a creative tool but a practical planning tool as well.
Graphic designer Marcus Chen adds, “The resolution and brightness of modern projectors have improved so much that you can easily display fine art pieces with incredible detail. It is a game-changer for anyone who wants to create a gallery-like experience at home without the cost of custom framing or prints.”
Key Takeaways
- Regular projectors work great for art: You do not need a fancy art-specific projector to display or create wall art.
- Brightness and resolution matter most: Choose a projector with at least 2,000 lumens and 1080p resolution for clear wall images.
- Setup and positioning are key: Distance, angle, and wall color all affect how your projected art looks.
- You can use projectors for tracing: Artists have used projection methods for centuries to scale and transfer images.
- Ambient light can be a challenge: Darker rooms give you the best results when projecting art on walls.
- Keystone correction helps with alignment: Use this feature to fix distorted images and get a clean projection.
- It is affordable and fun: A regular projector lets you create a home gallery without expensive custom framing or prints.
Conclusion
The answer to the question Can I Use A Regular Projector For Art On The Walls is a resounding yes. A standard projector is a versatile, affordable, and powerful tool for displaying and creating art. Whether you want to build a digital gallery, trace designs for a mural, or simply add a splash of color to a blank wall, a regular projector delivers impressive results.
You do not need expensive specialized equipment or a technical background. With the right setup, a quality image source, and a few simple adjustments, you can turn any wall into a stunning canvas. The key is to pay attention to brightness, resolution, wall surface, and room lighting. Avoid the common mistakes outlined in this guide, and follow the quick tips for the best experience.
So go ahead and give it a try. Set up your regular projector for art, pick your favorite images, and watch your wall come to life. You might just discover a new favorite way to enjoy and create art in your home.
Frequently Asked Questions
Can any regular projector be used for art on walls?
Most regular projectors can be used for art on walls. You want one with at least 2,000 lumens of brightness and 1080p resolution for the best results. Even budget projectors can produce great wall art displays if the room is dim and the wall is light-colored.
Do I need a special type of wall to project art?
A smooth, white, matte wall gives you the best results. Textured or dark walls can distort the image and reduce clarity. If your wall is not ideal, you can hang a white sheet or portable screen instead for a clean projection surface.
Can I use a projector to trace art onto canvas or a wall?
Yes, tracing with a projector is one of the most popular uses for art projection. Simply project your image onto the surface and trace the outlines with your preferred medium. This works on canvas, drywall, wood, and many other surfaces.
What is the best room setup for projecting art on walls?
The best setup is a dim or dark room with a flat, light-colored wall. Close all curtains to block outside light, turn off overhead lights, and position the projector at the correct distance for your desired image size. This gives you the sharpest and most colorful projection.
Is it expensive to use a regular projector for art?
Not at all. A good regular projector costs between $150 and $400, which is much less than a specialized art projector. You likely already own a laptop or phone to use as the image source, so the ongoing cost is essentially zero.
Can I project art in a room with windows and natural light?
You can, but the image quality will be reduced. Natural light washes out projected images. If you must project in a bright room, choose a projector with at least 3,000 lumens, close the blinds, and use a white wall for the best possible results.