Can I Replace Projector Lamp Myself Without Any Help
Yes, you can replace projector lamp yourself without any help! This guide walks you through every step, from finding the right lamp to reassembling your projector. DIY projector lamp replacement saves you hundreds of dollars and takes under 30 minutes once you know the process.
Your projector is showing a dim image or maybe it stopped working altogether. The screen flashes a warning that says the lamp needs replacing. And your first thought is, “Can I replace projector lamp myself?”
The short answer is absolutely yes. You do not need a technician or a service call. With a few basic tools and about twenty minutes, you can handle this job on your own. Replace projector lamp yourself and save a ton of money in the process.
Many people think projector lamp replacement is complicated or risky. But it is actually one of the simplest maintenance tasks you can do. This guide will show you exactly how to do it safely and correctly. By the end, you will feel confident tackling the job on your own.
Key Takeaways
- DIY replacement is possible: Most projector owners can swap out their lamp without any professional help.
- You need the right lamp model: Always check your projector model number before buying a replacement.
- Safety matters: Let the projector cool down and handle the lamp carefully to avoid injury or damage.
- Cost savings are huge: Replacing the lamp yourself can save you $100 to $300 compared to professional service.
- Reset the lamp timer: This is a critical step many people forget after installing a new lamp.
- Warranty implications exist: DIY replacement may void your warranty, so check before you start.
- Tools are minimal: You only need a screwdriver and a clean cloth to complete the job.
📑 Table of Contents
- Why Your Projector Lamp Needs Replacement
- Can I Replace Projector Lamp Myself Without Any Help?
- Step-by-Step Guide to Replace Projector Lamp Yourself
- Where to Buy the Right Replacement Lamp
- Common Mistakes to Avoid When Replacing Your Projector Lamp
- When to Call a Professional Instead
- How Much Can You Save by DIY Lamp Replacement?
- Maintenance Tips to Make Your Projector Lamp Last Longer
- Key Takeaways
- Conclusion
Why Your Projector Lamp Needs Replacement
Projector lamps do not last forever. They have a limited lifespan, just like any light source. Over time, the brightness fades and the image quality drops. Understanding why this happens helps you know when it is time to act.
How Long Do Projector Lamps Last?
Most projector lamps last between 1,500 and 5,000 hours. The exact number depends on your projector model and usage patterns. If you use your projector every day for a few hours, you might need a new lamp once or twice a year.
Some modern projectors use LED or laser light sources that last much longer. But traditional lamp-based projectors are still very common in homes and offices. These lamps wear out over time and need to be swapped out.
Signs Your Projector Lamp Is Failing
Watch for these warning signs that your lamp is dying:
- Dim or faded image: The picture looks dull even at full brightness settings.
- Color changes: The image takes on a yellowish or reddish tint.
- Projector not turning on: The device powers on but shows no image or shuts off quickly.
- Lamp warning light: A red or orange indicator appears on the projector or remote.
- Strange noises: You hear buzzing or clicking sounds coming from the projector.
- Overheating: The projector feels unusually hot or shuts down unexpectedly.
If you notice any of these issues, it is time to check your lamp. You can often find the lamp hours in your projector menu. Most projectors let you reset the lamp timer after a replacement too.
Can I Replace Projector Lamp Myself Without Any Help?
The answer is a resounding yes. Thousands of people replace their projector lamps every year without calling a single professional. The process is designed to be user-friendly. Manufacturers expect owners to handle basic lamp swaps themselves.
That said, you do need to follow the right steps. Rushing through the job or skipping safety precautions can cause problems. This is where a clear guide makes all the difference.
What You Will Need
Before you start, gather these items:
- Replacement projector lamp: Make sure it matches your exact projector model.
- Phillips-head screwdriver: Most projectors use standard screws.
- Clean microfiber cloth: This helps you wipe down the projector safely.
- Soft, clean surface: A table or desk where you can work comfortably.
- Your projector manual: It has model-specific instructions that are very helpful.
You do not need any special tools or technical skills. The entire process is mechanical and straightforward. If you can change a light bulb at home, you can replace a projector lamp.
Is It Safe to Do It Yourself?
Yes, it is safe as long as you take proper precautions. The main safety concern is that projector lamps get very hot during use. Always let the projector cool down completely before you open it up. A hot lamp can cause burns or even shatter if handled too soon.
Another safety point is the electrical charge. Projectors can hold a small charge in their capacitors even after unplugging. Wait at least thirty minutes after turning off the device before you start working on it. This ensures everything is safe to touch.
Also, handle the new lamp carefully. The glass tube inside can be sensitive to fingerprints and oils from your skin. Hold it by the plastic housing only, never touch the glass directly.
Step-by-Step Guide to Replace Projector Lamp Yourself
Here is the full process broken down into simple steps. Follow along and you will have your projector working again in no time.
Step 1: Turn Off and Unplug the Projector
Power down your projector completely. Do not just put it on standby. Unplug it from the wall outlet. This eliminates any electrical risk while you work. Let it sit for at least thirty minutes so it cools down fully.
Step 2: Find and Remove the Lamp Cover
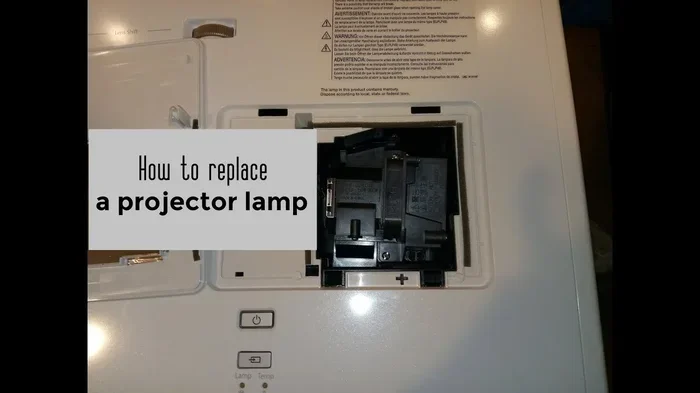
Most projectors have a removable panel on the side or bottom. This is the lamp cover. Look for screws or clips holding it in place. Use your screwdriver to remove the screws. Some models use twist-lock clips that you can release by hand.
Set the screws and clips aside in a small bowl. You do not want to lose them. Once the cover is off, you will see the lamp housing inside.
Step 3: Remove the Old Lamp
The lamp housing is usually held in by one or two screws. Remove those screws gently. Carefully pull the lamp assembly out of the projector. Some lamps plug into a connector on the side. If yours does, disconnect it first before pulling it out.
Place the old lamp on a clean surface. Do not throw it away yet. You may need to recycle it properly, since projector lamps contain small amounts of mercury.
Step 4: Clean the Lamp Chamber
This is an easy step that many people skip. Use your microfiber cloth to gently wipe the inside of the lamp chamber. Dust and debris can build up over time. Cleaning this area helps the new lamp perform better and last longer.
Look for any loose dust or debris around the fan and ventilation areas too. A clean projector runs cooler and lasts longer.
Step 5: Install the New Lamp
Take your new replacement lamp out of its packaging. Handle it only by the plastic housing. Hold it carefully and slide it into the lamp chamber. If there is a connector, plug it in securely. Secure the lamp housing with the screws you removed earlier.
Make sure the lamp sits firmly in place. It should not wobble or feel loose. A snug fit ensures proper electrical contact and safe operation.
Step 6: Replace the Lamp Cover
Put the lamp cover back on. Reattach the screws or clips you removed earlier. Make sure everything is secure and snug. A loose cover can cause dust to enter the projector or lead to overheating.
Step 7: Plug In and Test
Plug the projector back in and turn it on. The first time you power it on, you may see a lamp reset message on the screen. This is normal. Navigate to the projector menu and reset the lamp timer to zero.
Watch the first few minutes of your projected image. The picture should look bright and clear. If something looks off, turn the projector off and double-check that the lamp is seated properly.
Where to Buy the Right Replacement Lamp
Finding the correct replacement lamp is one of the most important parts of the entire process. Buying the wrong lamp model can waste your money and delay your fix.
How to Find Your Projector Lamp Model
Check your projector manual first. It lists the exact lamp model number. You can also find this information on the original lamp housing itself. Look for a sticker or engraving with a model number like “BL-FP230G” or “VPXL200.”
You can also check the projector manufacturer website. Enter your projector model number into their support page. The replacement parts section will show you the correct lamp.
OEM vs Compatible Lamps
You have two main options when buying a replacement lamp:
- OEM (Original Equipment Manufacturer) lamps: These are made by the same company that built your projector. They cost more but offer the best quality and reliability. OEM lamps often come with a warranty too.
- Compatible lamps: These are made by third-party manufacturers. They cost significantly less, often 40 to 60 percent less than OEM. Quality has improved a lot over the years, and many compatible lamps perform just as well.
Both options work well for DIY replacement. If you are on a tight budget, a compatible lamp is a great choice. If you want the highest reliability and your projector is still under warranty, go with OEM.
Where to Shop
You can buy replacement projector lamps from many places:
- Amazon and eBay: Wide selection and competitive prices.
- Manufacturer websites: Best for OEM lamps with full warranty support.
- Electronics retailers: Best Buy, B&H Photo, and similar stores carry projector lamps.
- Specialty projector parts websites: These often have the best prices for both OEM and compatible options.
Always compare prices across a few sellers. Read customer reviews before you buy. A well-reviewed lamp from a reputable seller will save you headaches down the road.
Common Mistakes to Avoid When Replacing Your Projector Lamp
Even though this is a simple job, mistakes do happen. Here are the most common ones and how to avoid them.
Skipping the Cool-Down Period
This is the number one mistake people make. A projector lamp runs extremely hot. Opening it up too soon can cause burns. Always wait at least thirty minutes after turning off the projector before you start working on it.
Touching the Glass Tube
Your fingers leave oils on the lamp glass. These oils create hot spots when the lamp is running. Hot spots can cause the lamp to shatter or burn out much faster. Always hold the lamp by the plastic housing only.
Forgetting to Reset the Lamp Timer
After installing a new lamp, you must reset the lamp timer in the projector menu. If you skip this step, the projector will keep displaying the old lamp hours. It may also show false warning messages about the lamp being dead. Resetting the timer takes just a few seconds in the settings menu.
Buying the Wrong Lamp Model
This mistake is easy to make but costly to fix. Different projector models use different lamps. Even lamps from the same manufacturer may not be interchangeable. Always double-check the model number before you place an order.
Not Cleaning the Lamp Chamber
Dust buildup inside the projector can affect the new lamp’s performance. A dirty chamber also traps heat, which shortens the lamp life. Take the extra minute to clean before you install the new lamp.
Over-Tightening Screws
Projector housings are not built to withstand heavy pressure. Over-tightening screws can crack the plastic or damage internal components. Tighten screws just until they are snug. Do not force them.
When to Call a Professional Instead
Most people can handle projector lamp replacement without any help. But there are situations where calling a professional makes sense.
If your projector is still under warranty, DIY replacement might void the coverage. Check your warranty terms before you start. Some manufacturers require authorized service centers to perform lamp changes. Opening the projector yourself could cost you a free replacement.
Also, if you notice other problems besides the lamp, a professional is the better choice. For example, if your projector has a color wheel issue or a fan that is making loud noises, these are more complex repairs. A trained technician can diagnose and fix these problems safely.
If you feel uncomfortable opening your projector or you do not have basic tools, there is no shame in hiring a pro. A professional lamp replacement service typically costs between $150 and $400 depending on your model. But if you are handy and comfortable following instructions, DIY saves you most of that cost.
How Much Can You Save by DIY Lamp Replacement?
The savings from replacing your projector lamp yourself can be significant. Professional service calls often charge between $150 and $300 for labor alone. Add the cost of the lamp, and a full service call can easily reach $400 or more.
By comparison, buying a replacement lamp yourself costs between $50 and $200 depending on the model and whether you choose OEM or compatible. That means you can save anywhere from $100 to $300 by doing it yourself.
Over the life of your projector, you might replace the lamp two or three times. The cumulative savings from DIY replacement can add up to $500 or more. That is a strong reason to learn how to do it yourself.
Maintenance Tips to Make Your Projector Lamp Last Longer
Once you have replaced your lamp, you want it to last as long as possible. These simple maintenance tips help extend lamp life and keep your projector running smoothly.
- Clean or replace filters regularly: Dust blocks airflow and causes overheating. Check your projector filter every few weeks.
- Use eco mode when possible: Eco mode reduces the lamp brightness slightly but significantly extends lamp life.
- Ventilate properly: Keep your projector in a well-ventilated area. Do not place it in a closed cabinet without airflow.
- Avoid frequent on-off cycling: Each power cycle puts stress on the lamp. Try to limit unnecessary power cycles.
- Keep the projector level: Tilting the projector can cause internal components to shift, affecting performance.
- Monitor lamp hours: Check the lamp timer in your projector menu regularly. This helps you plan replacements before the lamp fails completely.
Following these tips can push your projector lamp life closer to the upper end of its rated hours. A well-maintained lamp performs better and lasts longer.
Key Takeaways
- DIY replacement is possible: Most projector owners can swap out their lamp without any professional help.
- You need the right lamp model: Always check your projector model number before buying a replacement.
- Safety matters: Let the projector cool down and handle the lamp carefully to avoid injury or damage.
- Cost savings are huge: Replacing the lamp yourself can save you $100 to $300 compared to professional service.
- Reset the lamp timer: This is a critical step many people forget after installing a new lamp.
- Warranty implications exist: DIY replacement may void your warranty, so check before you start.
- Tools are minimal: You only need a screwdriver and a clean cloth to complete the job.
Conclusion
So, can you replace projector lamp yourself without any help? Absolutely yes. The process is straightforward, safe, and saves you real money. With the right replacement lamp, a screwdriver, and about twenty minutes, you can bring your projector back to life.
You do not need technical training or expensive tools. You just need a little patience and the willingness to follow instructions. This guide has given you everything you need to know to succeed.
Remember to handle the new lamp with care, clean the lamp chamber, and reset the lamp timer after installation. Avoid the common mistakes outlined above and your projector will be running bright and clear in no time.
Give it a try the next time your projector lamp starts fading. You will be glad you did. Replace projector lamp yourself and keep your movie nights, presentations, and gaming sessions going strong.
Frequently Asked Questions
How long does it take to replace a projector lamp yourself?
Most people complete the entire process in 15 to 30 minutes. The actual lamp swap takes about 10 minutes. The rest of the time goes toward cooling down the projector and cleaning the lamp chamber. It is a quick job once you know the steps.
Do I need any special tools to replace my projector lamp?
No special tools are needed. A basic Phillips-head screwdriver is usually all you require. Some projectors use twist-lock clips that need no tools at all. A microfiber cloth for cleaning is also helpful but not essential.
Will replacing the projector lamp myself void the warranty?
This depends on your warranty terms. Some manufacturers cover DIY lamp replacements while others do not. Check your warranty documentation or contact the manufacturer before you start. If the projector is still under warranty, it may be safer to use an authorized service center.
How do I know which replacement lamp to buy?
Find your projector model number on the back or bottom of the device. Check the user manual for the compatible lamp model number. You can also look at the old lamp housing for a sticker with the model number. Use this number when shopping for a replacement.
Can I use a compatible lamp instead of an OEM lamp?
Yes, compatible lamps work well for most users. They cost 40 to 60 percent less than OEM lamps and have improved significantly in quality over the years. If you want the highest reliability or your projector is still under warranty, OEM is the safer choice. But compatible lamps offer great value for everyday use.
What should I do with the old projector lamp?
Do not throw the old lamp in your regular trash. Projector lamps contain small amounts of mercury, which is hazardous. Check your local recycling guidelines for proper disposal. Many electronics stores and recycling centers accept old projector lamps. You can also check with the lamp manufacturer for take-back programs.