How Do I Connect Google Home To New Wifi Step By Step
Connecting your Google Home to a new WiFi network is simple when you follow the right steps. This guide walks you through the entire process using the Google Home app, from preparing your router to testing your connection. You will learn quick tips, common mistakes to avoid, and expert advice to keep your smart speaker running smoothly.
Setting up a Google Home device with a new WiFi network does not have to be a headache. Whether you just moved to a new house, got a new router, or changed your internet provider, the process is straightforward once you know the steps. Many people struggle at first, but the truth is, it only takes a few minutes when you follow the right method.
In this guide, we will show you exactly how to connect your Google Home to a new WiFi network step by step. We cover everything from gathering your WiFi details to fixing common problems. By the end, you will have your smart speaker online and ready to play music, answer questions, and control your smart home devices.
Before you dive in, make sure you have your new WiFi password handy. You will also need a phone or tablet with the Google Home app installed. This app is the central hub for managing all your Google smart devices. It works with both Android and iPhone, so you should have no trouble finding it in your app store.
Key Takeaways
- Use the Google Home app: The app is the main tool for connecting your device to a new WiFi network.
- Check your router first: Make sure your router is on and broadcasting before you start the setup.
- Know your WiFi details: Have your network name and password ready before you begin.
- Factory reset if needed: A reset can solve most connection problems quickly.
- Use 2.4GHz for best results: Most Google Home devices work best on the 2.4GHz band.
- Keep the app updated: An outdated app can cause setup failures and connection drops.
- Test after setup: Always ask a simple voice command to confirm everything works.
📑 Table of Contents
- How Do I Connect Google Home To New Wifi
- What To Do If Google Home Will Not Connect To New WiFi
- Tips for a Smooth Google Home WiFi Setup
- Common Mistakes People Make When Setting Up Google Home
- How to Switch Google Home Between WiFi Networks
- Expert Insights on Google Home WiFi Connections
- Key Takeaways
- Frequently Asked Questions
- Conclusion
How Do I Connect Google Home To New Wifi
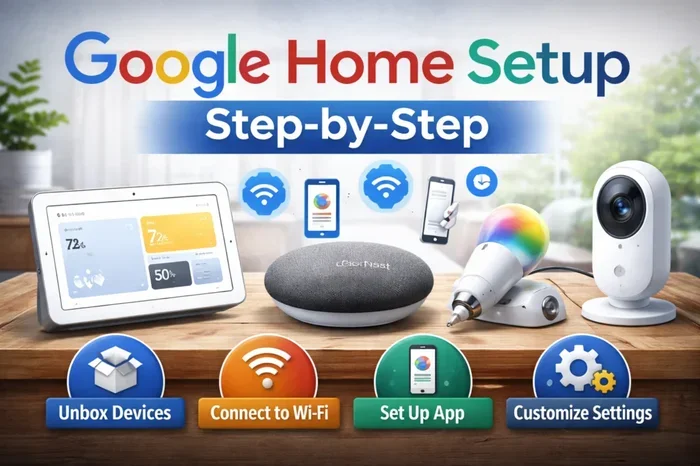
The main process for connecting your Google Home to a new WiFi network is simple and takes about five minutes. You will use the Google Home app on your phone to walk through the setup. The app guides you through every step, so even if you are not tech-savvy, you will be fine.
Here is the basic flow of what you will do:
- Open the Google Home app on your phone.
- Tap the Add button to start a new device setup.
- Choose your Google Home speaker from the list.
- Follow the on-screen prompts to select your new WiFi network.
- Enter your WiFi password and wait for the connection.
- Test your device with a simple voice command.
That is the core process. But there are important details you need to know before you start. Let us walk through each step carefully so you do not run into any surprises.
Step 1: Prepare Your Router and Network
Before you open the app, take a moment to prepare your router. Make sure it is powered on and working properly. Check that the WiFi network you want to connect to is broadcasting and visible to other devices.
Here are a few things to check on your router:
- Power light is on: Your router should have a steady power light showing it is working.
- WiFi light is blinking: This means the router is actively sending out a wireless signal.
- Network name is visible: Try connecting another phone or laptop to the network first to confirm it works.
- Password is correct: Double-check your new WiFi password to avoid setup errors.
If you just switched to a new internet plan, your network name might have changed. Log into your router admin page to confirm the current network name, also called the SSID. This small step saves a lot of frustration later.
Step 2: Open the Google Home App
Now open the Google Home app on your phone or tablet. Make sure you are signed in with the same Google account that is linked to your Google Home device. If you are not sure which account you used, check the device settings in the app.
Once the app is open, you will see your current list of smart home devices. Look for the Add icon, which usually appears in the top left corner of the screen. Tap it to begin adding a new device or reconfiguring an existing one.
If this is your first time using the app, you will need to set up a Google account first. The app walks you through this process with clear on-screen instructions. It only takes about two minutes to create an account if you do not already have one.
Step 3: Select Your Google Home Device
After tapping Add, the app will start scanning for nearby Google devices. Make sure your Google Home speaker is plugged in and powered on. It should be in setup mode, which means the light on the device is either blinking or solid white.
If your device does not appear on the screen, try moving your phone closer to the speaker. The Bluetooth signal between your phone and the speaker needs to be strong for the app to detect it. You can also try unplugging the device and plugging it back in to trigger setup mode again.
When your Google Home appears on the list, tap on it to continue. The app will now ask you to choose what type of device you are setting up. Select Google Home or Google Nest, depending on your model. The app will then start the pairing process.
Step 4: Connect to Your New WiFi Network
This is the most important step. The app will show you a list of available WiFi networks. Find your new network name in the list and tap on it. You will then be asked to enter the WiFi password.
Type your password carefully. WiFi passwords are case-sensitive, so check for capital letters and special characters. If you copy and paste the password, make sure there are no extra spaces before or after it.
Here are some tips for this step:
- Use the 2.4GHz band: Most Google Home devices connect better to 2.4GHz networks than 5GHz networks.
- Forget old networks: If your phone is still connected to the old WiFi, forget it first to avoid connection conflicts.
- Check for guest networks: Make sure you are selecting your main home network, not a guest network with limited access.
After entering the password, tap Connect. The app will send the network details to your Google Home device. You should see the light on the speaker turn solid blue, then white, when the connection is successful.
Step 5: Complete the Setup and Test
Once the connection is made, the app will ask you to name your device and assign it to a room in your home. This helps you organize multiple Google devices if you have more than one. Choose a clear room name like Living Room or Bedroom.
After you finish the setup, it is time to test your device. Say “Hey Google” or “OK Google” followed by a simple question like “What time is it?” If the speaker responds correctly, your connection is working perfectly.
You can also try playing music, setting a timer, or asking a fun fact. These quick tests confirm that both the WiFi connection and the Google Assistant service are working as expected.
What To Do If Google Home Will Not Connect To New WiFi
Sometimes things do not go as smoothly as we hope. If your Google Home refuses to connect to the new WiFi network, do not worry. This is a common issue and it is usually easy to fix. Let us look at the most common reasons and how to solve them.
Check Your WiFi Password Again
The most common reason for connection failure is a wrong password. It is easy to make a typo, especially with long or complex passwords. Go back and carefully re-enter your WiFi password. If you are typing it on a phone, turn on the “show password” option to double-check each character.
Restart Your Router and Google Home
A simple restart can fix most connection issues. Unplug your router from the power outlet and wait 30 seconds. Plug it back in and wait for all the lights to come back to normal. Then unplug your Google Home device, wait 10 seconds, and plug it back in.
Once both devices are back on, try the setup process again from the Google Home app. This fresh start clears out any temporary glitches that might be causing the problem.
Factory Reset Your Google Home Device
If restarting does not help, you may need to factory reset your Google Home. This wipes all previous settings and puts the device back to its original state. To do this, press and hold the microphone mute button on top of the device for about 15 seconds.
You will hear a sound or voice prompt confirming the reset. After the reset, the device will enter setup mode again. Open the Google Home app and go through the setup steps from the beginning. This time it should connect to your new WiFi without issues.
Move Your Router Closer to the Google Home
WiFi signal strength matters a lot during setup. If your router is far away from the Google Home, the signal might be too weak for the device to connect. Try moving your router closer to the speaker during the setup process. You can always move the router back to its normal location after the setup is complete.
Walls, floors, and large furniture can block WiFi signals. If possible, set up your Google Home in the same room as your router during the initial connection. This ensures the strongest possible signal during the setup phase.
Check for Router Compatibility
Some routers have settings that can block smart home devices from connecting. Check if your router has a feature called “AP isolation” or “client isolation.” This feature prevents devices on the same network from talking to each other, which can stop your Google Home from connecting properly.
Also, check if your router uses a separate band for smart devices. Some modern routers have a “smart connect” feature that combines 2.4GHz and 5GHz into one network name. While this is convenient for most devices, it can sometimes confuse Google Home during setup. Try disabling smart connect temporarily to see if it helps.
Tips for a Smooth Google Home WiFi Setup
Setting up your Google Home device does not have to be stressful. A little preparation goes a long way. Here are some expert tips that make the process smooth and fast.
Use the 2.4GHz WiFi Band
Most Google Home devices work best on the 2.4GHz WiFi band. This band has a longer range and better wall penetration than the 5GHz band. If your router broadcasts both bands with the same name, the Google Home app should automatically connect to the best one.
If your router uses different names for each band, look for the one that ends with “2G” or “2.4GHz.” Connecting to this band gives you a more stable connection and fewer setup problems.
Keep the Google Home App Updated
An outdated app can cause all kinds of setup issues. Before you start, go to the App Store or Google Play Store and check for updates. Install any available updates for the Google Home app. The latest version includes bug fixes and new features that make the setup process smoother.
You can also turn on automatic updates for the app so you always have the latest version. This is a good habit for all your smart home apps.
Name Your WiFi Network Clearly
If you have the option, avoid using special characters or very long names for your WiFi network. Simple names like “HomeWiFi” or “FamilyNetwork” work best with smart home devices. Google Home devices sometimes have trouble connecting to networks with unusual characters in the name.
Also, avoid using the same name for your 2.4GHz and 5GHz bands if you run into connection issues. Having two separate network names gives you more control over which band your Google Home uses.
Keep Your Phone Close During Setup
During the setup process, your phone communicates with the Google Home device using Bluetooth. Keep your phone within a few feet of the speaker for the best results. Once the device is connected to WiFi, you can move it to any room in your home.
This Bluetooth connection is only needed during the initial setup. After that, the Google Home device connects directly to your WiFi network and does not need your phone nearby to work.
Common Mistakes People Make When Setting Up Google Home
Even with a good guide, people still make mistakes during setup. Here are the most common errors and how to avoid them.
Using the Wrong Google Account
Your Google Home device is linked to a specific Google account. If you sign into the Google Home app with a different account, the app will not find your device. Always use the same account you used when you first set up the device.
If you are not sure which account is linked, look at the device settings in the app. The account name should be displayed there. You can also check the original setup email or confirmation message you received when you first bought the device.
Skipping the Router Preparation Step
Many people jump straight into the app setup without checking their router first. This leads to frustration when the device fails to connect. Taking five minutes to verify your router settings and WiFi details saves a lot of time in the long run.
Make sure your new WiFi network is active and working before you start. Connect your phone to it first to confirm the password is correct. This simple check prevents most setup issues.
Not Waiting Long Enough
The Google Home setup process takes a little time, especially when sending network credentials to the device. Do not unplug the device or close the app too quickly. Wait until you see the confirmation screen in the app before moving on to the next step.
Sometimes the light on the Google Home speaker will blink slowly to show it is still processing. Be patient and give it at least two to three minutes to complete the connection.
Ignoring Firmware Updates
After connecting your Google Home to the new WiFi, the device may download a firmware update automatically. This update can take several minutes. Do not unplug the device during this time. Let it finish the update so it runs at peak performance.
You can check for pending updates in the Google Home app at any time. Go to your device settings and look for a “Software Update” option. Keeping your device updated ensures you get the latest features and security patches.
How to Switch Google Home Between WiFi Networks
Sometimes you need to move your Google Home from one WiFi network to another without doing a full reset. This is common when you have a primary network and a guest network. Here is how to switch between them.
Open the Google Home app and tap on your device. Go to the Settings gear icon. Look for the WiFi or Network option. You will see the current network your device is connected to. Tap on it and choose your new network from the list.
Enter the password for the new network and wait for the connection to complete. The device will disconnect from the old network and join the new one. This method works well when both networks are in the same location and use the same router.
If you are moving your Google Home to a completely different location with a different router, a factory reset followed by a fresh setup is the better approach. This ensures all settings are optimized for the new network environment.
Expert Insights on Google Home WiFi Connections
According to smart home experts, most connection issues come down to three things: weak WiFi signal, incorrect password entry, and outdated app software. Fixing these three areas solves the vast majority of setup problems.
Network engineers also recommend using a mesh WiFi system if you have a large home. Mesh systems use multiple nodes to spread the WiFi signal evenly throughout your house. This eliminates dead zones where your Google Home might lose connection. Brands like Google Nest WiFi and Eero make excellent mesh systems that pair perfectly with Google Home devices.
Another expert tip is to assign a static IP address to your Google Home device in your router settings. This prevents the IP address from changing every time the device reconnects, which can cause intermittent connection drops. Setting a static IP is a small step that makes a big difference in long-term reliability.
Finally, keep your router firmware updated just like you update your Google Home device. Router manufacturers release firmware updates that fix bugs and improve compatibility with smart home devices. Checking for router updates once a month is a simple habit that keeps your entire home network running smoothly.
Key Takeaways
- Use the Google Home app: The app is the main tool for connecting your device to a new WiFi network.
- Check your router first: Make sure your router is on and broadcasting before you start the setup.
- Know your WiFi details: Have your network name and password ready before you begin.
- Factory reset if needed: A reset can solve most connection problems quickly.
- Use 2.4GHz for best results: Most Google Home devices work best on the 2.4GHz band.
- Keep the app updated: An outdated app can cause setup failures and connection drops.
- Test after setup: Always ask a simple voice command to confirm everything works.
Frequently Asked Questions
Can I connect Google Home to a new WiFi without the Google Home app?
No, the Google Home app is required for the initial setup and WiFi configuration. The app handles all the communication between your phone and the Google Home device during the setup process. Without the app, you cannot change the WiFi network your device is connected to.
Why does my Google Home keep disconnecting from the new WiFi?
Frequent disconnections usually happen because of a weak WiFi signal or interference from other devices. Try moving your router closer to the Google Home speaker. You should also check if other smart devices are causing network congestion. Switching to the 2.4GHz band often solves this problem because it has a stronger range than 5GHz.
How long does it take to connect Google Home to a new WiFi?
The entire process takes about five minutes if everything goes smoothly. You need a few minutes to open the app, select your device, and enter the WiFi password. If you run into issues, it could take longer, especially if you need to factory reset the device or adjust router settings.
Do I need to factory reset my Google Home when switching to a new WiFi?
You do not always need a full factory reset. If both WiFi networks are from the same router, you can switch networks through the Google Home app settings. However, if you are moving to a completely different router or internet provider, a factory reset followed by a fresh setup is the best approach.
Can Google Home connect to both 2.4GHz and 5GHz WiFi?
Yes, most newer Google Home models support both bands. However, the device tends to connect more reliably to the 2.4GHz band during setup. If your router uses a combined network name for both bands, the Google Home app will usually select the best one automatically. For the most stable connection, consider using the 2.4GHz band.
What should I do if the Google Home app does not detect my device?
First, make sure your Google Home device is plugged in and in setup mode. The light on the device should be blinking or solid white. Move your phone closer to the device and make sure Bluetooth is turned on. If it still does not appear, try restarting both your phone and the Google Home device. You can also try uninstalling and reinstalling the Google Home app to refresh the connection.
Conclusion
Connecting your Google Home to a new WiFi network is a simple process when you follow the right steps. Start by preparing your router and having your WiFi details ready. Use the Google Home app to guide you through the setup, and always connect to the 2.4GHz band for the best results. If you run into problems, a restart or factory reset usually fixes them quickly.
Remember to keep your app updated and test your device after setup with a simple voice command. These small habits keep your smart speaker running smoothly for years to come. With this guide, you have all the knowledge you need to connect your Google Home to any new WiFi network with confidence. Go ahead and get your smart home set up today!