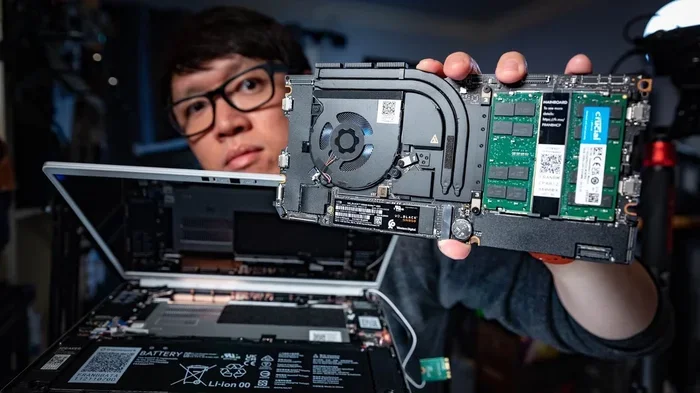
Can You Make A Diy Laptop Heres What You Need To Know
Yes, you can build a DIY laptop, but it is not as simple as assembling a desktop PC. A DIY laptop requires specific components like a barebone chassis, compatible motherboard, and a custom screen assembly. This guide walks you through every step, from choosing parts to avoiding common mistakes, so you can decide if a DIY laptop project is right for you.
Have you ever wondered if you can build your own laptop from scratch? The idea of creating a DIY laptop might sound intimidating at first. After all, laptops are compact, complex machines with tightly integrated parts. But the truth is, more people are diving into custom laptop projects every year. Some want a machine tailored to their exact needs. Others want to learn how computers work inside and out. Either way, building a DIY laptop is a rewarding challenge that teaches you a lot about hardware.
In this guide, we will cover everything you need to know. From the essential laptop components you will need, to the step-by-step process of putting one together. We will also talk about the challenges, common mistakes, and whether a DIY laptop is actually worth your time and money. If you have ever considered a DIY computer project but thought laptops were off-limits, keep reading. You might be surprised at what is possible.
A DIY laptop is not just a tech experiment. It is a real project that can result in a functional, portable computer you built yourself. Let us break it all down.
Key Takeaways
- Building a DIY laptop is possible but requires patience, research, and the right components.
- A barebone laptop kit is the easiest starting point for beginners.
- Key components include a motherboard, CPU, RAM, storage, screen, battery, and chassis.
- Common mistakes include incompatible parts, poor cable management, and skipping the testing phase.
- DIY laptops save money in some cases but often cost more than pre-built options when you factor in time and trial parts.
- Raspberry Pi and open-source projects offer affordable alternatives to traditional DIY builds.
- Testing and troubleshooting are essential before closing up the chassis.
📑 Table of Contents
What Is a DIY Laptop and Why Would You Build One?
A DIY laptop is a portable computer you assemble yourself using individual parts or a pre-selected kit. Unlike a desktop PC, a laptop has a built-in screen, keyboard, trackpad, and battery. All of these components must work together in a compact space. This makes a DIY laptop more complex than a standard desktop build.
So why do people take on this challenge? There are several reasons.
- Customization: You choose every part. Want a bigger SSD? Add it. Prefer a specific keyboard layout? Pick one that suits you.
- Learning experience: Building a DIY laptop teaches you about hardware compatibility, cable management, and troubleshooting.
- Cost savings: In some cases, you can save money by choosing your own laptop parts instead of paying for a brand name.
- Repairability: When you build it yourself, you know exactly how to fix it later.
- Fun and satisfaction: There is something incredibly rewarding about using a computer you built with your own hands.
A DIY laptop project is not for everyone. It requires patience, technical curiosity, and a willingness to troubleshoot. But if you are up for the challenge, it can be one of the most satisfying tech projects you ever tackle.
DIY Laptop vs. Desktop Build
It is important to understand how a DIY laptop differs from a custom PC build. A desktop build gives you plenty of room inside the case. You can swap parts easily. Cables are manageable. Cooling is straightforward. A laptop, on the other hand, packs everything into a small chassis. Every component must fit precisely. The laptop motherboard is custom-shaped. The screen assembly connects through delicate cables. The laptop battery is built into the frame. All of these factors make a DIY laptop significantly harder than a desktop build.
That said, the difficulty is not impossible. It just means you need to do your research carefully before you start.
Essential Laptop Components You Need to Know
Before you start building, you need to understand the core laptop components. Each part plays a specific role. Let us go through them one by one.
1. Barebone Laptop Chassis
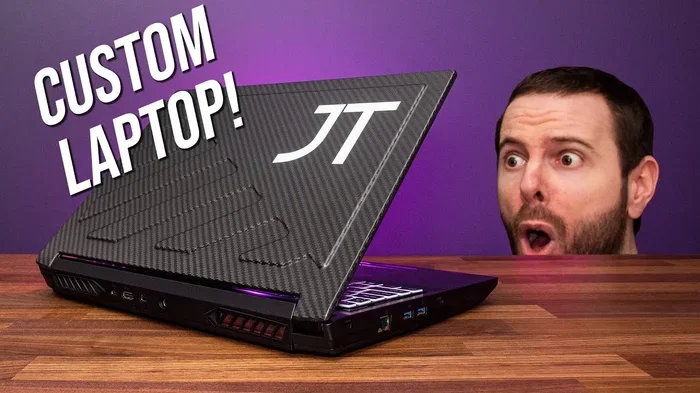
A barebone laptop is the foundation of most DIY laptop projects. It is a partially assembled laptop shell that includes the chassis, display, keyboard, and trackpad. You still need to add the internal components like the motherboard, CPU, RAM, and storage. Companies like Clevo and Tongfang sell barebone laptop chassis that are popular among DIY builders. These shells give you a ready-made frame to work with, which saves a lot of time and effort.
2. Motherboard and CPU
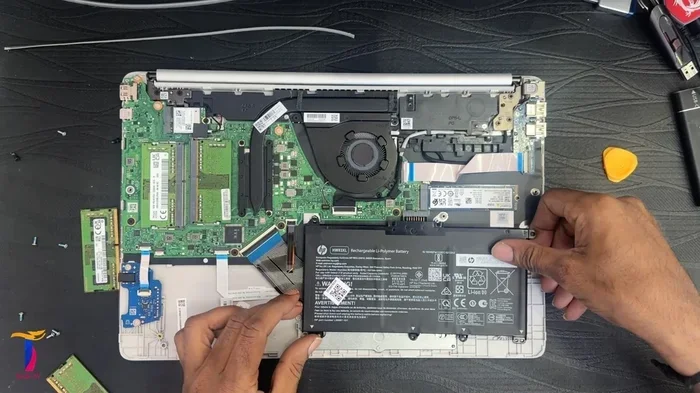
The laptop motherboard is the brain of your build. It connects every component together. When choosing a motherboard for a DIY laptop, you need to make sure it fits the chassis. The motherboard also determines which CPU you can use. Some barebone laptop kits come with the motherboard already installed. Others leave this choice up to you. Popular CPUs for DIY laptop builds include Intel Core and AMD Ryzen mobile processors. Always check compatibility before purchasing.
3. RAM and Storage
Random Access Memory, or RAM, is what your laptop uses to handle tasks in real time. For a DIY laptop, 8GB is the minimum for everyday use. 16GB is ideal for multitasking and light creative work. Storage is usually handled by an SSD, or solid-state drive. NVMe SSDs are fast and compact, making them perfect for laptop parts. You can typically upgrade storage later, but RAM is often soldered onto the motherboard in modern laptops. Choose wisely from the start.
4. Display and Screen Assembly
The screen assembly includes the display panel, the backlight, and the connecting cables. Most DIY laptop builders use a 15.6-inch or 14-inch panel. IPS panels offer better color and viewing angles than TN panels. When selecting a screen, check the resolution and the connector type. A laptop screen connects to the motherboard through a ribbon cable, and getting this right is essential for a working build.
5. Battery and Power Supply
A laptop battery gives your machine portability. Most DIY laptop builders use 3-cell or 6-cell lithium-ion batteries. The battery connects to the motherboard through a dedicated power connector. You will also need a compatible charger that matches the battery voltage. Never use a mismatched power supply, as it can damage your components. The laptop battery is one of the most important safety considerations in any DIY laptop project.
6. Keyboard and Trackpad
In a barebone laptop kit, the keyboard and trackpad usually come with the chassis. But if you are building from scratch, you will need to source these separately. Keyboard compatibility depends on the motherboard layout. Some builders prefer external keyboards for a better typing experience, but a built-in keyboard keeps the portable feel intact.
Step-by-Step Guide to Building Your Own Laptop
Now that you know the components, let us walk through the actual process of building a DIY laptop. This is a simplified overview to get you started.
Step 1: Gather Your Tools and Parts
Before you touch anything, make sure you have everything you need. Here is a checklist:
- Barebone laptop chassis or DIY laptop frame
- Laptop motherboard compatible with the chassis
- CPU and thermal paste
- RAM sticks (compatible with your motherboard)
- SSD or storage drive
- Screen assembly with ribbon cable
- Laptop battery and charger
- Screwdrivers (Phillips and Torx sets)
- Anti-static wrist strap
- Cable ties and small tray for screws
Lay everything out on a clean, flat surface. Use an anti-static wrist strap to prevent static damage to sensitive components. This is a small step that saves a lot of headaches.
Step 2: Install the Motherboard
The laptop motherboard is the heart of your build. Carefully place it into the chassis. Secure it with the screws that came with the frame. Make sure no cables are pinched or bent. The motherboard should sit flat and firmly in place. Take your time with this step. A misaligned motherboard can cause serious issues later.
Step 3: Install the CPU and RAM
Next, install the CPU into its socket on the motherboard. Handle it gently by the edges. Apply a small dot of thermal paste to the CPU surface before attaching the cooler. Then insert the RAM sticks into their slots. Push them down firmly until they click into place. For a DIY laptop, you usually have one or two RAM slots. Check your motherboard manual for the correct configuration.
Step 4: Connect the Storage Drive
Slide your SSD into its bay or connector. Most modern DIY laptop builds use M.2 NVMe SSDs. These are small, fast, and easy to install. Secure the drive with a screw if needed. Then connect any necessary cables to the motherboard.
Step 5: Install the Screen Assembly
This step requires care. Attach the screen assembly to the laptop lid using the provided brackets. Connect the ribbon cable to the motherboard. Make sure the connection is secure but gentle. A loose screen cable is one of the most common reasons a DIY laptop does not display an image on first boot.
Step 6: Install the Battery and Power Connections
Connect the laptop battery to the motherboard. Then plug in the power charger. Double-check all connections before proceeding. A loose battery connection can prevent the laptop from turning on or may cause safety issues.
Step 7: Test Before Closing the Chassis
This is the most important step. Before you screw the laptop shut, connect an external monitor and power it on. Check that the CPU is recognized. Confirm that the RAM is detected. Make sure the screen works. Run a quick stress test if you are comfortable. Only close the chassis once everything is working correctly. This saves you from the nightmare of disassembling everything to fix a simple issue.
Challenges and Common Mistakes When Building a DIY Laptop
Building a DIY laptop is not without its hurdles. Even experienced builders run into problems. Here are the most common challenges and mistakes to avoid.
Incompatible Components
The biggest mistake people make is buying parts that do not work together. A laptop motherboard designed for one chassis will not fit another. A CPU must be compatible with the motherboard socket. RAM must match the motherboard type. Always verify compatibility before purchasing any part. Read the manuals. Check forums. Ask experts in DIY electronics communities.
Skipping the Testing Phase
Many builders are eager to close up the laptop and call it done. This is a huge mistake. Always test every function before sealing the chassis. Check the screen, the keyboard, the trackpad, the speakers, and the Wi-Fi. If something is not working, now is the time to fix it.
Poor Cable Management
Inside a laptop, space is extremely limited. Loose cables can block airflow, press against the fan, or short out against the motherboard. Use cable ties to secure every wire. Route cables neatly along the chassis edges. Good cable management makes your DIY laptop safer and easier to maintain later.
Underestimating the Difficulty
A DIY laptop is not a weekend project for a beginner. It can take several days of research, planning, and assembly. Do not get discouraged if something does not work right away. Patience is your most valuable tool. Join online forums and communities where builders share tips and troubleshoot together.
Ignoring Thermal Management
Laptops run hot. Without proper cooling, your CPU and GPU can overheat, causing performance drops or permanent damage. Make sure your cooling solution is adequate. Clean any dust from fans and heat sinks regularly. A well-cooled DIY laptop will last much longer than one with poor thermal management.
Buying the Cheapest Parts
It is tempting to save money by choosing the cheapest laptop parts available. But low-quality components can cause compatibility issues, poor performance, or even safety hazards. Invest in reputable brands for your motherboard, battery, and power supply. A DIY laptop is only as good as its weakest component.
Best Kits and Parts for a DIY Laptop Project
If you are new to DIY electronics, starting with a kit can save you a lot of guesswork. Here are some of the best options for a DIY laptop build.
Barebone Laptop Kits
A barebone laptop kit gives you the chassis, screen, keyboard, and motherboard already partially set up. You just need to add the CPU, RAM, and storage. Some popular brands include Clevo and Tongfang. These kits are widely used by DIY laptop enthusiasts and are available from online retailers. They are the easiest path to a working custom laptop.
Raspberry Pi Laptops
If you want a budget-friendly DIY laptop, a Raspberry Pi build is a great option. The Raspberry Pi is a small, affordable single-board computer. You can pair it with a small screen, a keyboard, and a battery to create a portable DIY computer. These builds are popular in the maker community and are perfect for learning. They are not as powerful as a full-size laptop, but they are fun and educational.
Open-Source Laptop Projects
The open source laptop movement is growing. Projects like the Novena laptop and the Framework Laptop encourage users to build, modify, and repair their own machines. These designs focus on modularity and transparency. If you care about software freedom and repairability, an open source laptop project might be the perfect fit for your DIY laptop journey.
Where to Buy Laptop Parts
You can find laptop parts from many online retailers. Amazon, Newegg, and AliExpress are popular choices. For specialized barebone laptop chassis, check dedicated forums and supplier websites. Always buy from reputable sellers to avoid counterfeit or defective parts. Reading reviews and joining DIY tech projects communities can help you find trusted sources.
Is a DIY Laptop Worth It? Final Verdict
The honest answer is: it depends. Building a DIY laptop is not always cheaper than buying a pre-built one. When you factor in the cost of trial parts, tools, and the time you invest, the savings can be minimal. However, the value of a DIY laptop goes beyond money.
You gain deep knowledge of how laptops work. You develop troubleshooting skills that serve you for life. You create a machine that is truly yours. For tech enthusiasts, educators, and makers, a DIY laptop project is absolutely worth it.
If you are looking for a simple, affordable portable computer, a pre-built laptop might be the better choice. But if you want to learn, to create, and to challenge yourself, building a DIY laptop is one of the most rewarding projects you can take on.
Start small. Try a barebone laptop kit first. Learn as you go. And remember, every builder started exactly where you are now. The DIY laptop community is welcoming and full of people who love to share their knowledge. You will be building your own custom laptop in no time.
Final Thoughts
A DIY laptop is more than a machine. It is a statement. It says you are curious, you are capable, and you are willing to learn. Whether you build a powerful workstation or a simple Raspberry Pi portable, the experience is invaluable. So gather your laptop components, roll up your sleeves, and start your DIY laptop project today. You will be glad you did.
Frequently Asked Questions
Can a beginner build a DIY laptop?
Yes, but it is best to start with a barebone laptop kit rather than building from scratch. Beginners should research compatibility thoroughly and follow detailed tutorials. Expect a learning curve, but many first-timers succeed with patience and careful planning.
How much does it cost to build a DIY laptop?
The cost varies widely depending on the components you choose. A basic DIY laptop using a barebone chassis can cost anywhere from $300 to $800. High-performance builds with premium parts can exceed $1,500. Always budget for extra parts in case something does not work the first time.
Is building a DIY laptop cheaper than buying one?
Not always. While some components may be cheaper individually, the total cost can add up when you factor in the barebone chassis, compatible parts, and tools. However, the real value of a DIY laptop lies in the customization and learning experience, not just the price tag.
What is the easiest way to start a DIY laptop project?
The easiest way is to buy a barebone laptop kit that includes the chassis, screen, keyboard, and motherboard. You then add the CPU, RAM, and storage. This approach removes much of the complexity and lets you focus on assembly and testing.
Can I use a Raspberry Pi to build a DIY laptop?
Absolutely. A Raspberry Pi is a great platform for a budget-friendly DIY laptop. You will need a small screen, a keyboard, a battery, and a case. These builds are popular in the maker community and are excellent for learning the basics of portable computer construction.
How long does it take to build a DIY laptop?
A first-time build can take anywhere from a weekend to several weeks, depending on your experience level and how much research you do. Experienced builders can assemble a DIY laptop in a day or two. Allow extra time for testing and troubleshooting.
=== CONCLUSION ===
Building a DIY laptop is challenging, but it is also incredibly rewarding. You now know the essential laptop components, the step-by-step process, and the common pitfalls to avoid. A DIY laptop gives you a custom machine built exactly to your specifications. Whether you choose a barebone laptop kit or go all-in with individual laptop parts, the journey itself is a powerful learning experience.
Start with a simple project if you are new to this. Use a barebone laptop kit, take your time, and test everything carefully. Join communities of fellow builders who can offer advice and encouragement. The world of DIY electronics is vast and welcoming, and a DIY laptop is one of the most impressive projects you can complete.
So what are you waiting for? Gather your laptop components, plan your build, and start your DIY laptop journey today. You will be amazed at what you can create.